Microsoft 365 Guide
This guide explains how to integrate SWIRL with an existing Microsoft 365 (M365) tenant. It is intended for M365 administrators who can register new applications in the Azure Portal.
Administrators may also need to grant API permissions so users can query their personal M365 content through SWIRL.
Register a New App in Azure Portal
You need administrator access to your organization's Azure Active Directory / Entra ID tenant to complete the app registration steps below. If you don't have admin access, contact your IT administrator.
To connect SWIRL to an M365 tenant, first register and configure a new app in the Azure Portal.
Once registered, the app allows:
- User authentication via OIDC.
- Personal M365 content searches using OAuth2 permission consent.
Before You Begin
Ensure you have the following details about your SWIRL deployment:
swirl-host— the fully qualified domain name of your SWIRL instance.swirl-port— the port SWIRL runs on (only needed if different from the default).
For example, if your deployment is search.swirl.today, then swirl-host is search.swirl.today.
HTTPS Requirement
To use OIDC and OAuth2 with Microsoft, your deployment must use https (except localhost, where http:// is allowed). Single-page applications and web protocols in Azure applications require https:// for fully qualified domains.
Getting Started
-
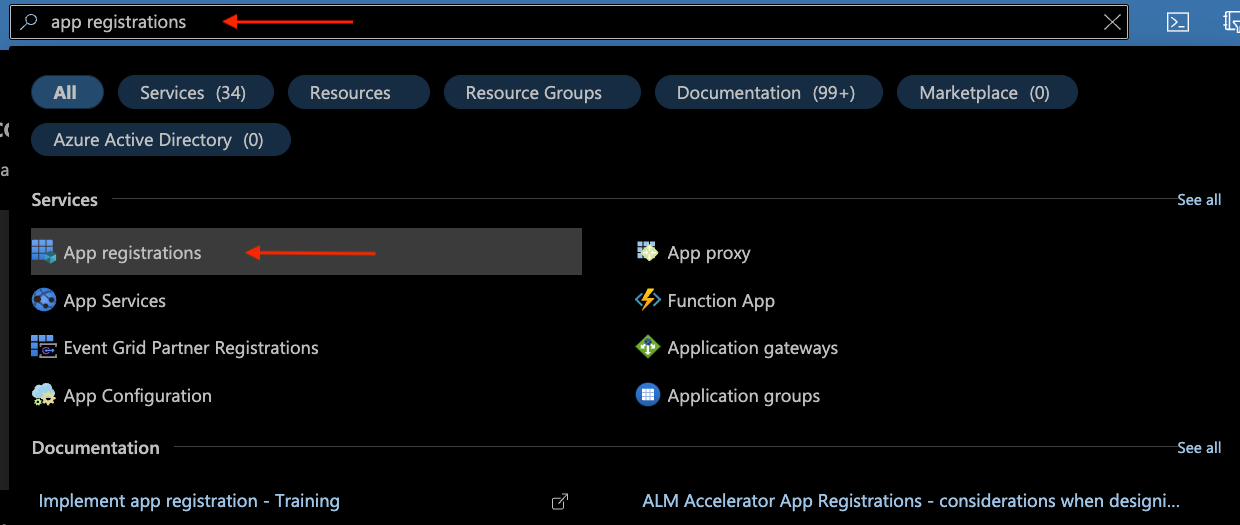
Log in to the Azure Portal: https://portal.azure.com
-
In the search bar, type:
app registrations, then select "App registrations" under Services.
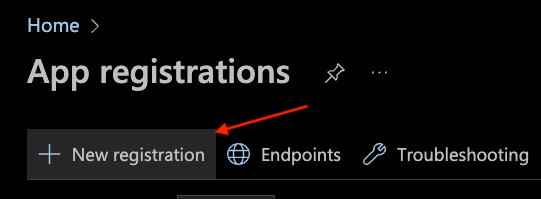
Create the New Application
- On the "App registrations" page, click
New registration:
- On the "Register an application" page:
- Name → Enter a name for the App (e.g.,
SWIRL Documentation App). - Supported account types → Select:
Accounts in this organizational directory only (MSFT only - Single tenant).
- For the SWIRL Enterprise Edition:
- Add a Redirect URI (optional) value for a "Web" application:
- Platform:
Web - Value:
https://<swirl-host>[:<swirl-port>]/swirl/callback/microsoft-callback
- Platform:
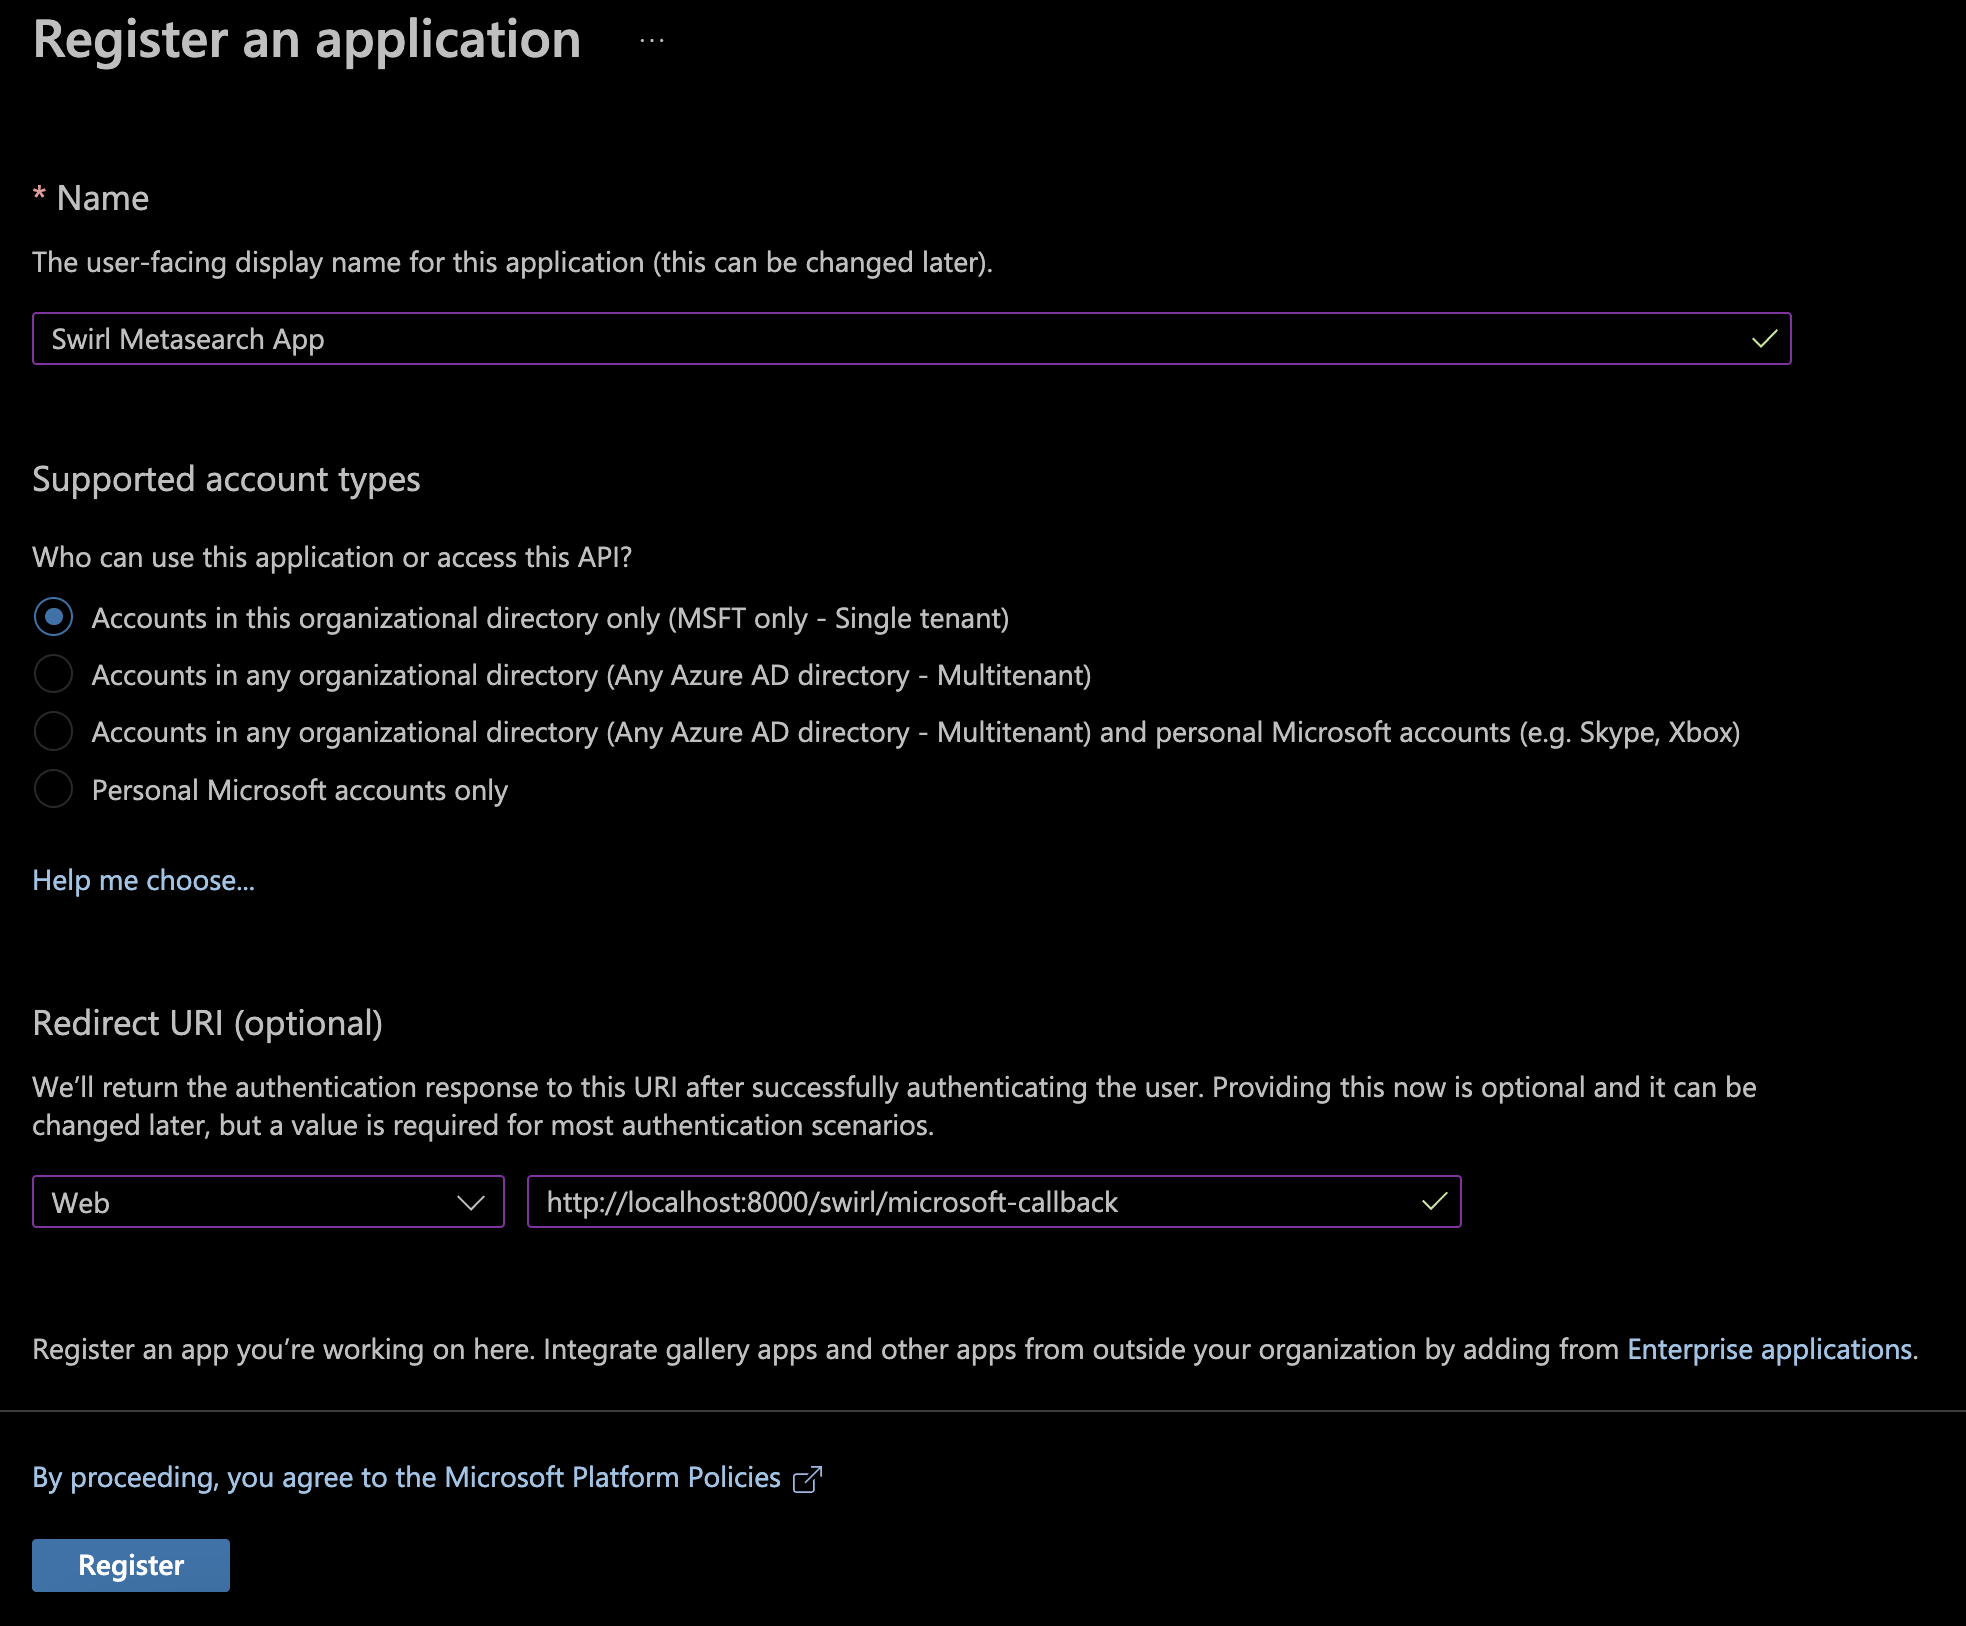
- Click
Registerto create the application.
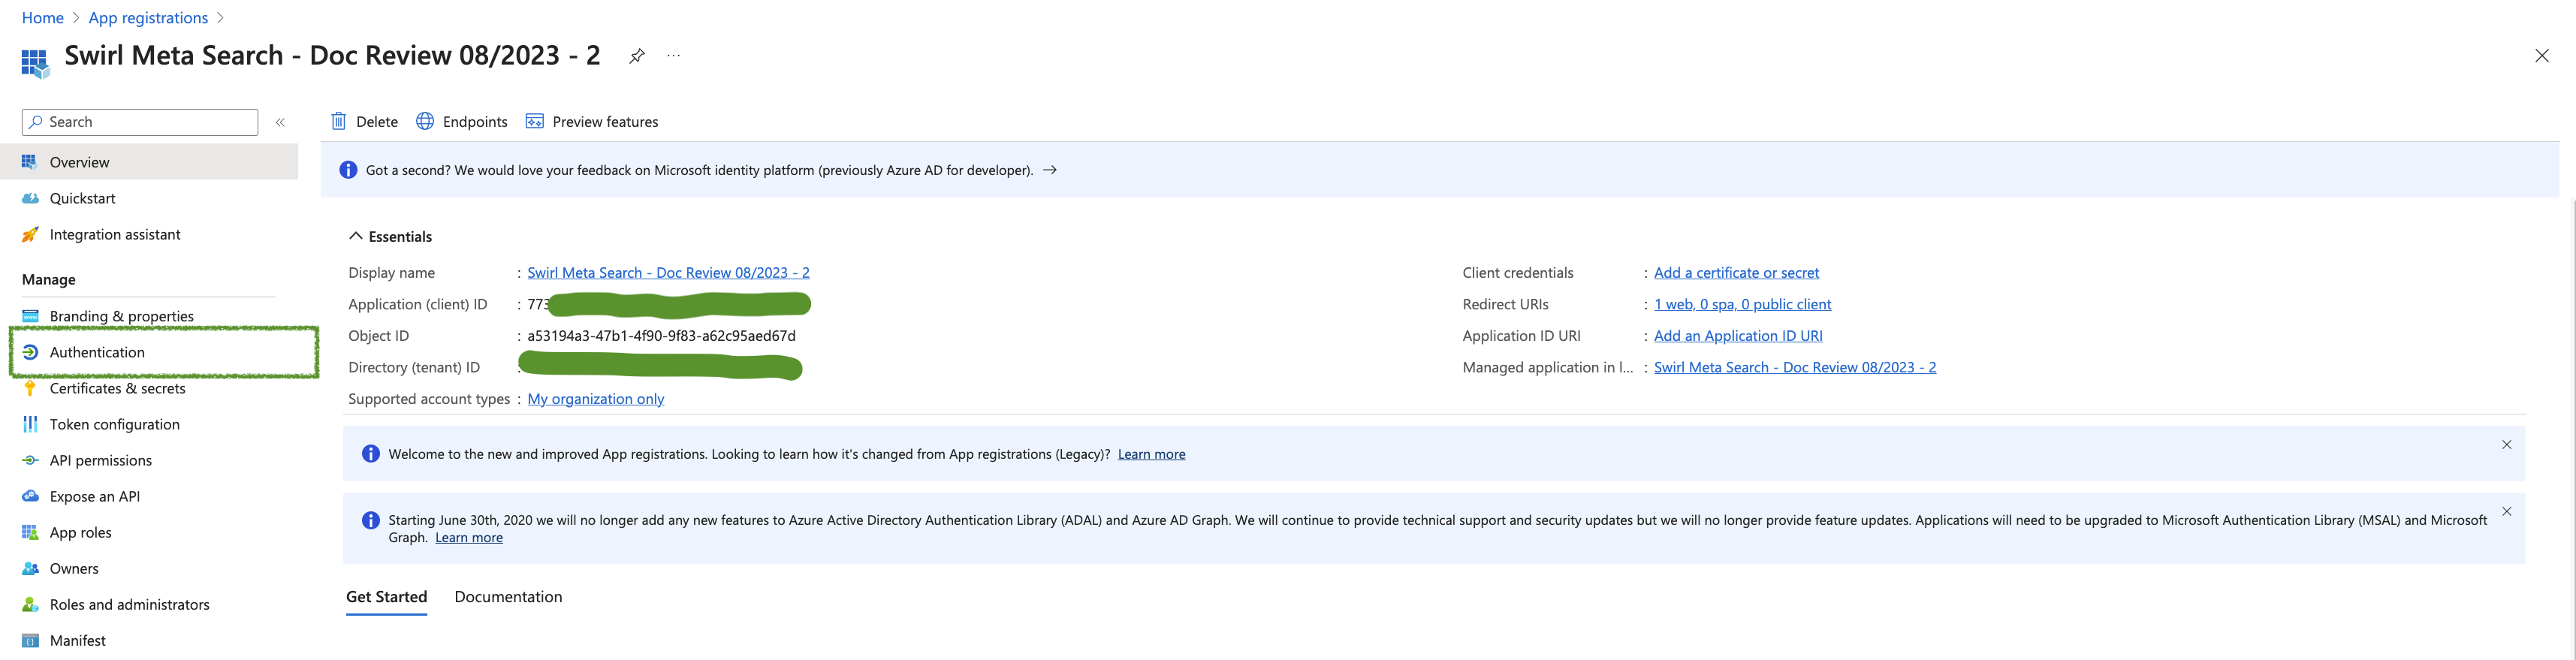
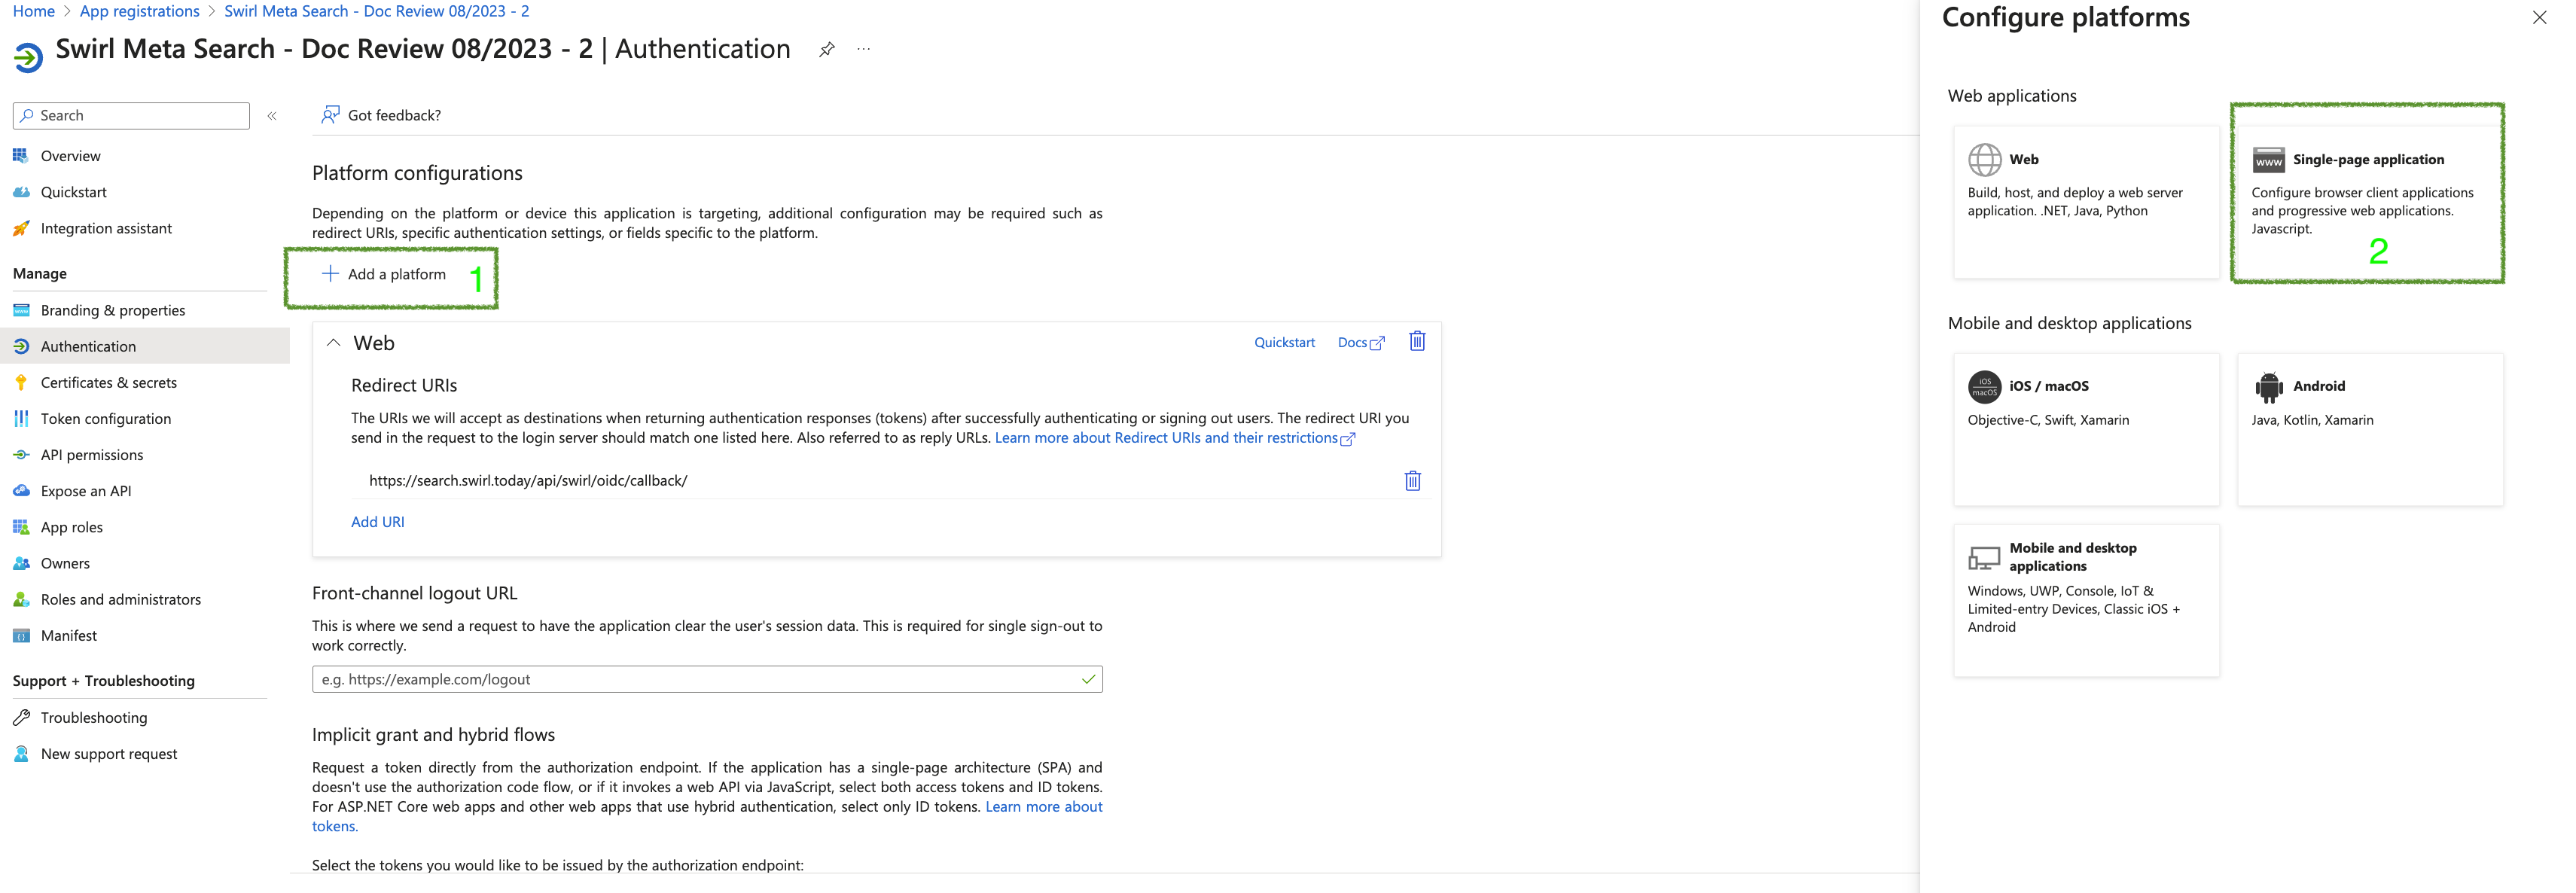
Configure Redirect URI(s) for a Single-Page Application
- Navigate to the "Authentication" page and click
Add a platformand select "Single Page Application":
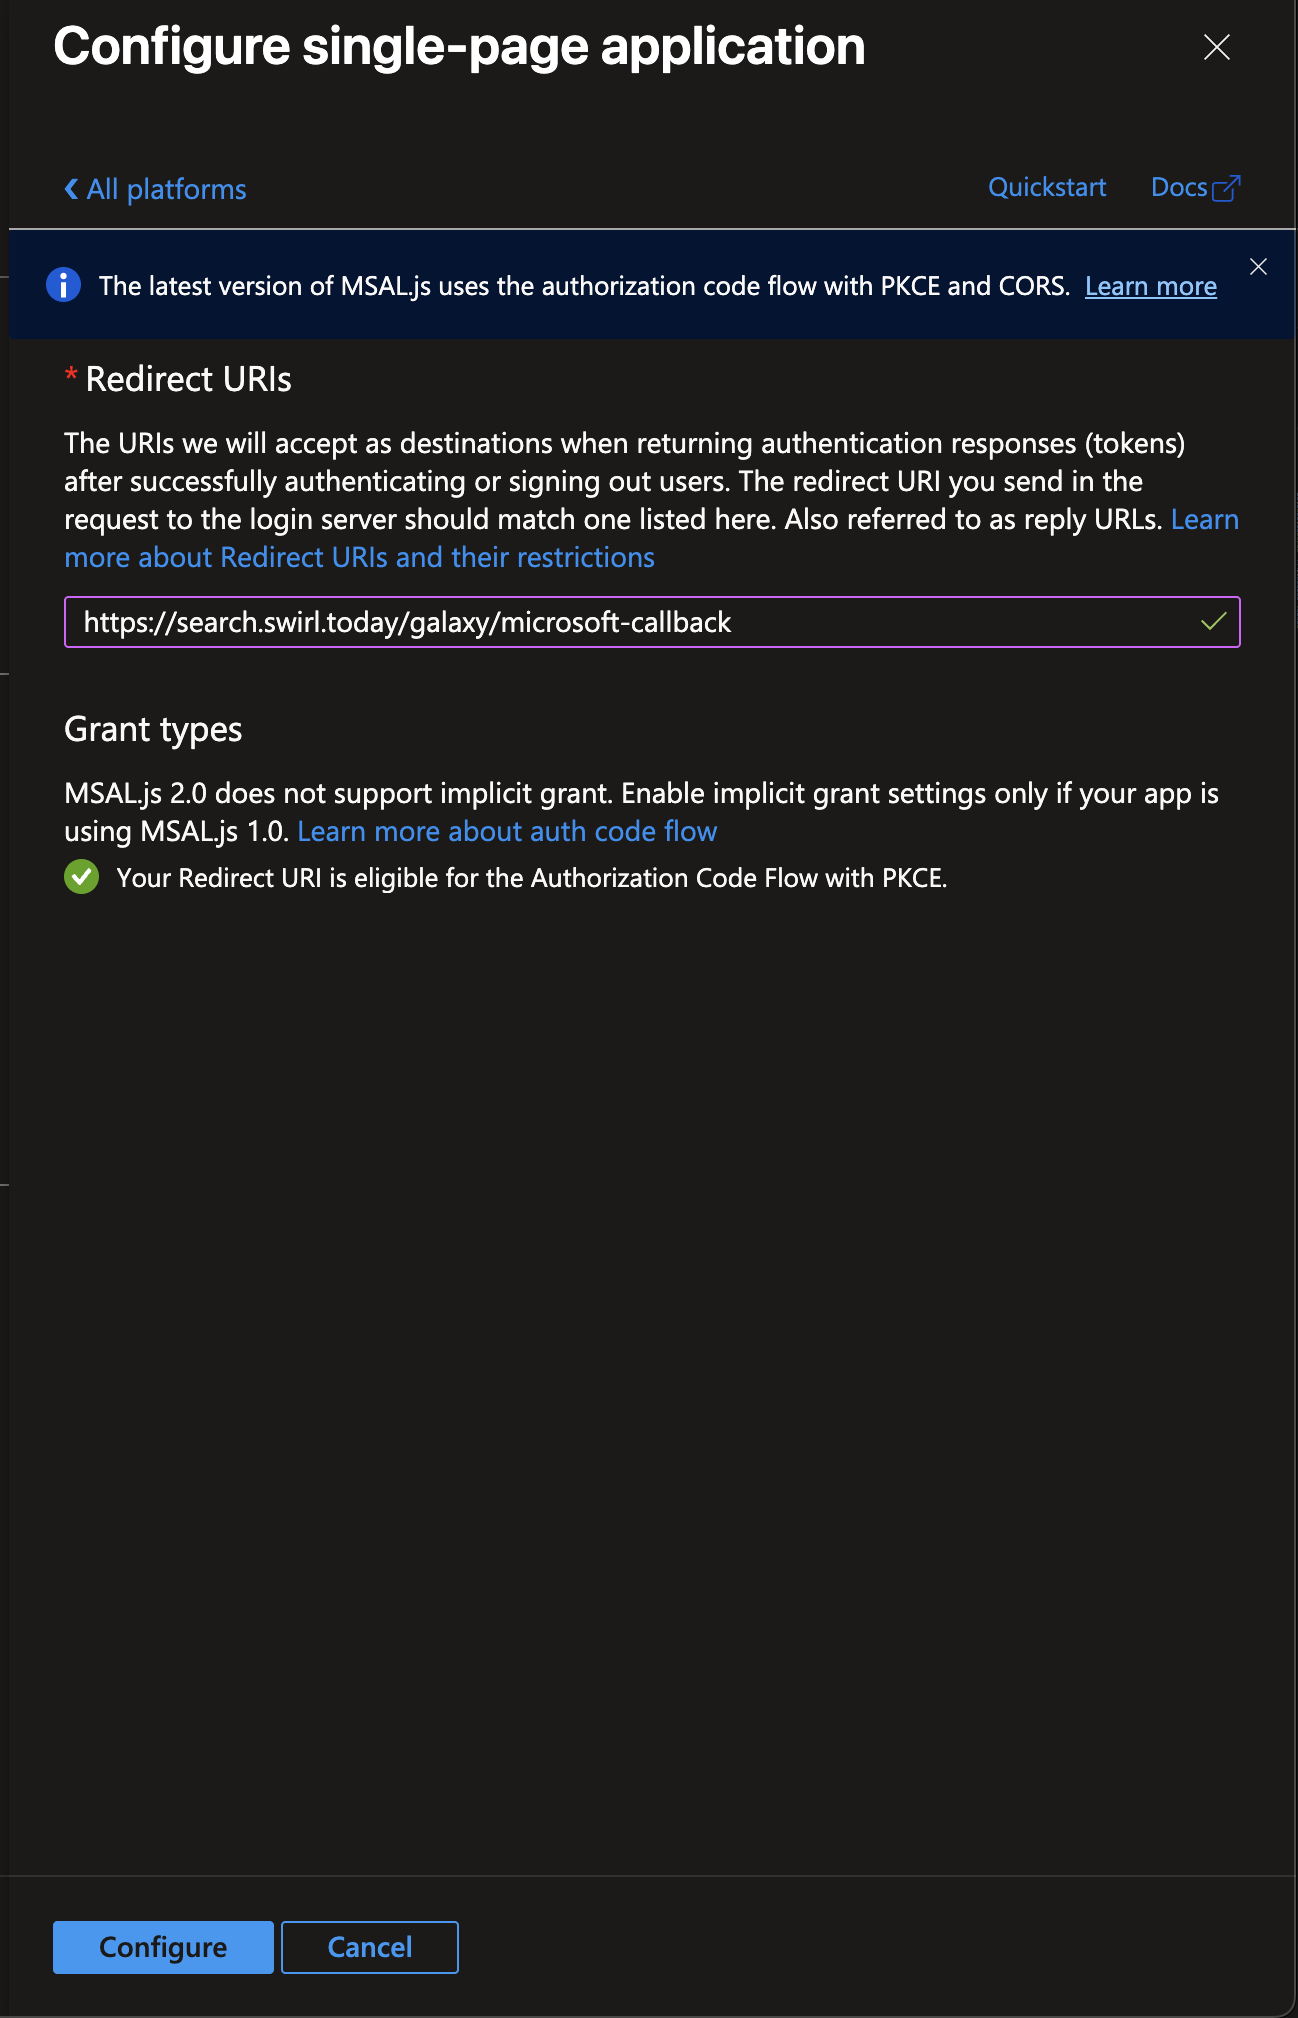
- For SWIRL Community edition:
- Add the OAuth2 callback URL:
- Click
Add URI - Value:
https://<swirl-host>[:<swirl-port>]/galaxy/microsoft-callback - Click
Configureto add the URI.
- Click
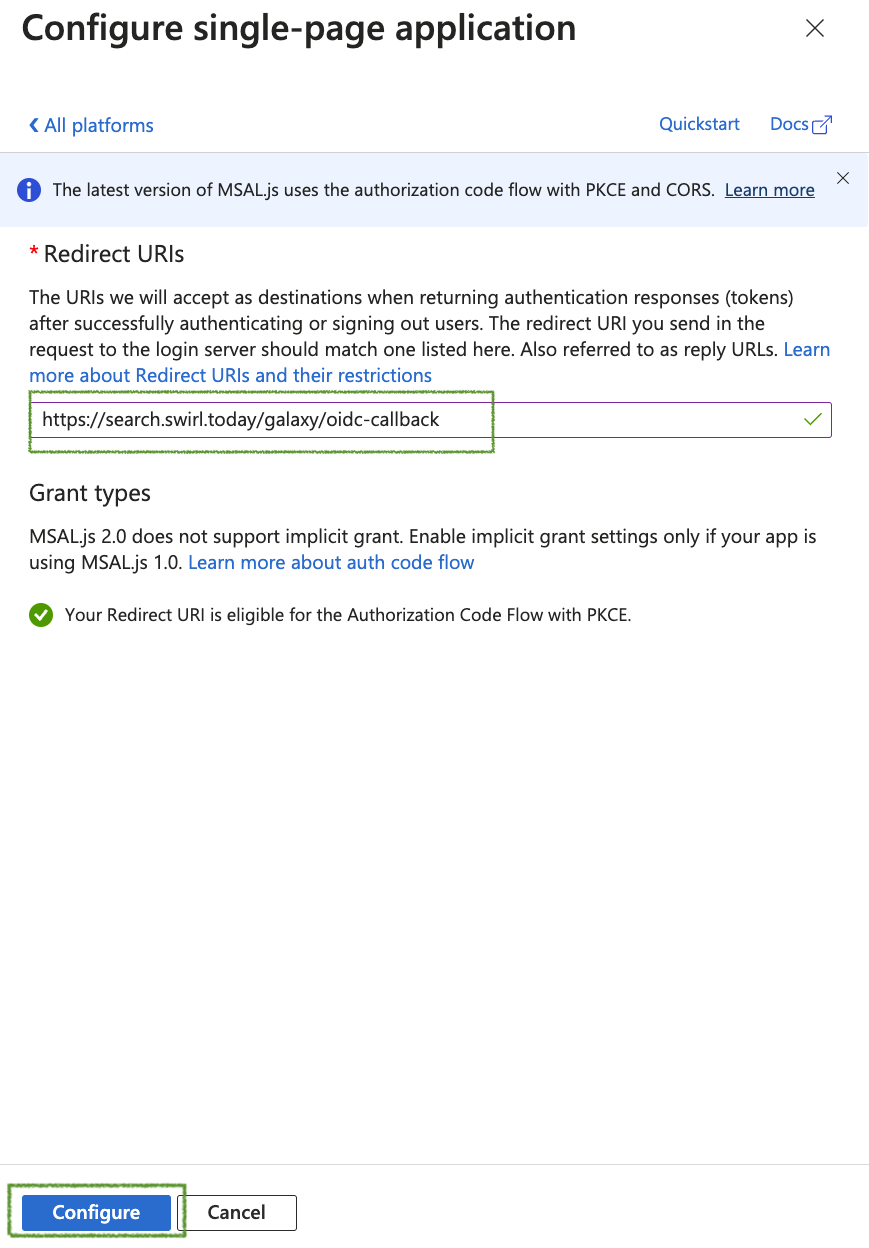
- Required if you plan to enable OIDC ("Login with Microsoft"), for both Community and Enterprise Editions:
- Add the OIDC Callback URL:
- Click
Add URI - Value:
https://<swirl-host>[:<swirl-port>]/galaxy/oidc-callback - Click
Saveto add the URI.
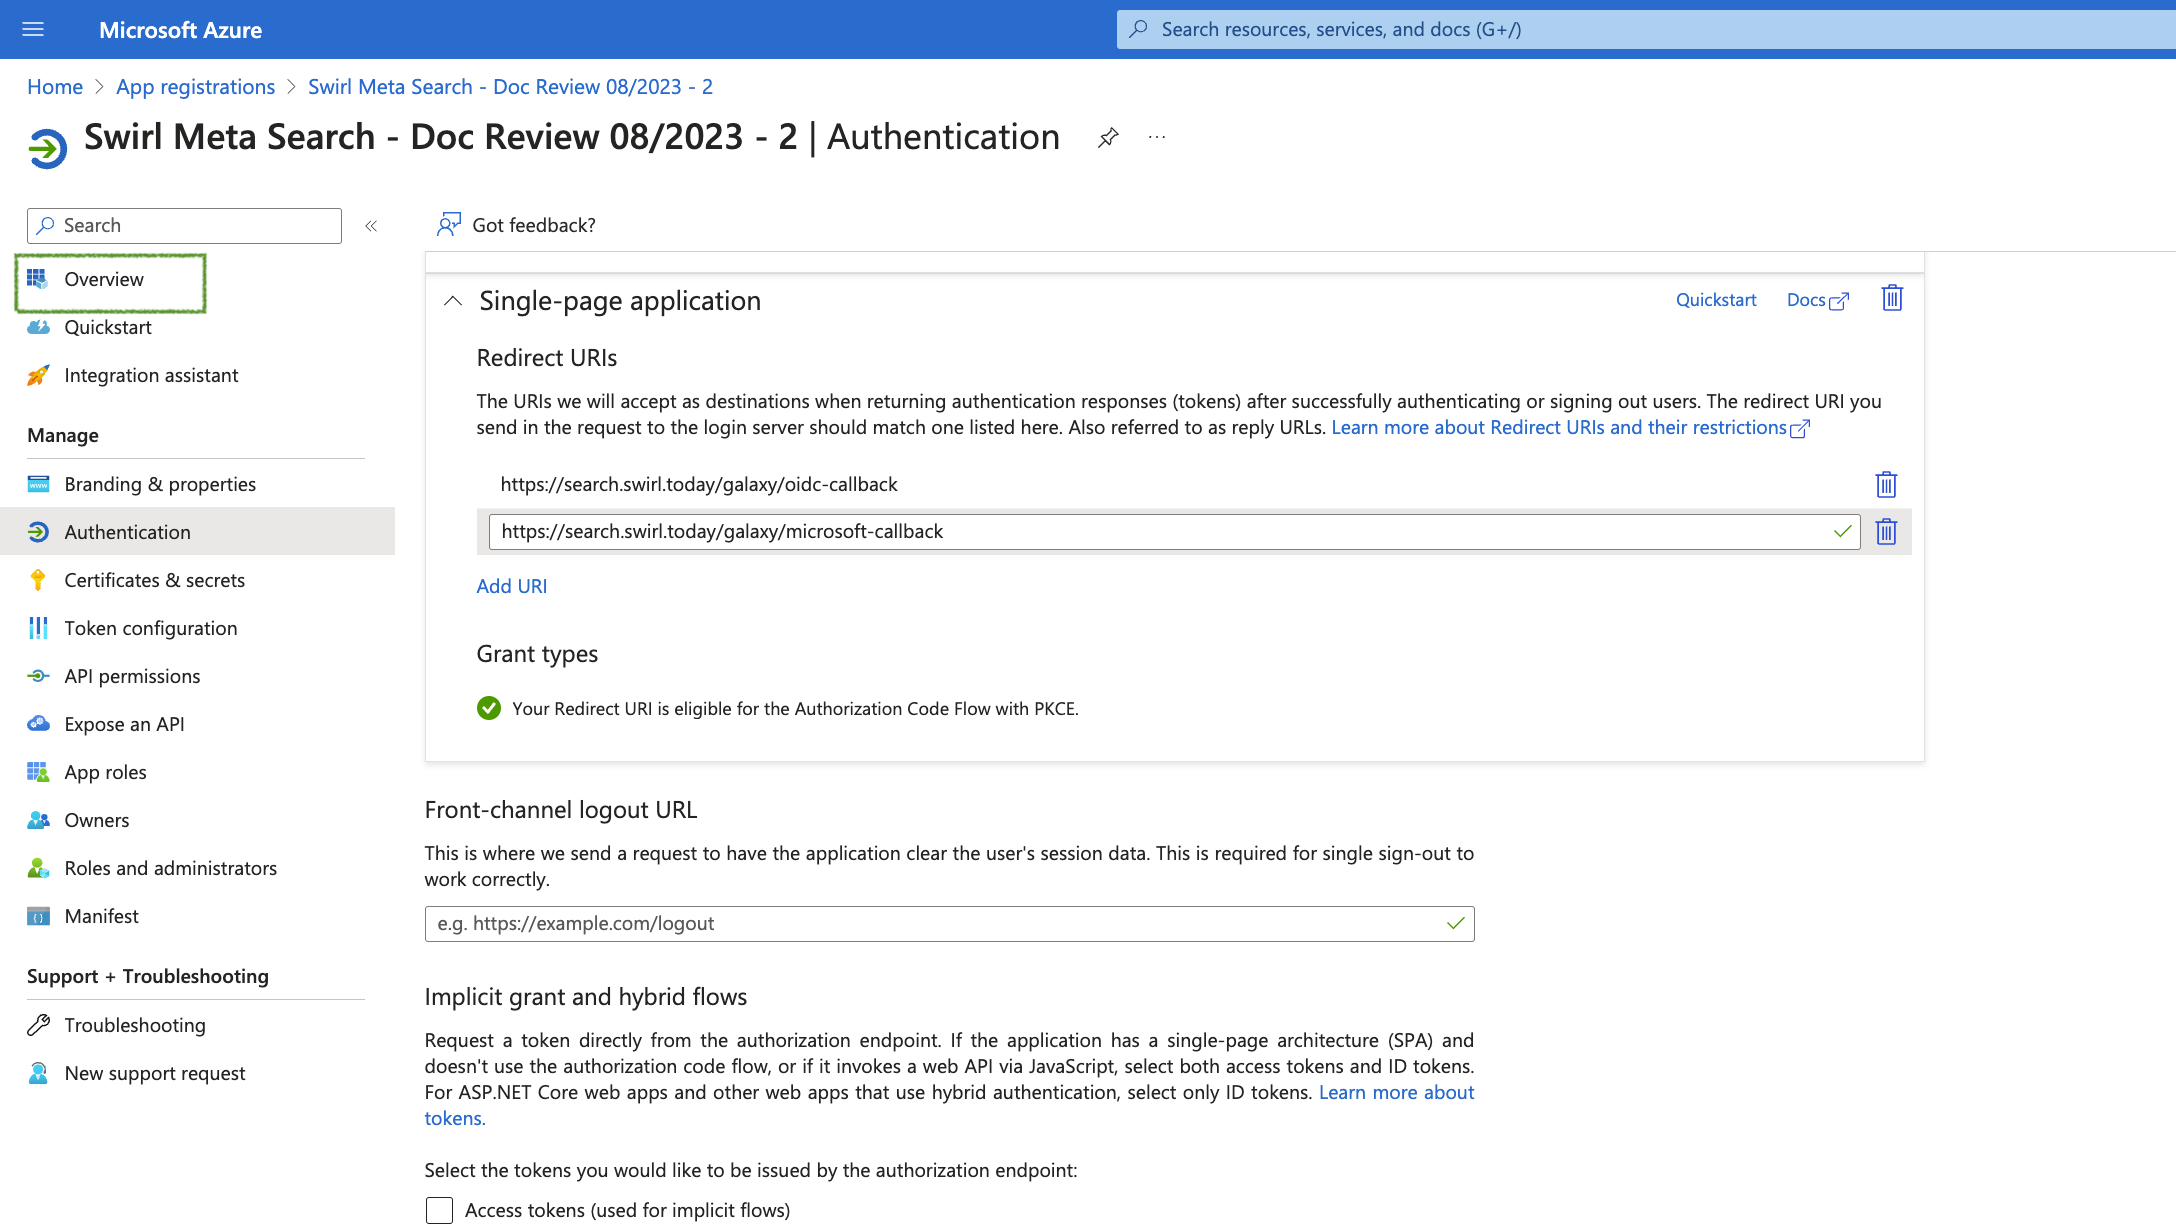
- Click
- Return to the Authentication screen:
Add App API Permissions
Assign the Necessary Permissions
- In the left column, select "API permissions", then click
Add a permission:

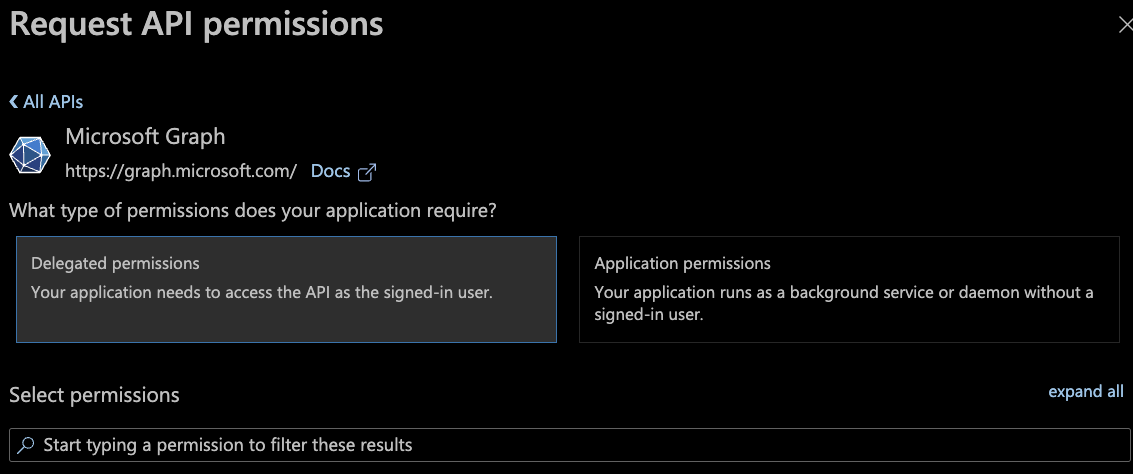
- In the "Request API permissions" panel that opens: - Select the "Microsoft APIs" tab (at the top). - Click the "Microsoft Graph" button. - Click the "Delegated permissions" button.
- In the search box, enter and select each of the following permissions, then click
Add permissions:
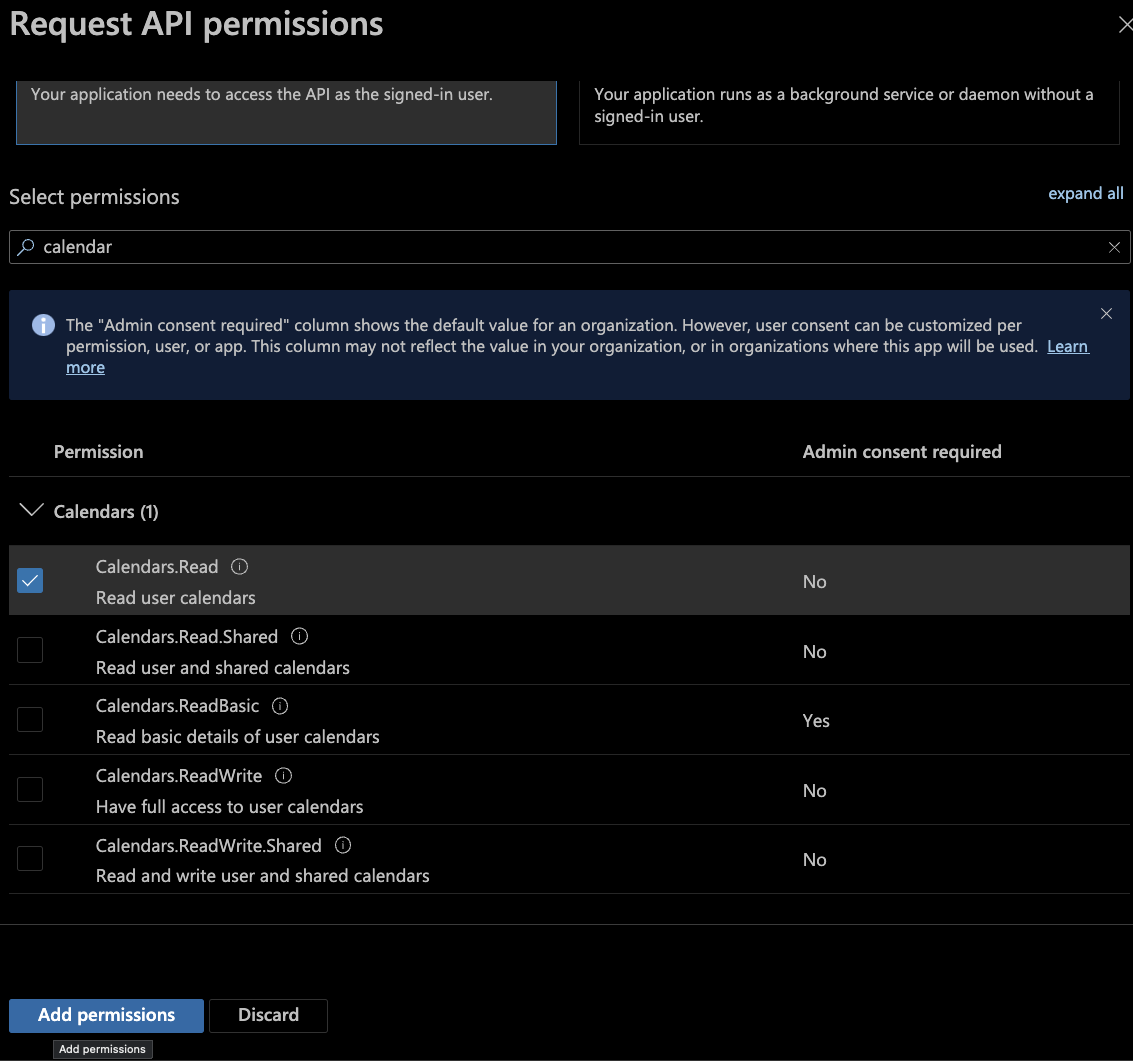
- Required Permissions:
Calendars.ReadChannelMessage.Read.AllDirectory.Read.AllemailChat.ReadFiles.Read.AllprofileMail.Readoffline_accessSites.Read.AllUser.Read
Admin Consent for Permissions
- After adding the permissions, click
Grant admin consent for <your-tenant>under "Configured permissions":
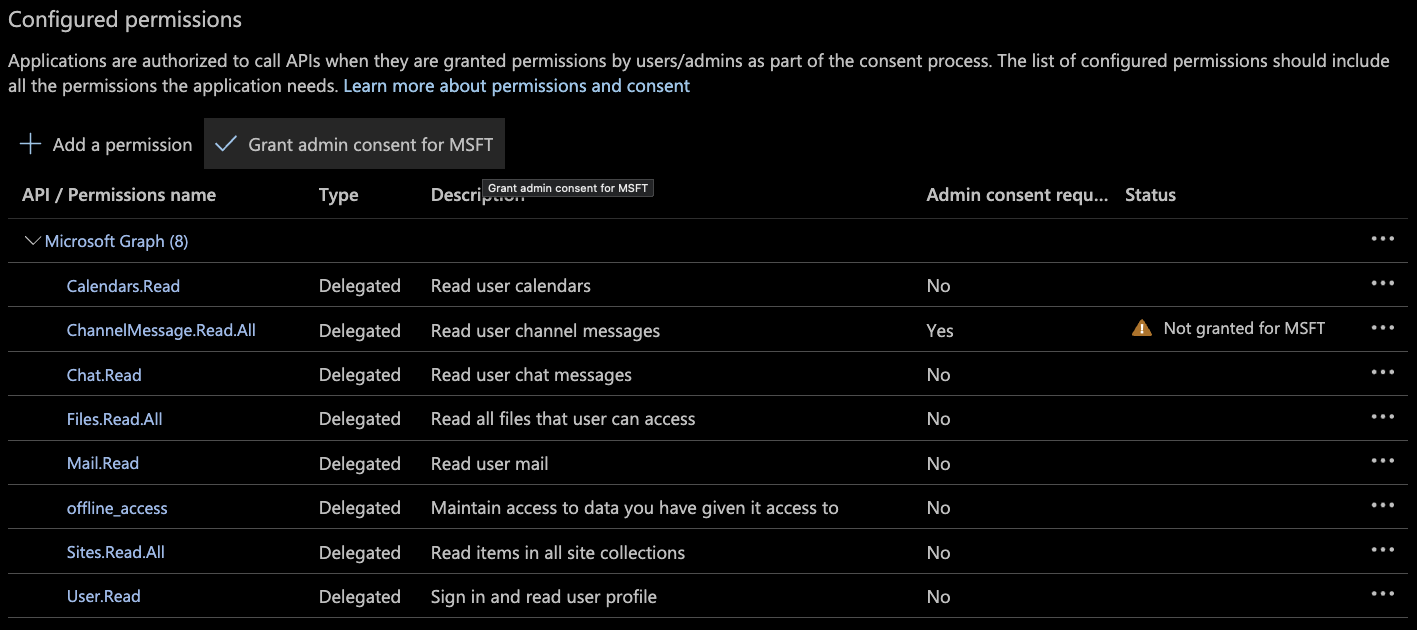
- Confirm by selecting "Yes":

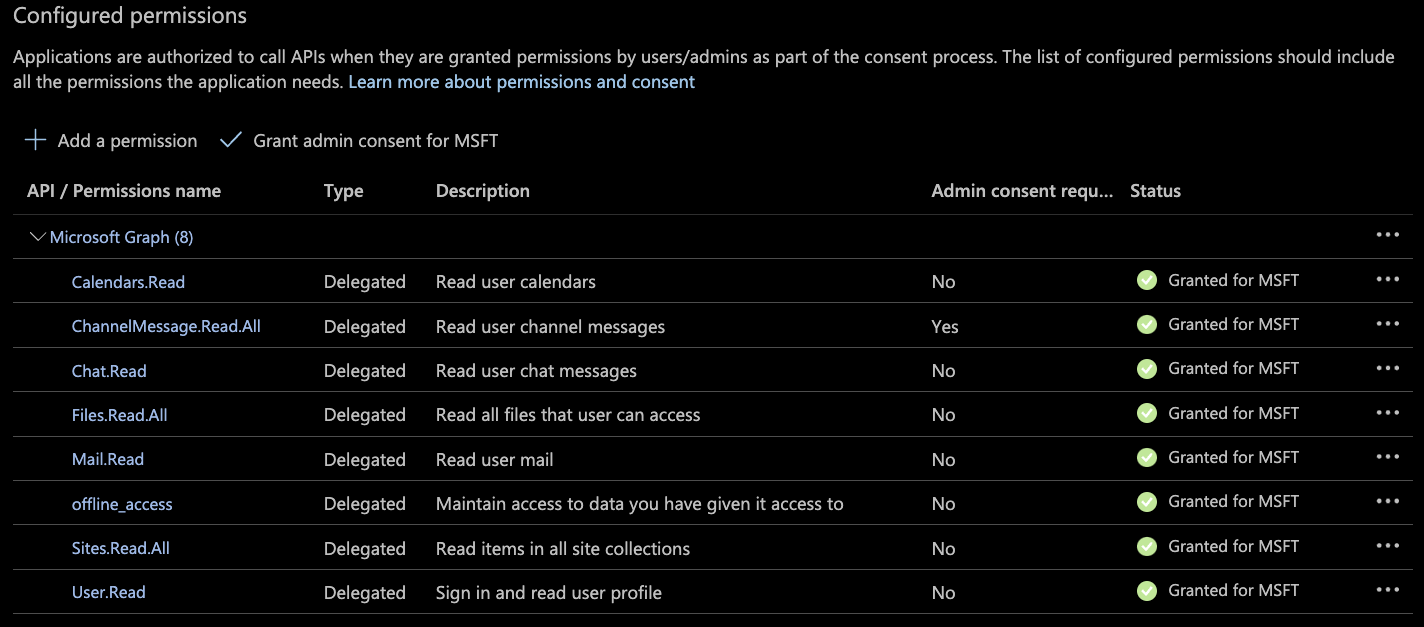
- The Configured permissions section should now display all granted permissions:
Generate a Client Secret
- In the left sidebar, select "Certificates & secrets", then click
New client secret:

- In the "Add a client secret" panel:
- Enter a
Descriptionfor the new secret. - Select anExpirestime range for the secret.
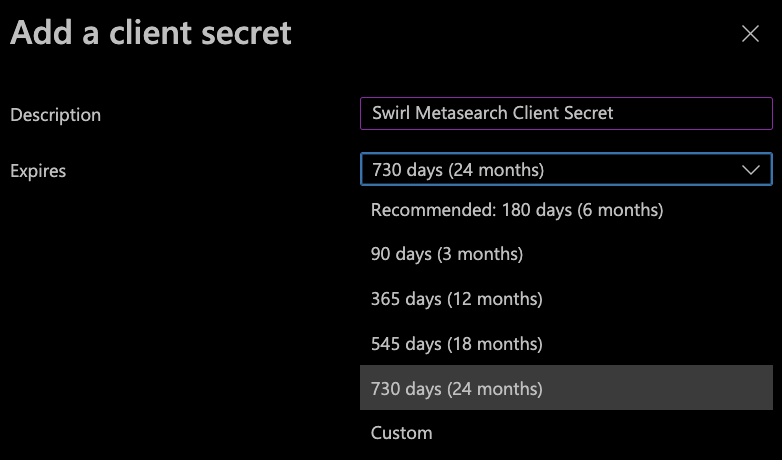
- Click
Add. The "Certificates & secrets" page will now display a new Client secret entry.

Once the secret is created, copy the Value immediately! It will be hidden permanently once you leave this page.
Configure OAuth2 for M365
Community Edition
Add the OAuth2 Configurations
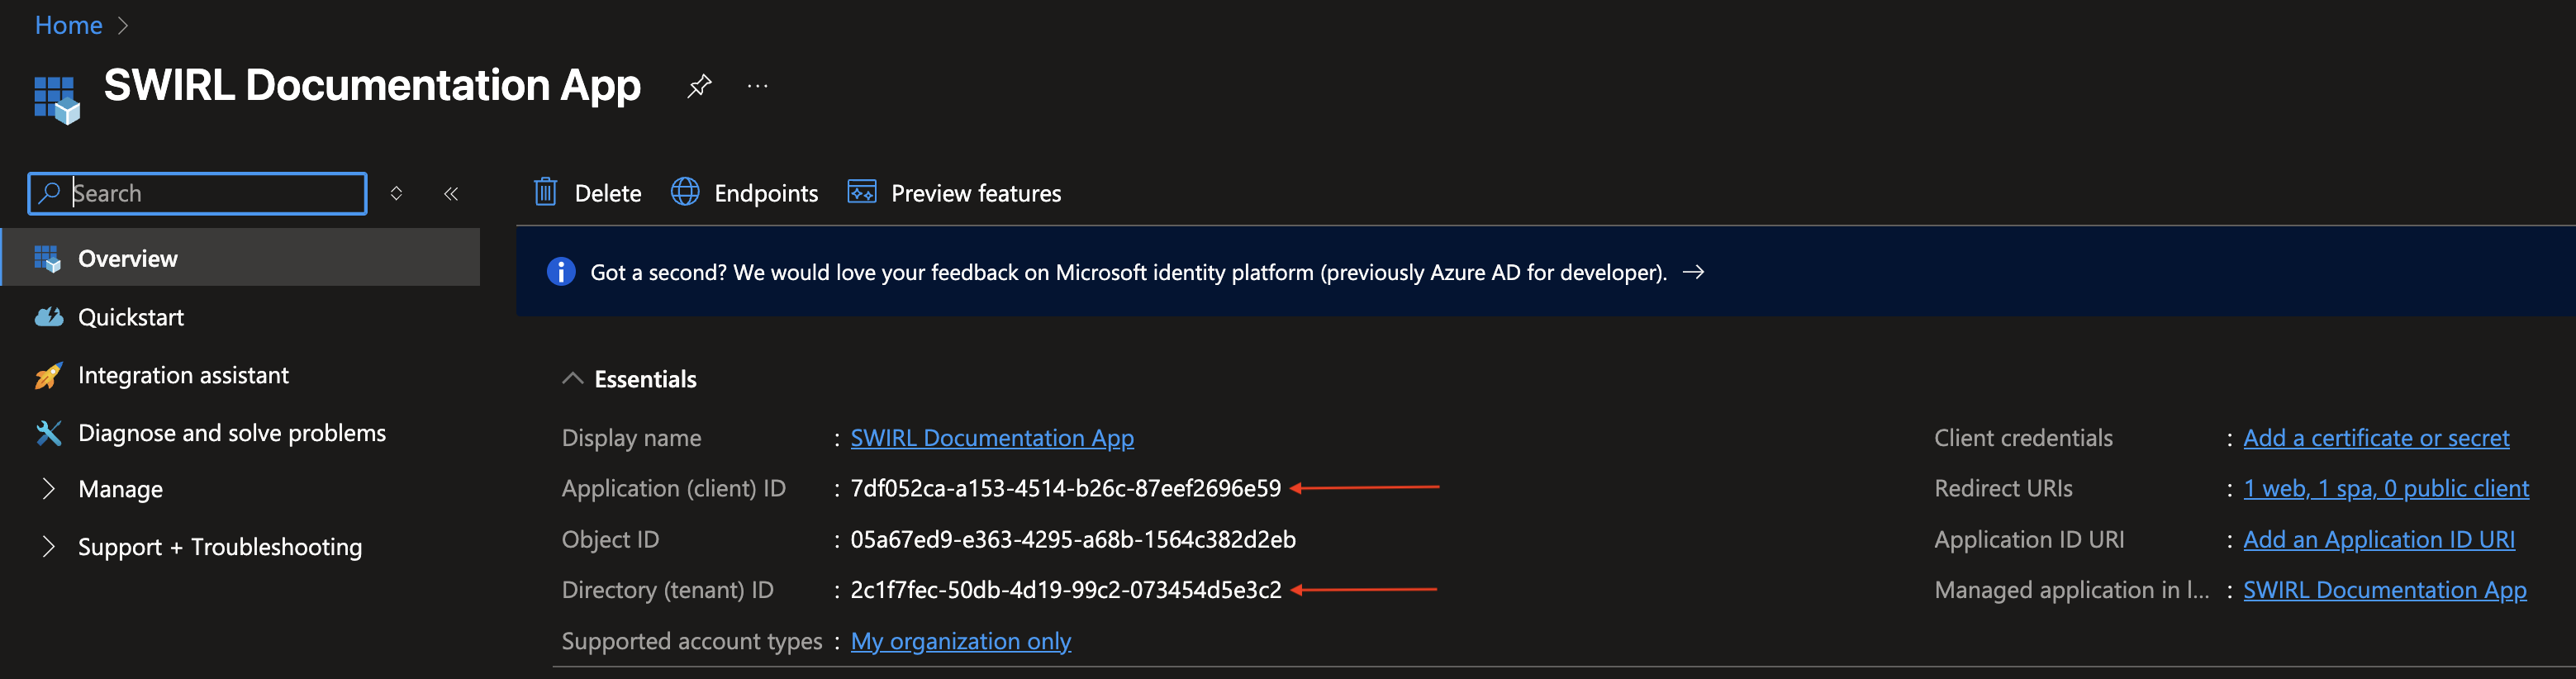
To enable OAuth2 content search for M365 in the SWIRL Community Edition, locate and copy the following values from your new Azure App Registration:
- <application-id>
- <tenant-id>
From the SWIRL home directory, open the static/api/config/default file within in an editor and locate the msalConfig section:
  "msalConfig": {
    "auth": {
      "clientId": "",
      "authority": "https://login.microsoftonline.com/",
      "redirectUri": "http://:/galaxy/microsoft-callback"
    }
  },
Update this section with the values from your Azure App Registration and the host and (optional) port of the SWIRL application. Those values should be added as follows:
  "msalConfig": {
    "auth": {
      "clientId": "<application-id>",
      "authority": "https://login.microsoftonline.com/<tenant-id>",
      "redirectUri": "http(s)://<swirl-host>(:<swirl-port>)/galaxy/microsoft-callback"
    }
  },
Example configuration for SWIRL running locally:
  "msalConfig": {
    "auth": {
      "clientId": "<client-id-redacted>",
      "authority": "https://login.microsoftonline.com/<tenant-id-redacted>",
      "redirectUri": "http://localhost:8000/galaxy/microsoft-callback"
    }
  },
Example configuration for SWIRL running behind a gateway:
  "msalConfig": {
    "auth": {
      "clientId": "<client-id-redacted>",
      "authority": "https://login.microsoftonline.com/<tenant-id-redacted>",
      "redirectUri": "https://search.swirl.today/galaxy/microsoft-callback"
    }
  },
Restart SWIRL
python swirl.py restart
Proceed to Activate the M365 SearchProviders for Community Edition.
Enterprise Edition
To enable OAuth2 content search for M365 in the SWIRL Enterprise edition, locate and copy the following values from your new Azure App Registration:
- <application-id>
- <tenant-id>
- <client-secret-value>

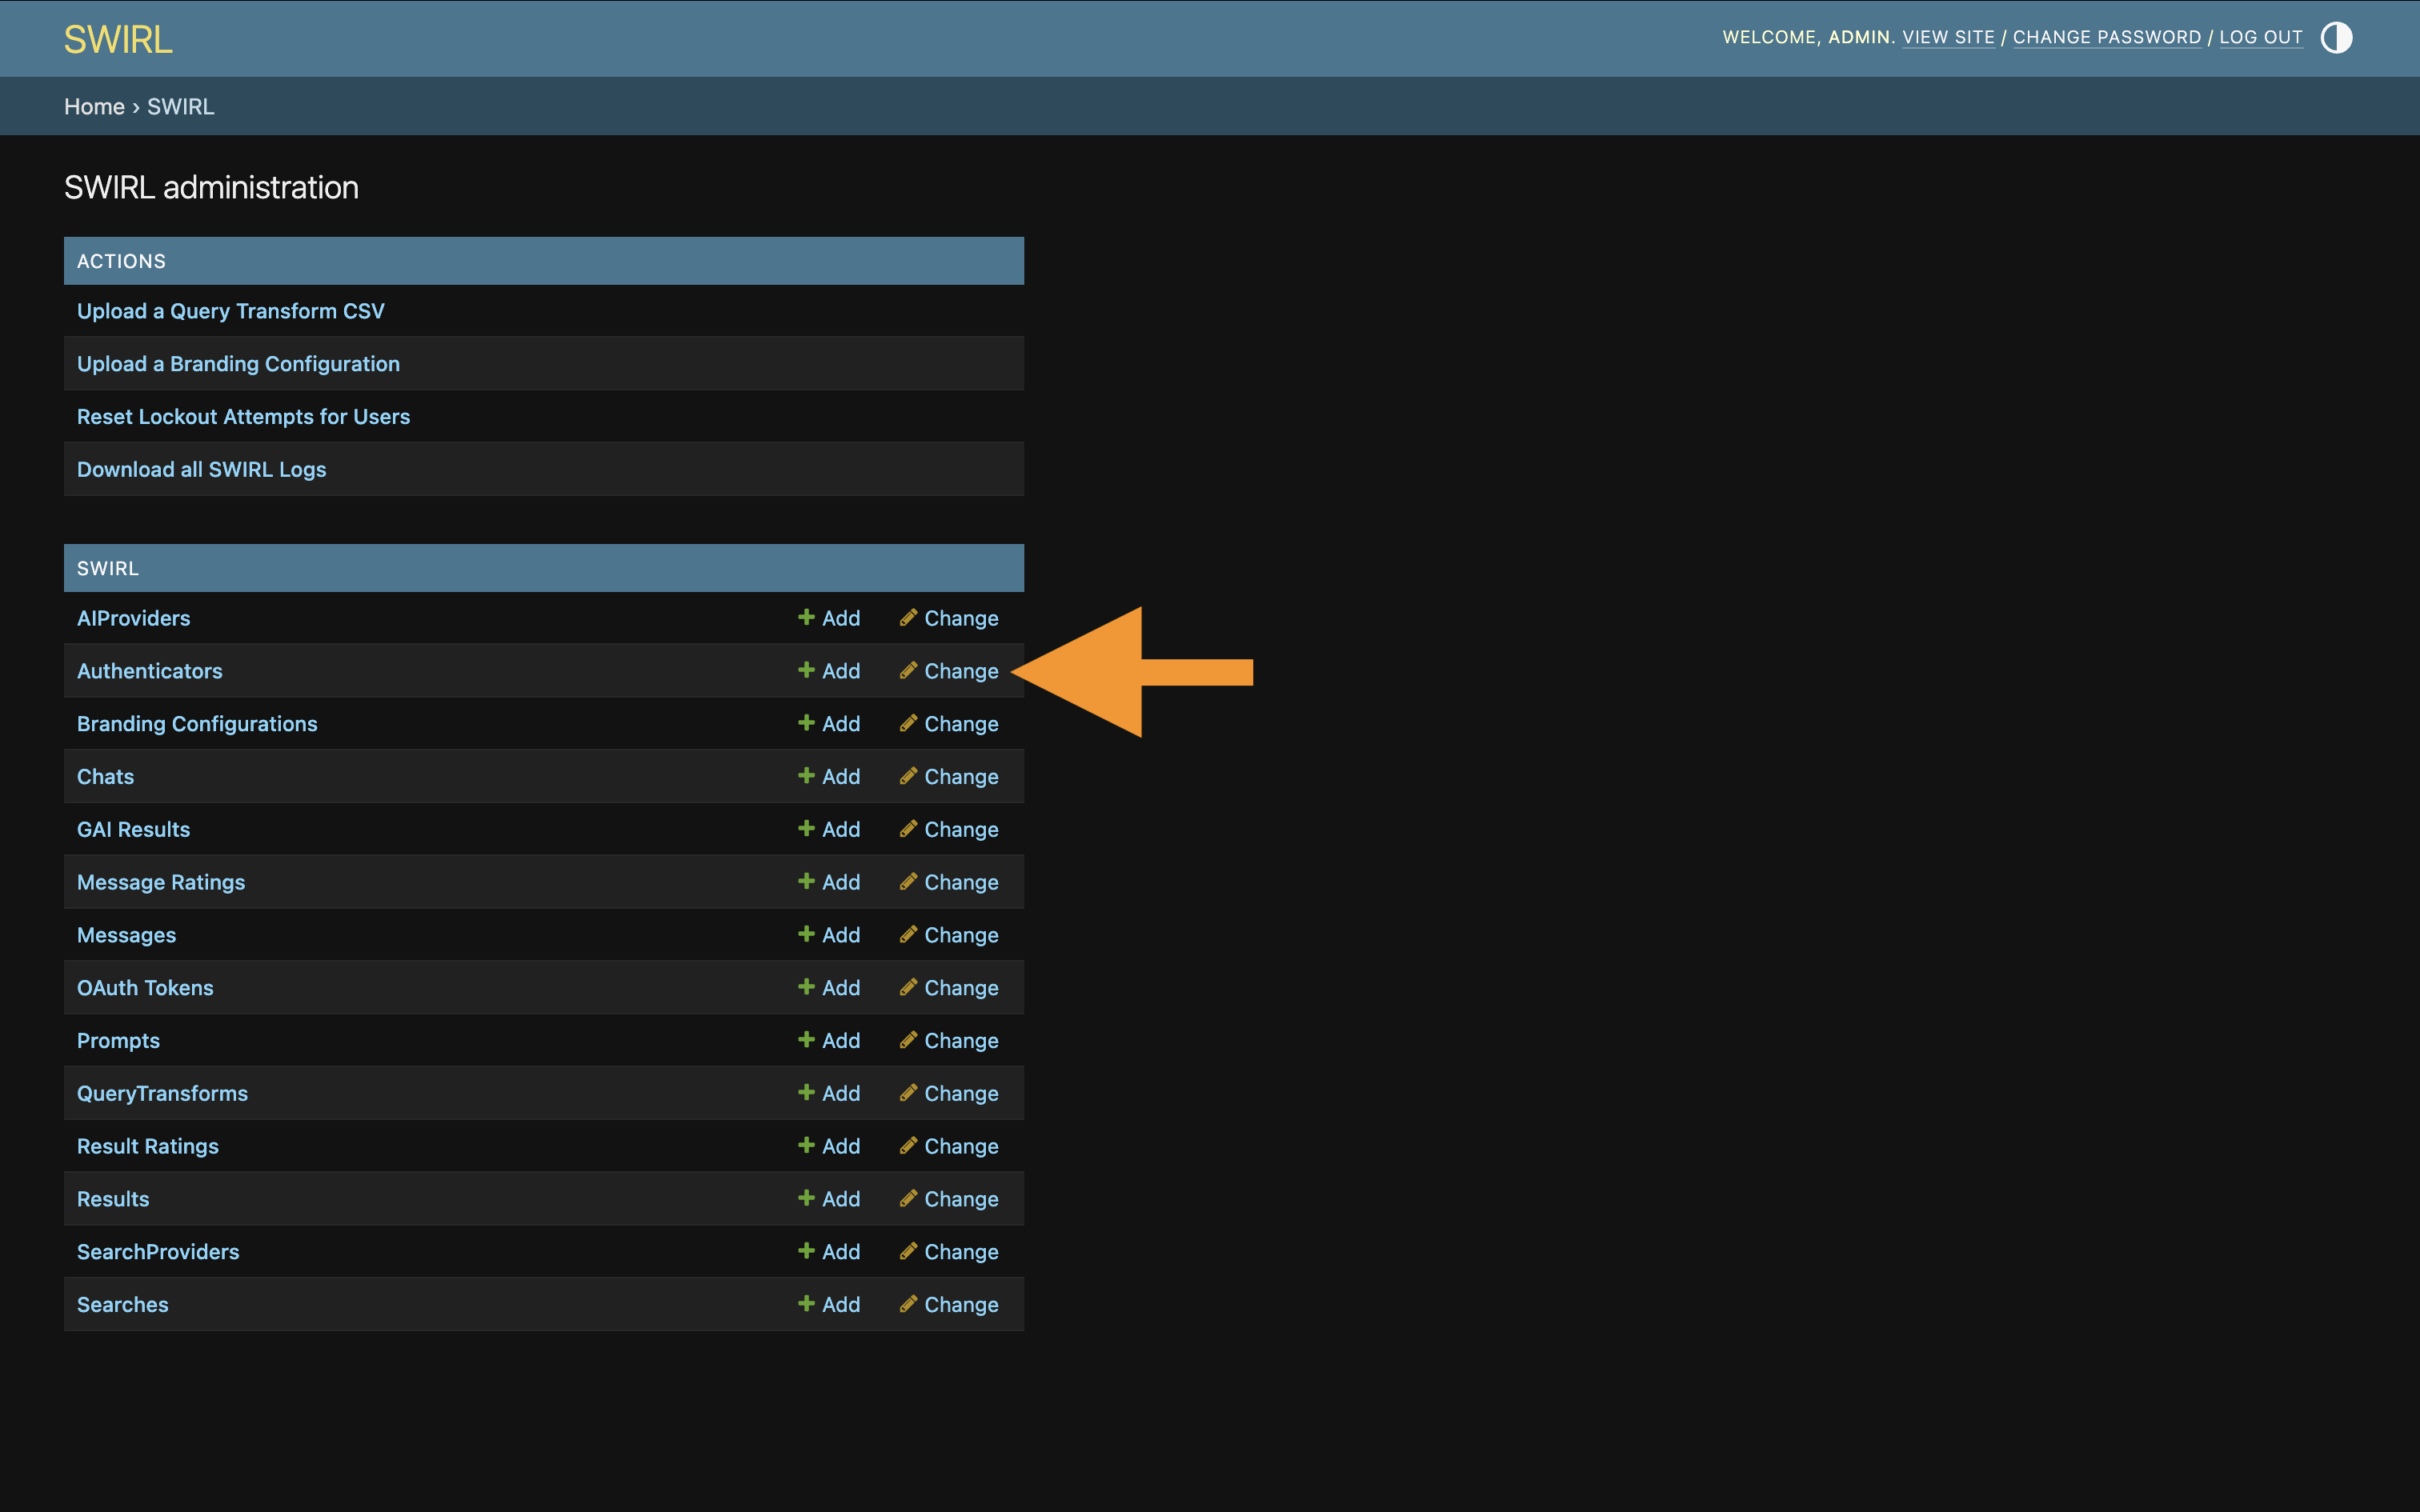
Configure the Microsoft Authenticator
SWIRL includes a preconfigured Microsoft Authenticator.
Use the Admin Console to configure it: http://localhost:8000/admin/swirl/
Click on the "Authenticators" link:
Click the "Microsoft" Authenticator to bring up the edit form:
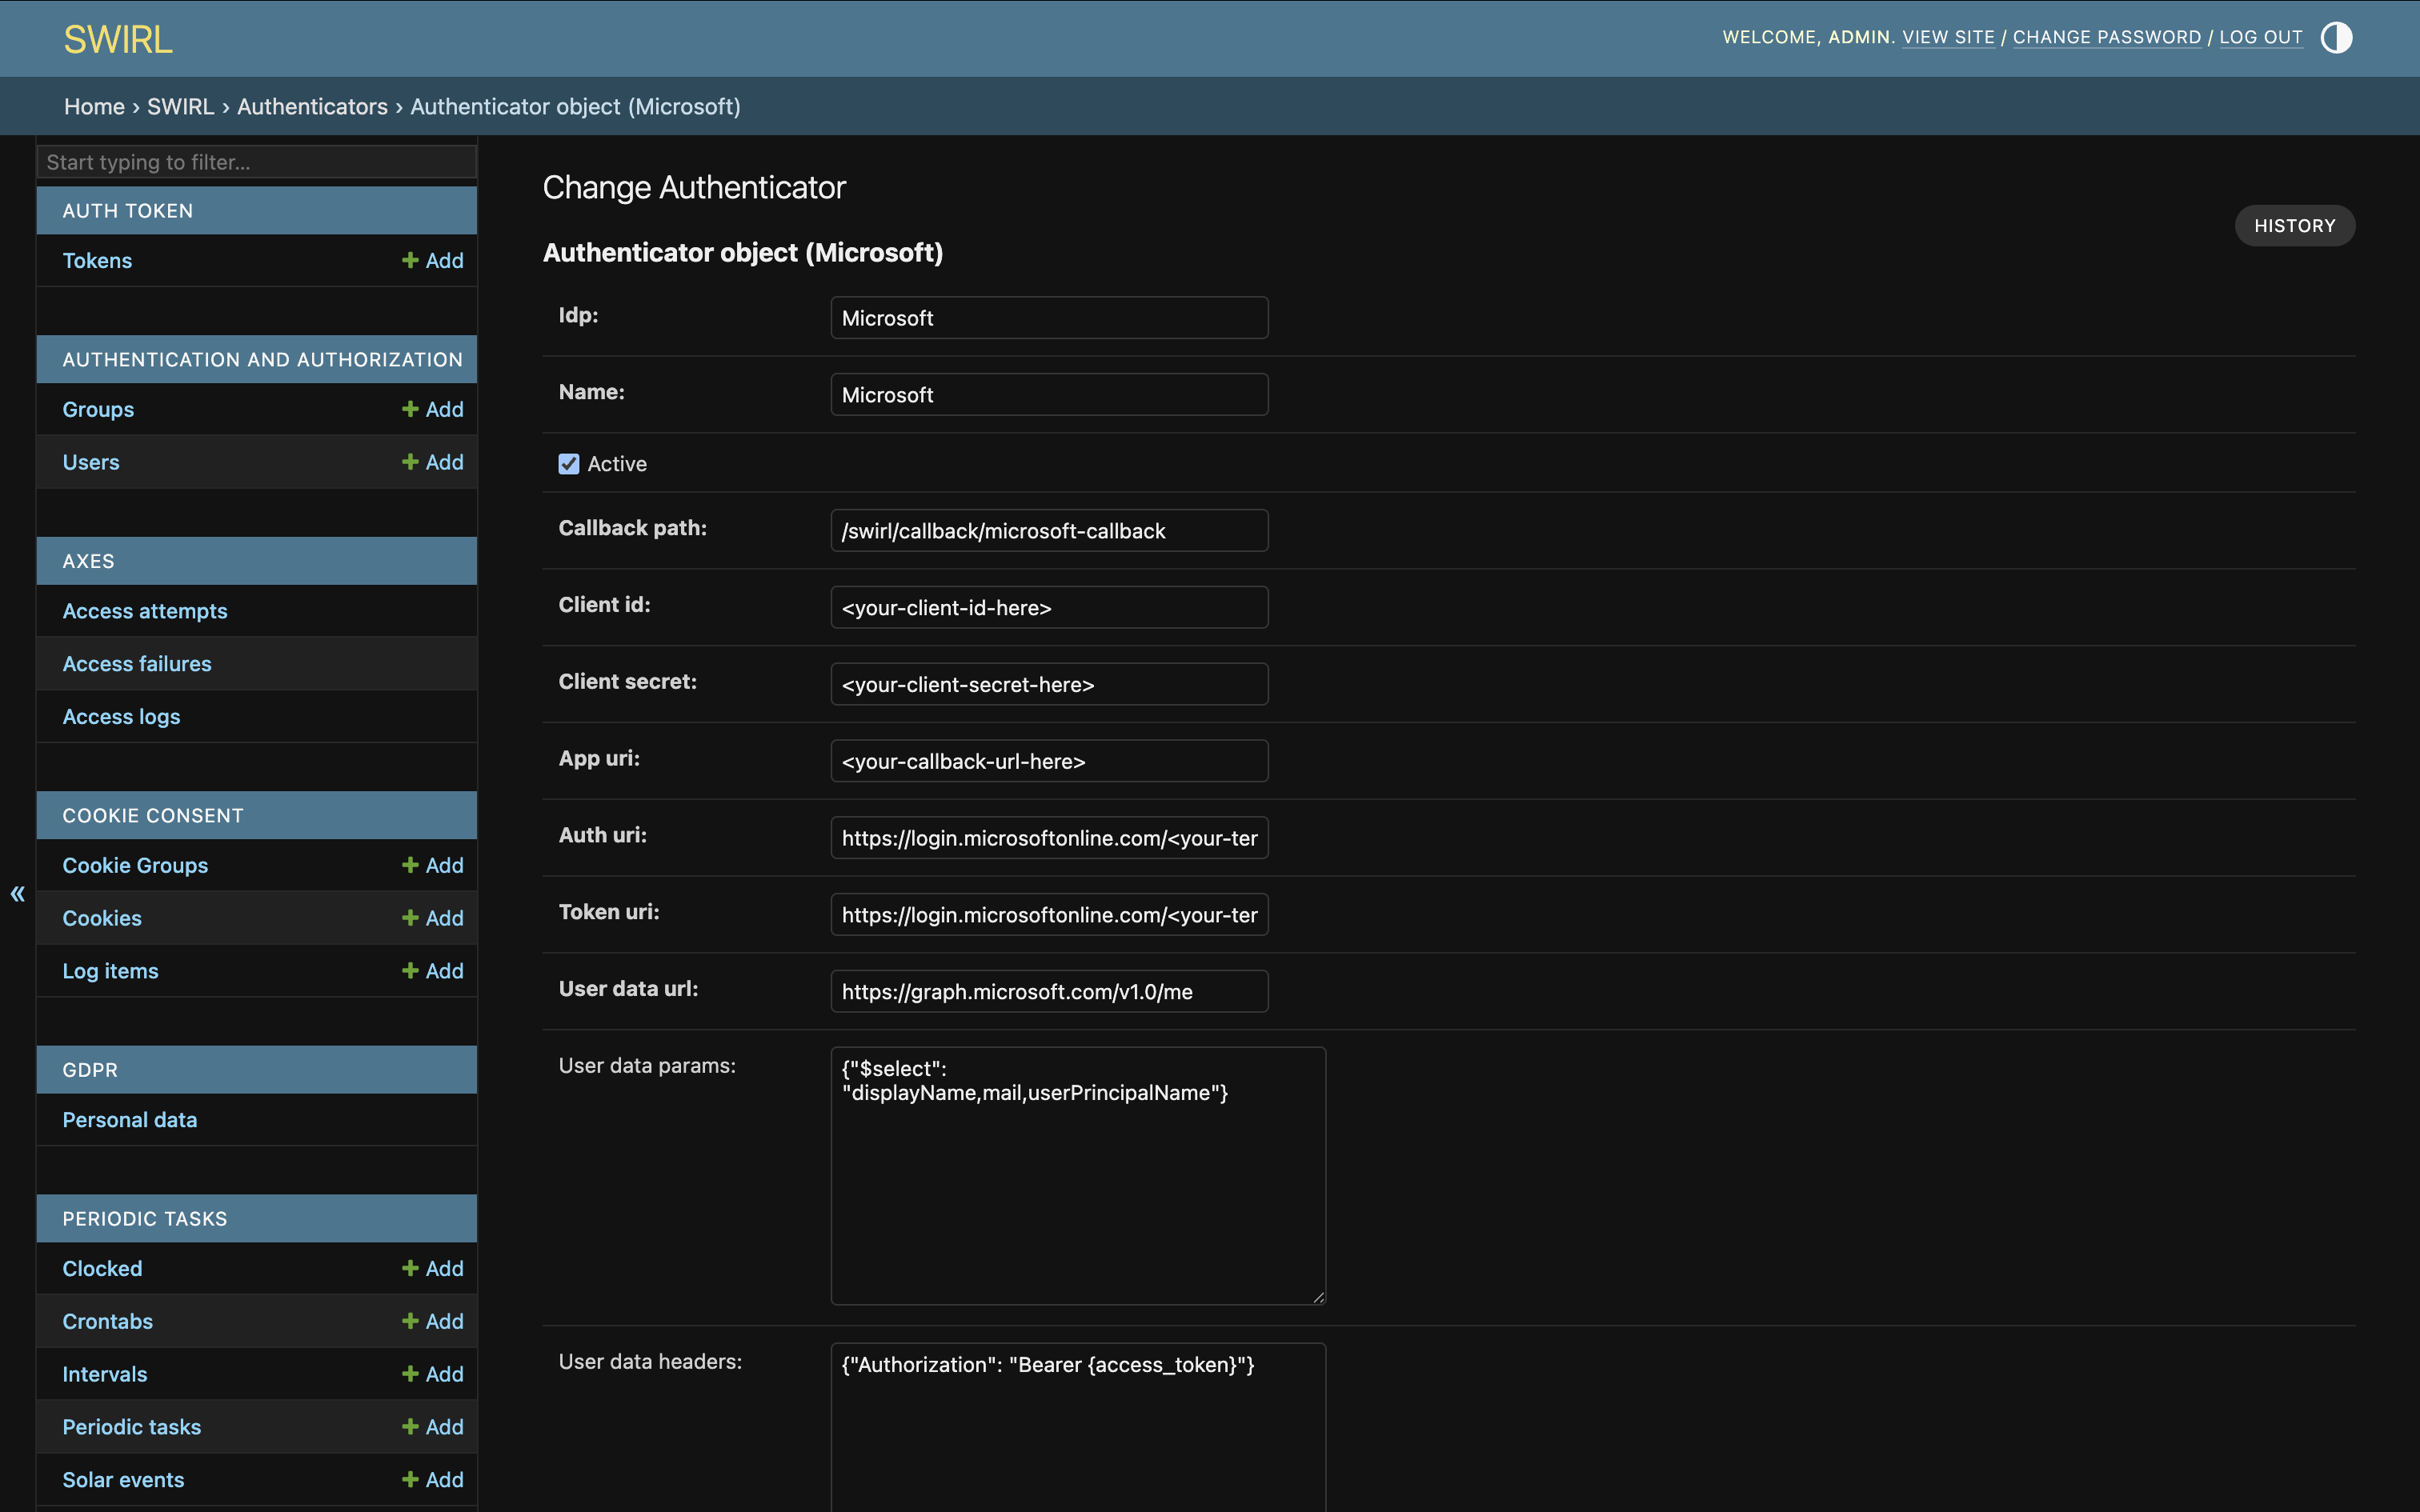
Make the following changes:
* Update the Authenticator client_id value with Azure App <application-id>
* Update the Authenticator client_secret value with Azure App <client-secret-value>
* Update the Authenticator app_uri value with the host and optional port of the SWIRL application.
* Update the Authenticator auth_uri and token_uri values to include the Azure App <tenant-id> where indicated.
* Make the Authenticator active by checking it.
Do not include a trailing slash in the app_uri value!
Click the "SAVE" button at the bottom of the page to commit changes.
You must activate the M365 SearchProviders before attempting to login using the new Authenticator.
Example Configurations
This configuration is for a server running in production, with a fully qualified domain name (like swirl.yourdomain.com).
{
    "idp": "Microsoft",
    "name": "Microsoft",
    "active": false,
    "callback_path": "/swirl/callback/microsoft-callback",
    "client_id": "<application(client)-id>",
    "client_secret": "<client-secret>",
    "app_uri": "https://<fully-qualified-domain-of-swirl-app>",
    "auth_uri": "https://login.microsoftonline.com/<tenant-id>/oauth2/v2.0/authorize",
    "token_uri": "https://login.microsoftonline.com/<tenant-id>/oauth2/v2.0/token",
    "user_data_url": "https://graph.microsoft.com/v1.0/me",
    "user_data_params": {
        "$select": "displayName,mail,userPrincipalName"
    },
    "user_data_headers": {
        "Authorization": "Bearer {access_token}"
    },
    "user_data_method": "GET",
    "initiate_auth_code_flow_params": {},
    "exchange_code_params": {},
    "is_code_challenge": true,
    "scopes": "User.Read Mail.Read Files.Read.All Calendars.Read Sites.Read.All Chat.Read ChannelMessage.Read.All offline_access",
    "should_expire": true,
    "use_basic_auth": true,
    "expires_in": 0
}
This configuration can be used when running SWIRL locally:
{
    "idp": "Microsoft",
    "name": "Microsoft",
    "active": true,
    "callback_path": "/swirl/callback/microsoft-callback",
    "client_id": "<client-id-redacted>",
    "client_secret": "<secret-redacted>",
    "app_uri": "http://localhost:8000",
    "auth_uri": "https://login.microsoftonline.com/<tenant-id-redacted>/oauth2/v2.0/authorize",
    "token_uri": "https://login.microsoftonline.com/<tenant-id-redacted>/oauth2/v2.0/token",
    "user_data_url": "https://graph.microsoft.com/v1.0/me",
    "user_data_params": {
        "$select": "displayName,mail,userPrincipalName"
    },
    "user_data_headers": {
        "Authorization": "Bearer {access_token}"
    },
    "user_data_method": "GET",
    "initiate_auth_code_flow_params": {},
    "exchange_code_params": {},
    "is_code_challenge": true,
    "scopes": "User.Read Mail.Read Files.Read.All Calendars.Read Sites.Read.All Chat.Read ChannelMessage.Read.All offline_access",
    "should_expire": true,
    "use_basic_auth": true,
    "expires_in": 0
}
Configuring OIDC for Microsoft
To enable OIDC ("Login with Microsoft") in both SWIRL Enterprise and Community edition, locate and copy the following values from your new Azure App Registration:
- <application-id>
- <tenant-id>
- <oidc-callback-url>
Complete Step 3 of the Configure Redirect URI(s) for a Single-Page Application section above before proceeding!
Update the Default Configuration Values
From the SWIRL home directory, open the static/api/config/default file within in an editor and locate the oidcConfig section:
"oidcConfig": {
   "Microsoft": {
      "active": false,
      "issuer": "https://login.microsoftonline.com/<tenant-id>/v2.0",
      "clientId": "<microsoft-client-id>",
      "redirectUri": "http://<msal-host>:<msal-port>/galaxy/oidc-callback",
      "scope": "openid email",
      "responseType": "code",
      "requireHttps": false,
      "strictDiscoveryDocumentValidation": false,
      "skipIssuerCheck": true
   }
},
Add the values from your Azure App Registration to the Microsoft section as follows:
* Update the clientId value with the Azure App <application-id>
* Update the redirectUri value with the <oidc-callback-url> from your Single-Page Application
* Update the issuer field with the Azure App <tenant-id>
* Update the active value to true
Example OIDC configuration for Microsoft:
"oidcConfig": {
   "Microsoft": {
      "active": true,
      "issuer": "https://login.microsoftonline.com/<tenant-id-redacted>/v2.0",
      "clientId": "<client-id-redacted>",
      "redirectUri": "https://search.swirl.today/galaxy/oidc-callback",
      "scope": "openid email",
      "responseType": "code",
      "requireHttps": false,
      "strictDiscoveryDocumentValidation": false,
      "skipIssuerCheck": true
   },
   "Google": {
      "active": false,
      "clientId":  "<google-client-id>.apps.googleusercontent.com",
      "redirectUri": "http://<swirl-host>:<swirl-port>/galaxy/oidc-callback",
      "scope": "openid email profile"
   }
},
For the Enterprise Edition, the Microsoft Authenticator must be correctly configured as noted above.
Restart SWIRL
Restart SWIRL. The login page should now present a Login with Microsoft button:
Configure OIDC for the SWIRL Public Docker Compose
Use of OIDC is optional.
Main instructions: https://github.com/swirlai/docker-compose/blob/main/doc/setup-instructions.md#configure-oidc-with-microsoft-as-the-idp-optional
Configure OIDC for the SWIRL Azure Marketplace Offer
Use of OIDC is optional.
Configure the following environment variables in the .env file found in the deployment's /app directory:
MS_AUTH_CLIENT_ID- Microsoft application registration client ID value.MS_TENANT_ID- Tenant ID value from Microsoft Azure IdP.PROTOCOL- The protocol used by the SWIRL instance (e.g.httporhttps).SHOULD_USE_TOKEN_FROM_OAUTH- Set this value to "True" (default) to use the tokens from OIDC. Otherwise, set it to False.SWIRL_FQDNThe Fully Qualified Domain Name of the SWIRL instance.SWIRL_PORTThe port used by SWIRL (defaults tounsetallowingPROTOCOLto set to 443 for HTTPS, and 80 for HTTP).
Restart SWIRL
sudo systemctl stop swirl
sudo systemctl start swirl
During the SWIRL start-up process, the following command is run, which populates the /app/static/api/config/default file:
python swirl.py config_default_api_settings
The SWIRL login page should then present a Login with Microsoft button.
Activate the Microsoft 365 SearchProviders
The SWIRL distribution includes pre-configured SearchProviders for:
- Outlook Messages
- Calendar Events
- OneDrive Files
- SharePoint Sites
- Teams Chat
The Microsoft Teams desktop app must be open before clicking a Teams Chat result link.
- Calendar Events – Only recent events are shown.
- Outlook Messages – Only the latest messages are shown.
- OneDrive – Folders are omitted; only documents appear.
- Teams – Only chat messages are indexed. Files shared in chats appear in OneDrive or SharePoint results.
Enable Microsoft SearchProviders
-
Open the Admin Console:
http://localhost:8000/admin/swirl/ -
Click SearchProviders:
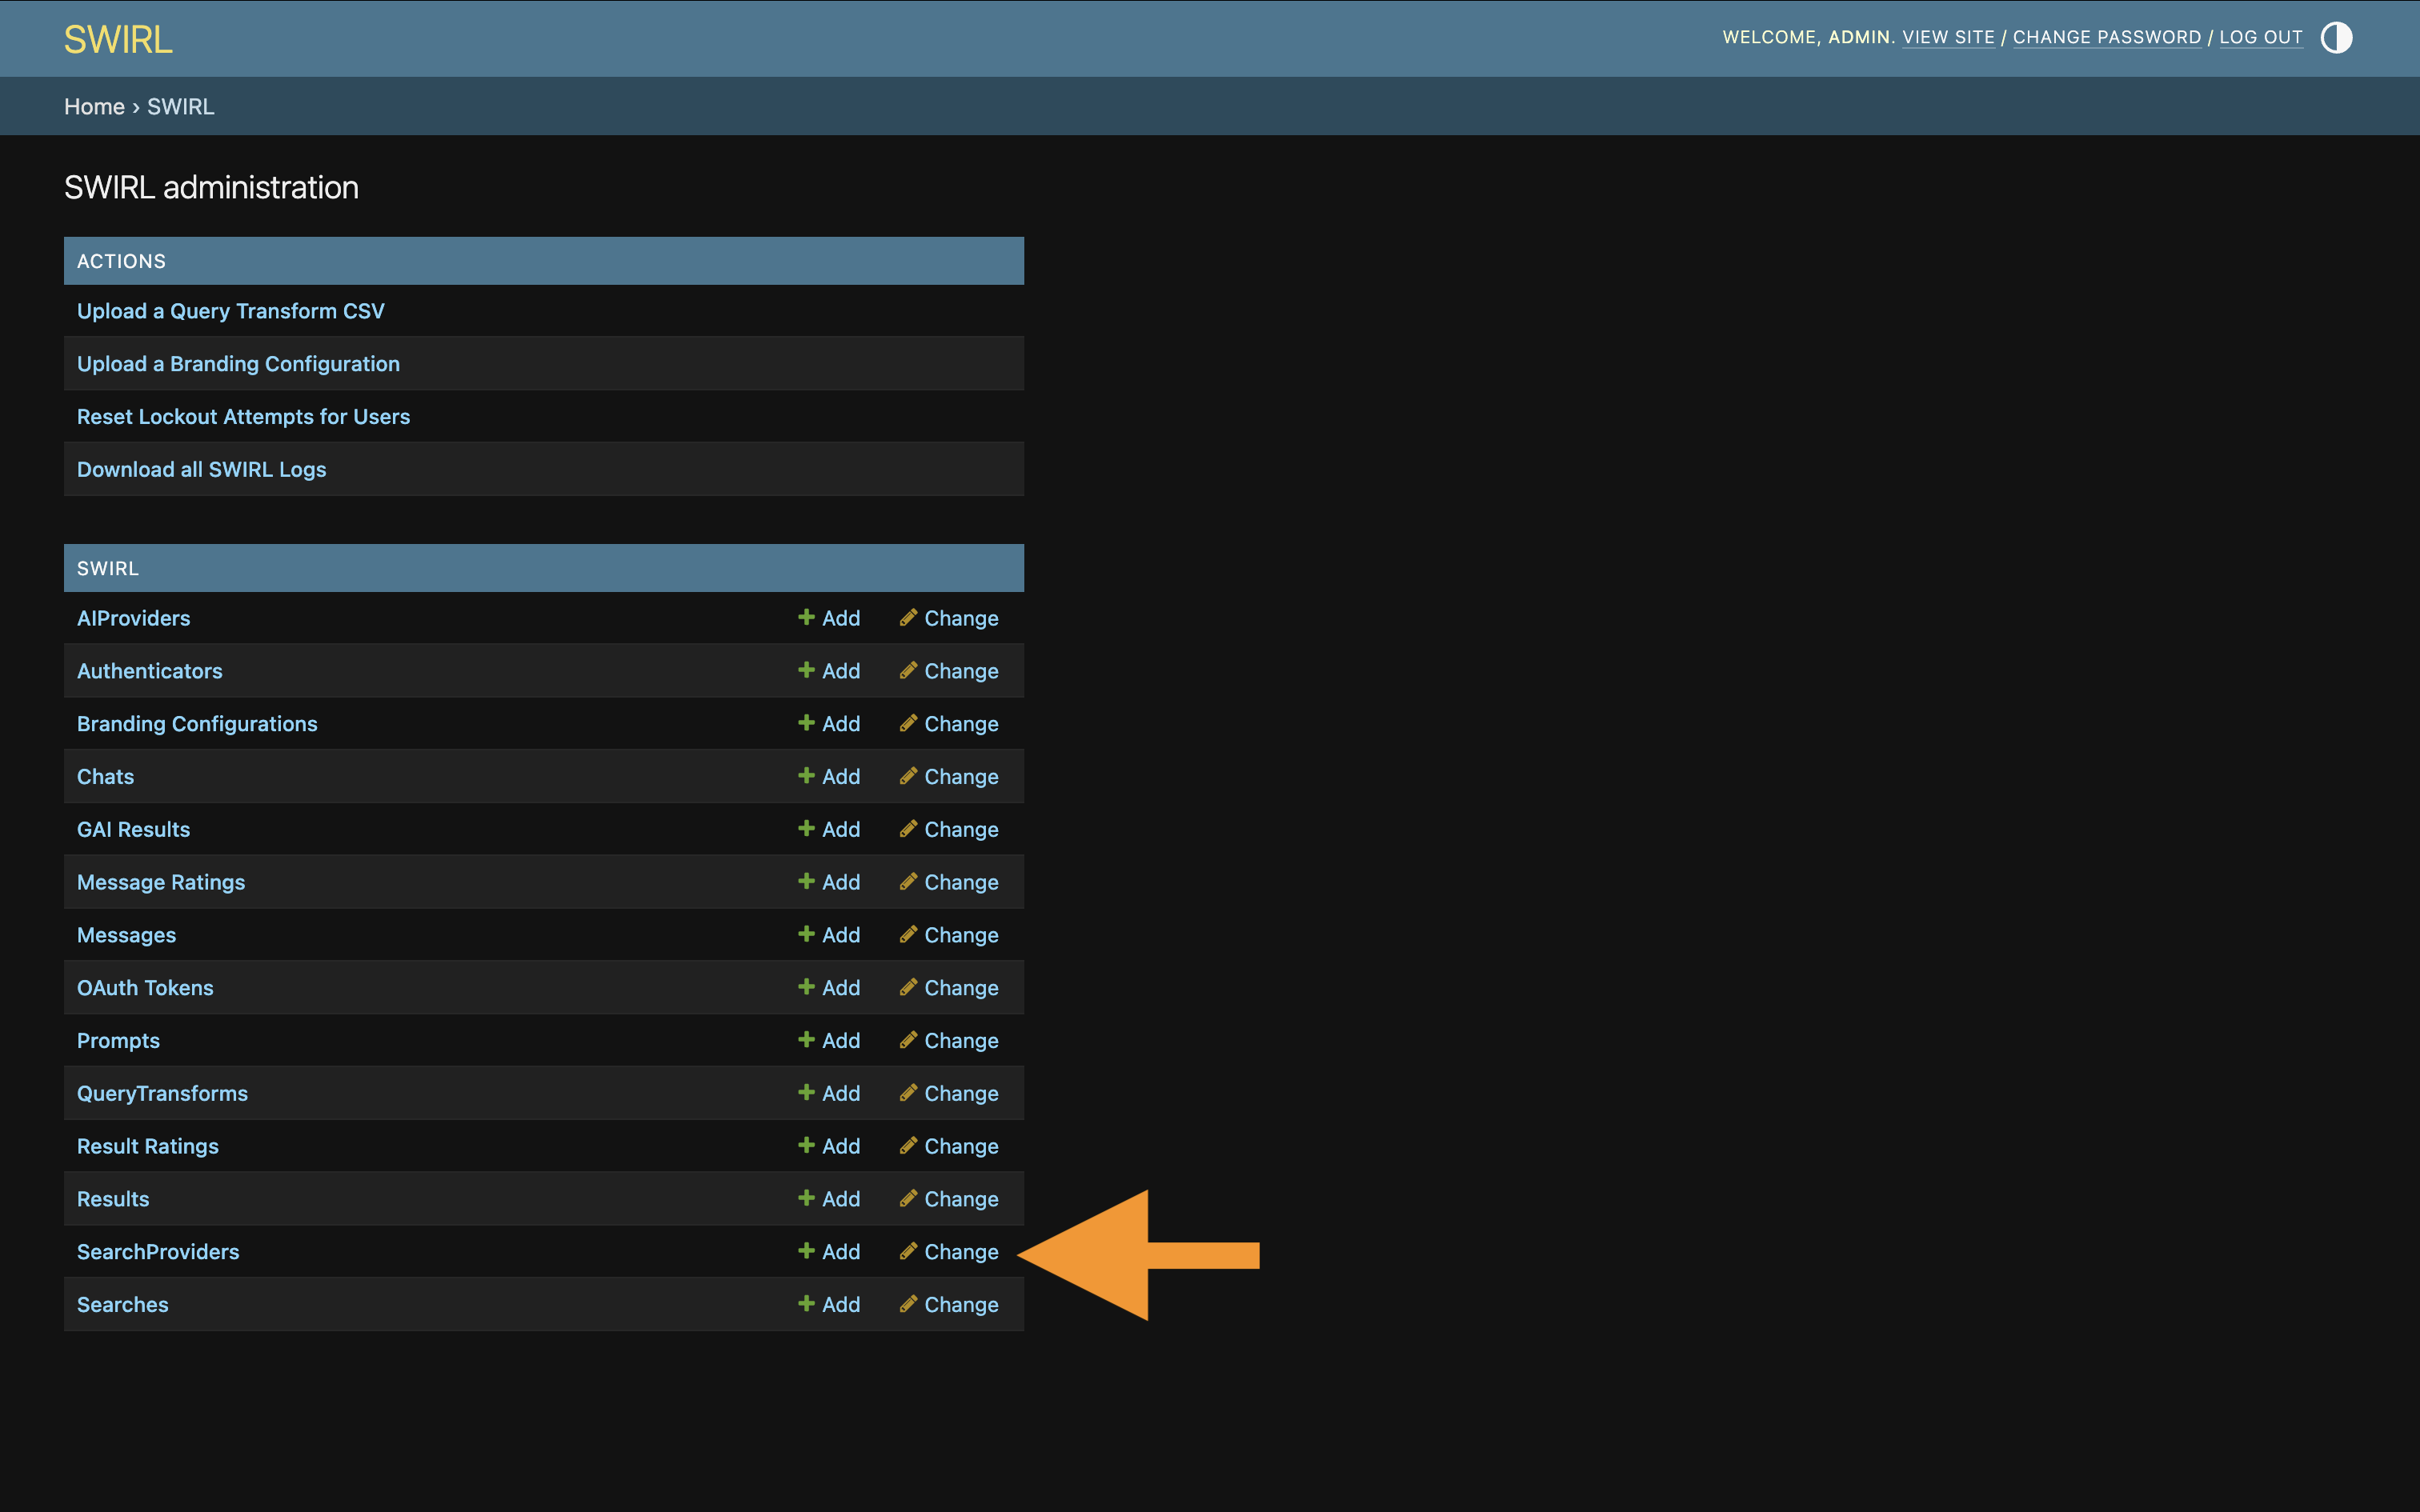
-
This will bring up the list of SearchProviders:
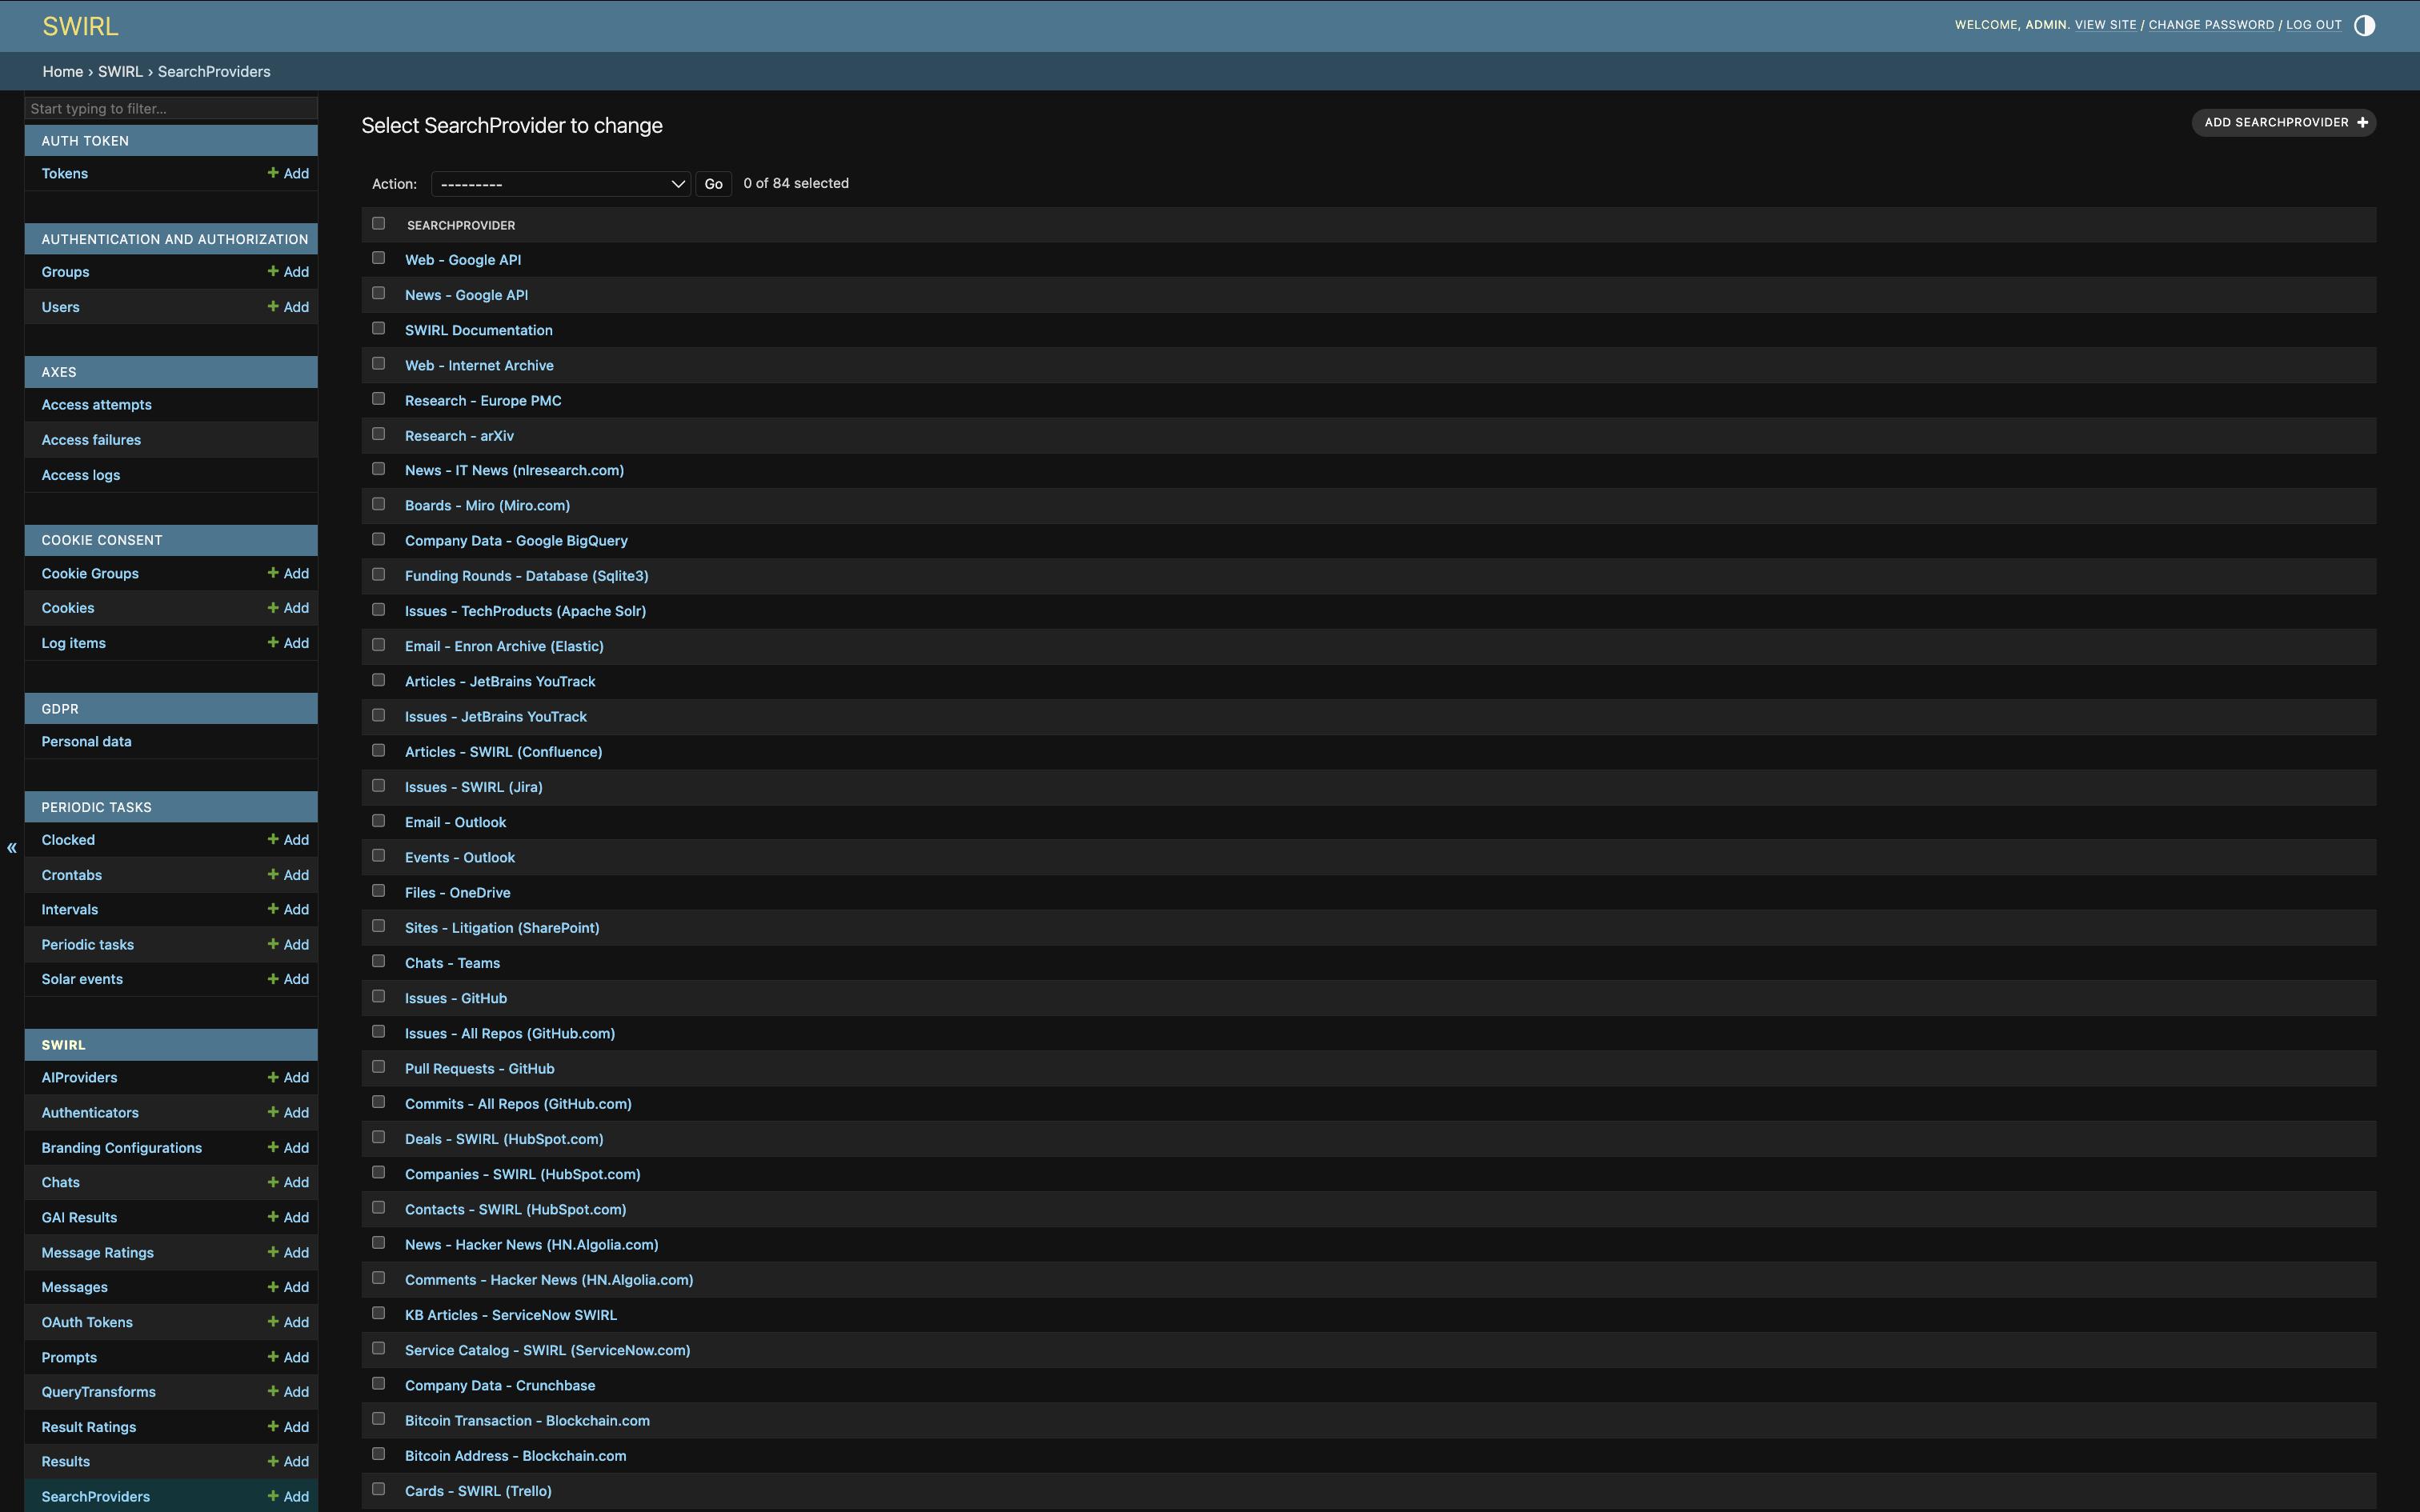
-
Click each M365 SearchProvider like Outlook Messages, OneDrive Files, or Teams Chat, to edit it. This will bring up the edit form:
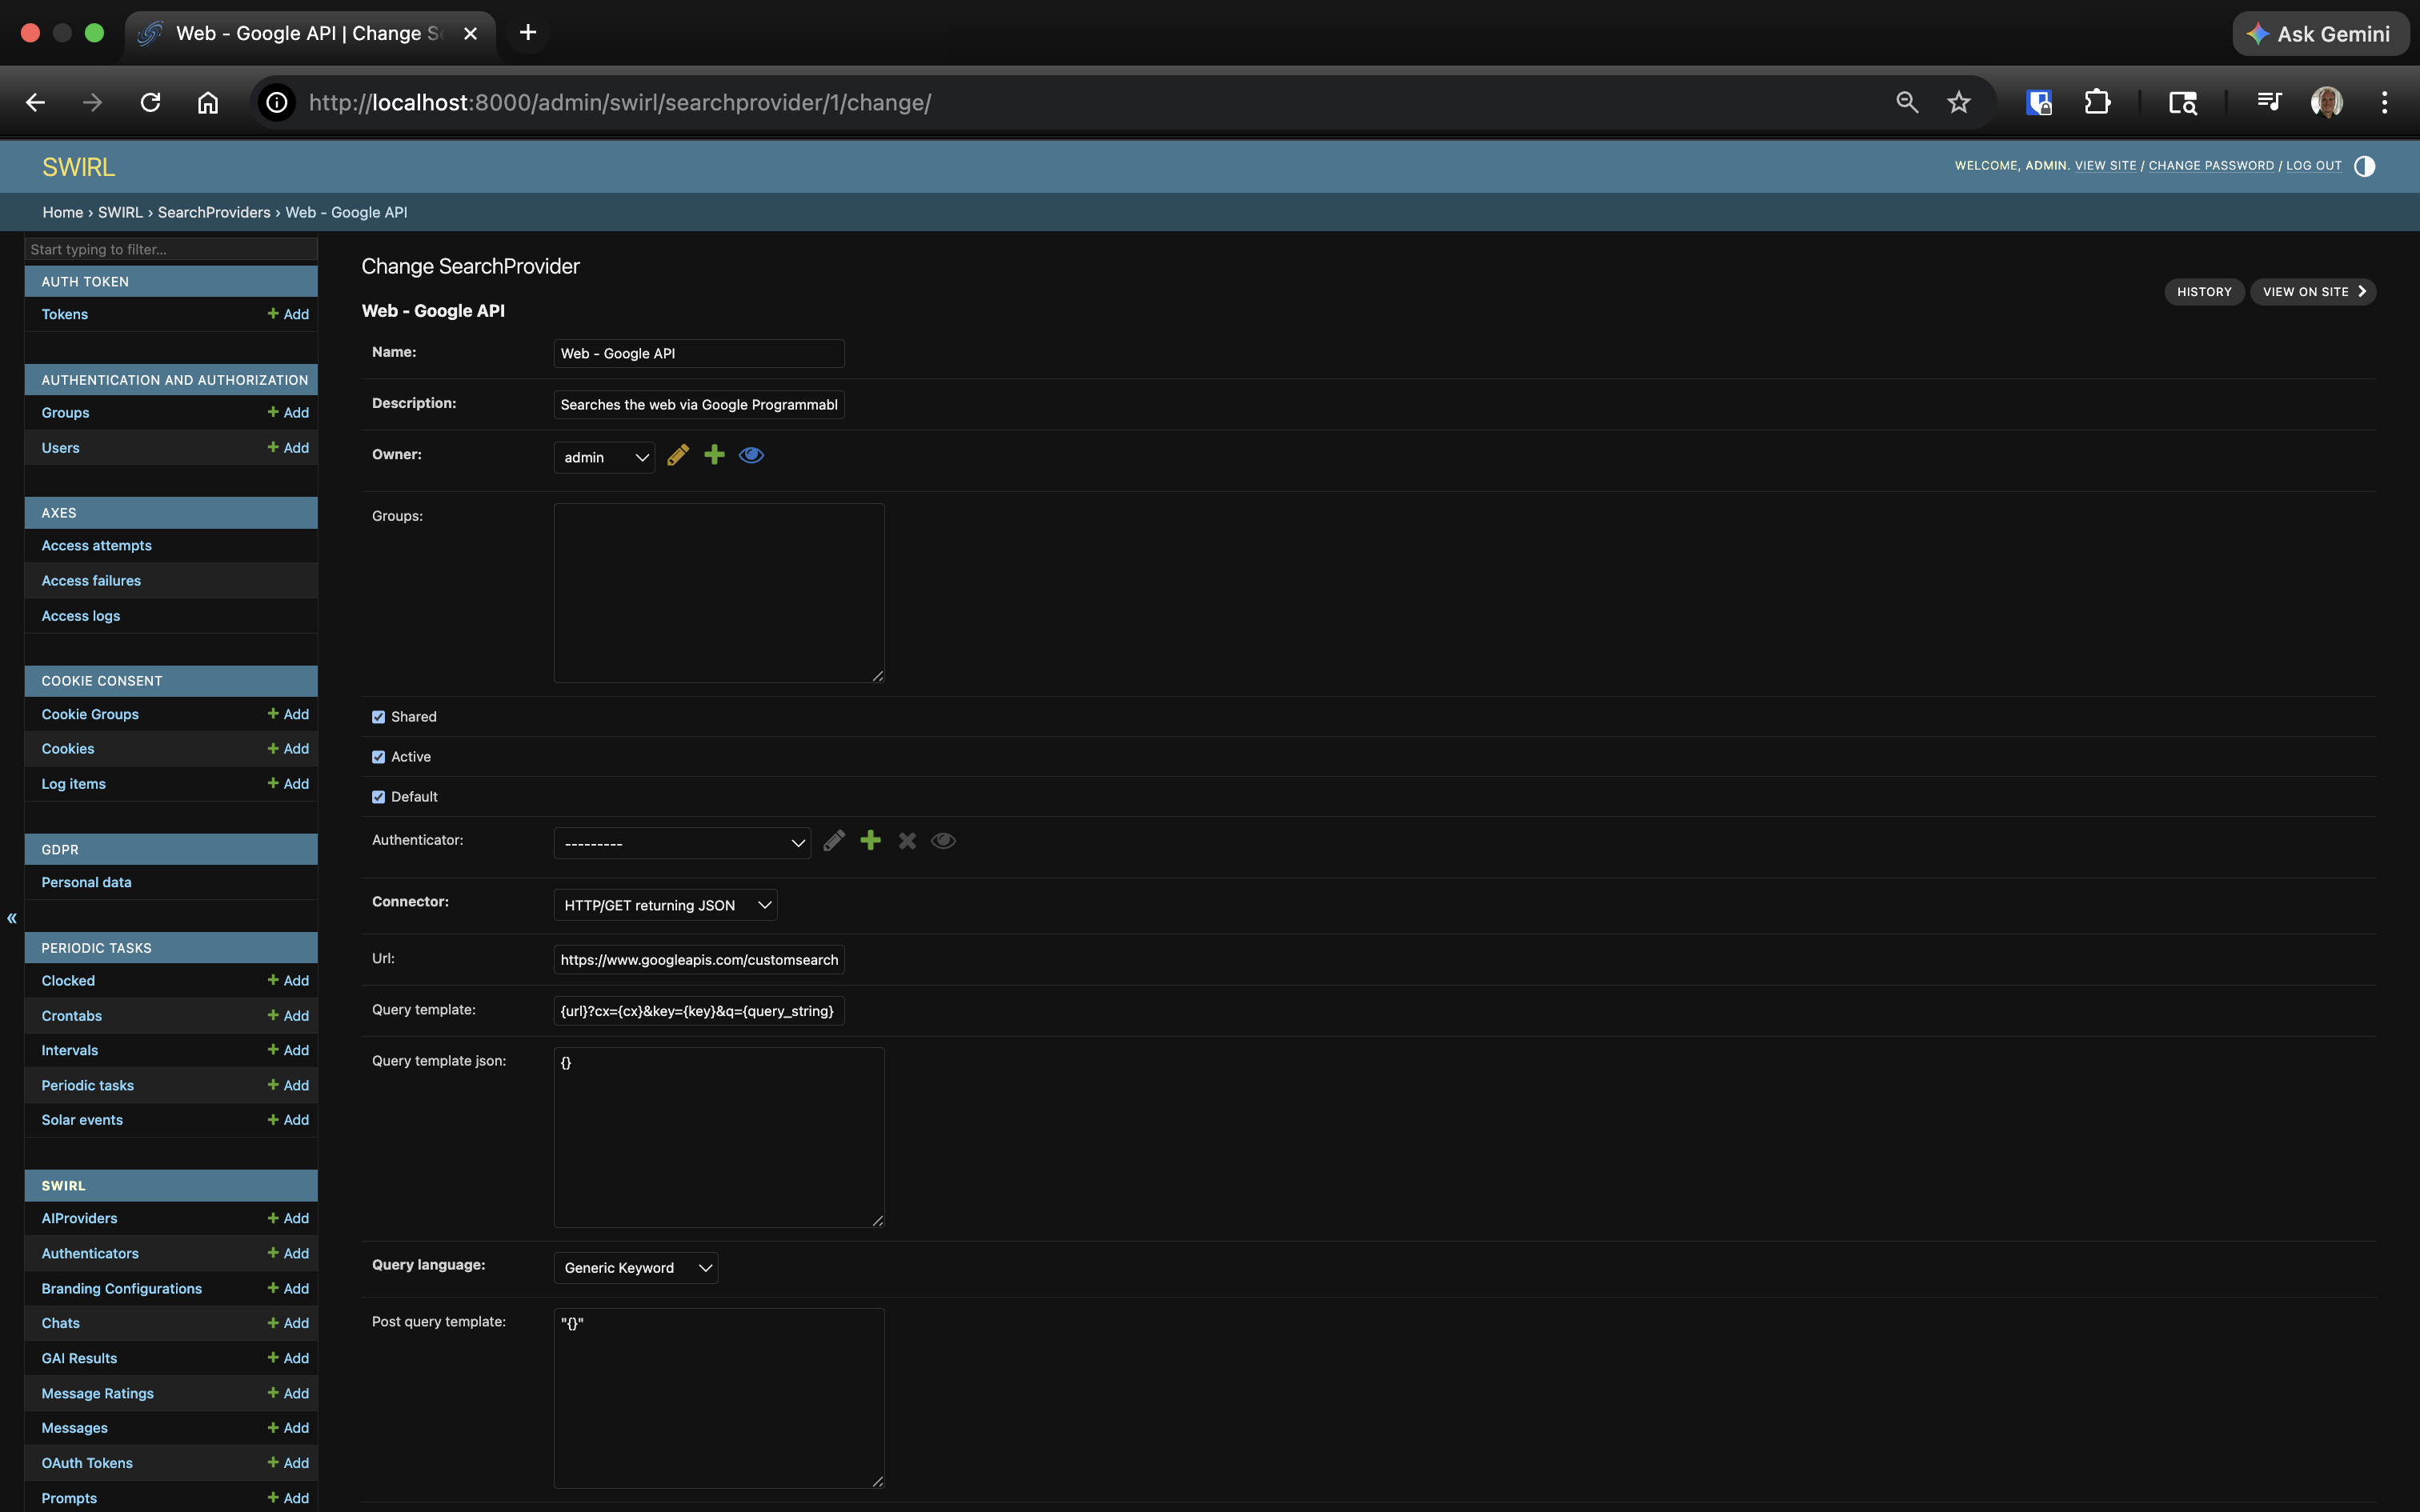
-
Activate the provider by checking the "active" box.
-
Hit "SAVE" at the bottom of the page.
Authenticating with Microsoft
To verify that SWIRL-M365 integration is working:
-
Open the Galaxy UI:
- http://localhost:8000
- or http://localhost:8000/galaxy/ -
Enable Microsoft Authentication:
- Click the profile icon (top right).
- Toggle Microsoft to activate authentication.
- If required, grant permissions during authentication.
- Successful Connection:
- The Microsoft toggle lights up after authentication.
- You can now search Microsoft 365 sources.
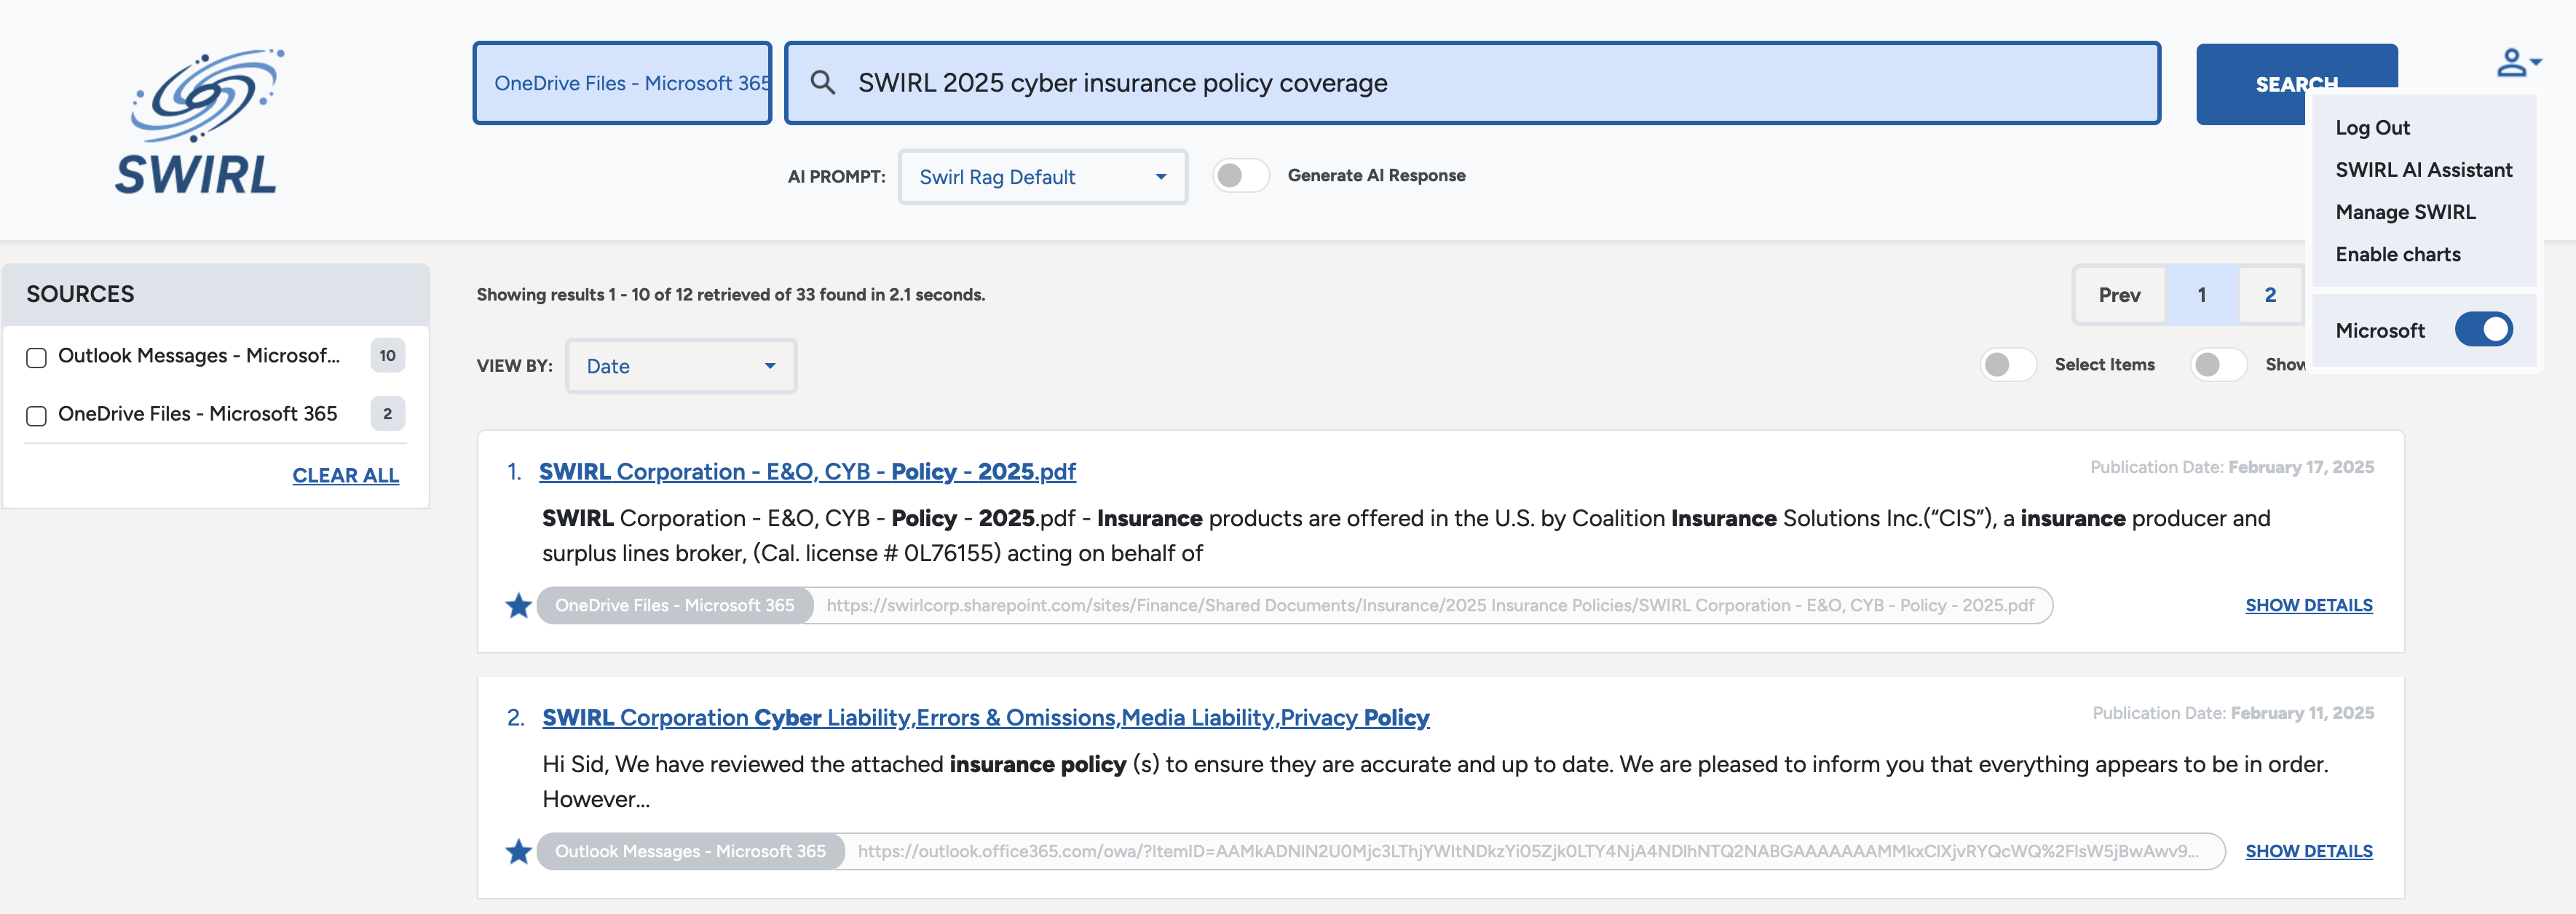
If the Microsoft toggle does not activate after authentication, please contact support. The Related Documentation below may also be helpful.
Related Documentation
-
Register an app with Azure Active Directory (Some steps do not apply to the SWIRL App)