Admin Guide
Administration Console
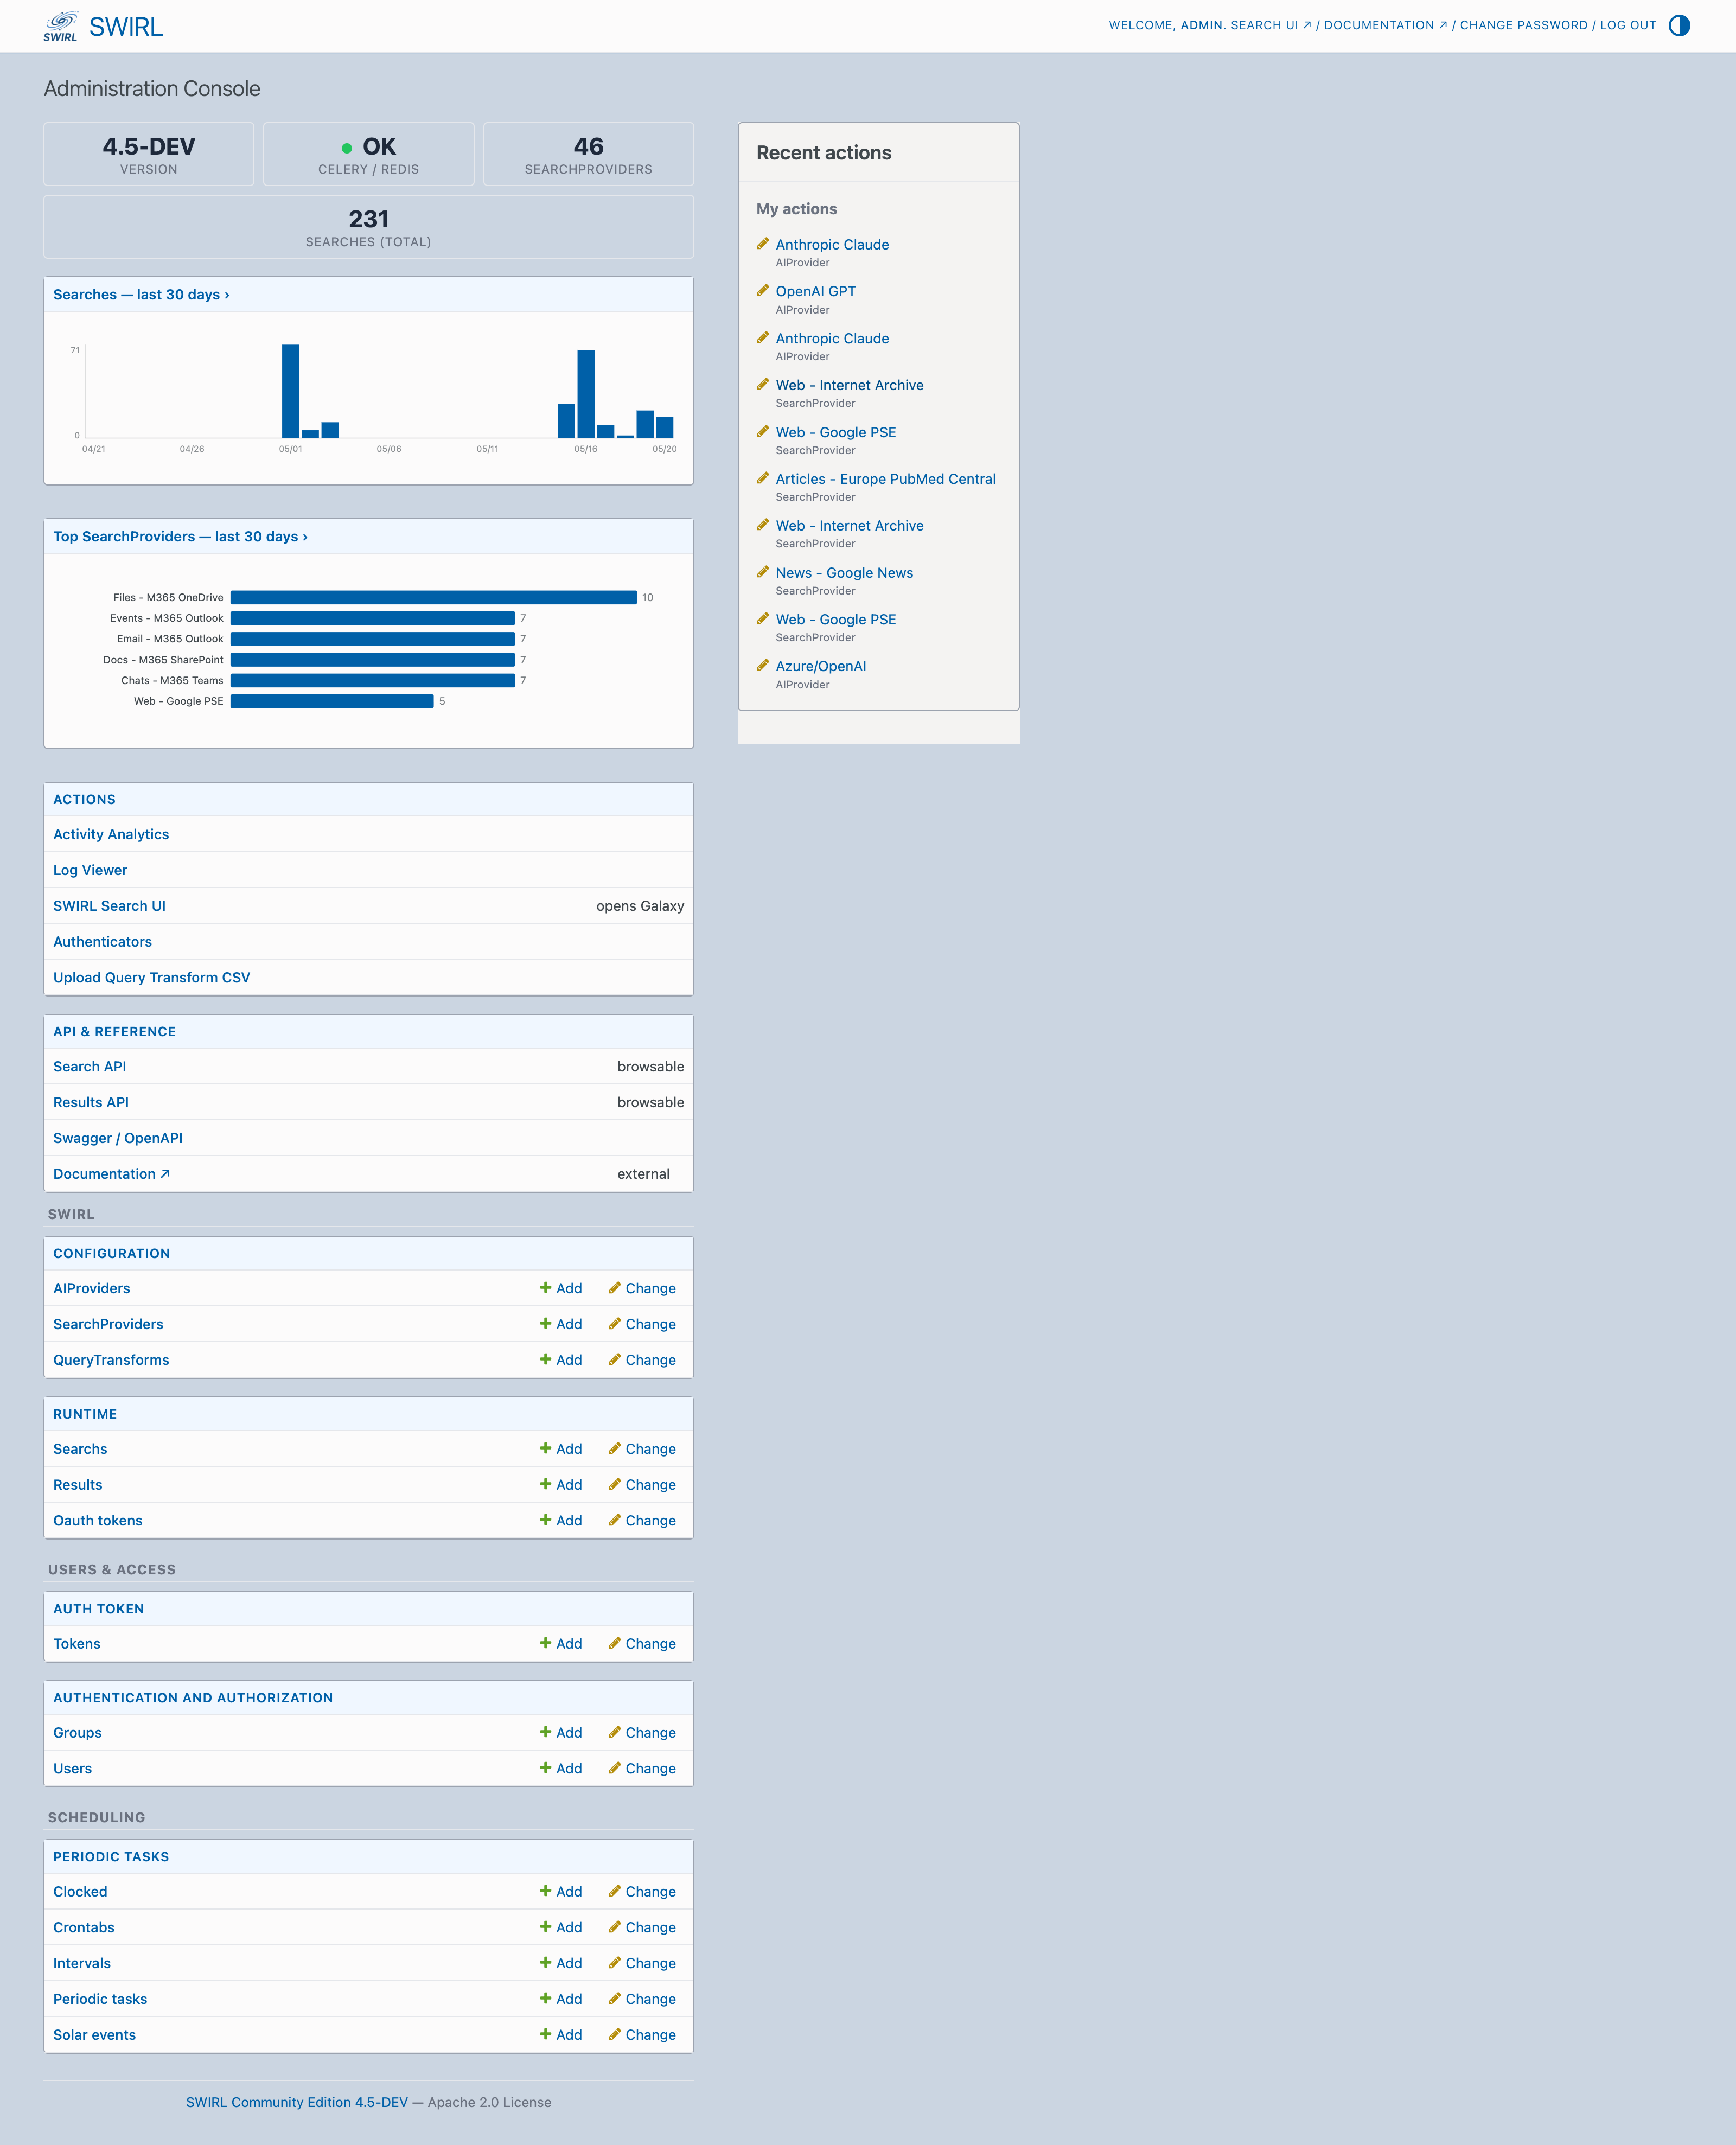
SWIRL's Administration Console is the single place to monitor and configure a running SWIRL instance. It is available at http://localhost:8000/admin/ after logging in as a superuser (the default is admin / password).
COMMUNITY: As of SWIRL Community 4.5, virtually all SWIRL objects — SearchProviders, AIProviders, Query Transforms, OAuth Tokens, API Tokens, Authenticators, Users, and scheduled tasks — can be added and edited entirely from the Administration Console. There is no longer any need to edit .env or load JSON fixtures by hand for routine configuration.
Dashboard
The top of the console shows four status tiles:
- Version — the running SWIRL build.
- Celery / Redis —
OKwhen both the Celery worker and Redis broker are reachable. - SearchProviders — the number of active SearchProviders configured.
- Searches (total) — the lifetime count of
Searchrecords in the database.
Underneath, two charts give an at-a-glance view of recent activity:
- Searches — last 30 days — a daily column chart of total search volume.
- Top SearchProviders — last 30 days — a bar chart of the providers that have served the most results.
Actions Panel
The Actions panel groups the most common administrative jumps:
- Activity Analytics — long-form analytics on searches, providers, and futile queries.
- Log Viewer — a tailing, filterable view of the Django, Celery worker, and Celery beat logs.
- SWIRL Search UI — opens the Galaxy search UI in a new tab.
- Authenticators — edit the Microsoft authenticator used for M365 OAuth.
- Upload Query Transform CSV — bulk-load rewrite/synonym/bag CSVs into a
QueryTransformrecord.
API & Reference Panel
The API & Reference panel links to the browsable DRF endpoints and the Swagger/OpenAPI schema:
- Search API →
/swirl/search/(browsable) - Results API →
/swirl/results/(browsable) - Swagger / OpenAPI →
/swirl/api/docs/ - Documentation → docs.swirlaiconnect.com (external)
Configuration Panel
The Configuration panel exposes Add / Change shortcuts for the three core configuration objects:
- SearchProviders
- AIProviders (COMMUNITY — new in 4.5; previously Enterprise-only)
- Query Transforms
SearchProvider and AIProvider edit pages now group fields into Identity, Connector/Model, Processing, and Auth sections, with monospaced text-areas for JSON fields and inline help text.
Runtime, Users & Scheduling Panels
The remaining panels give read-only access to runtime objects (Searchs, Results, OAuth tokens), user and group management (Tokens, Groups, Users), and the Celery Beat schedule (Clocked, Crontabs, Intervals).
Activity Analytics
COMMUNITY: A new page at /admin/activity/ renders three pure-Django queries against the Search and Result tables — no charting library required, no external services contacted:
- Searches by day — daily search counts for the last 30 days, rendered as an inline SVG sparkline.
- Top SearchProviders — providers ranked by number of results delivered.
- Futile queries — searches that completed but returned no results, or that errored out with
ERR_NO_SEARCHPROVIDERS/NO_RESULTS_READY.
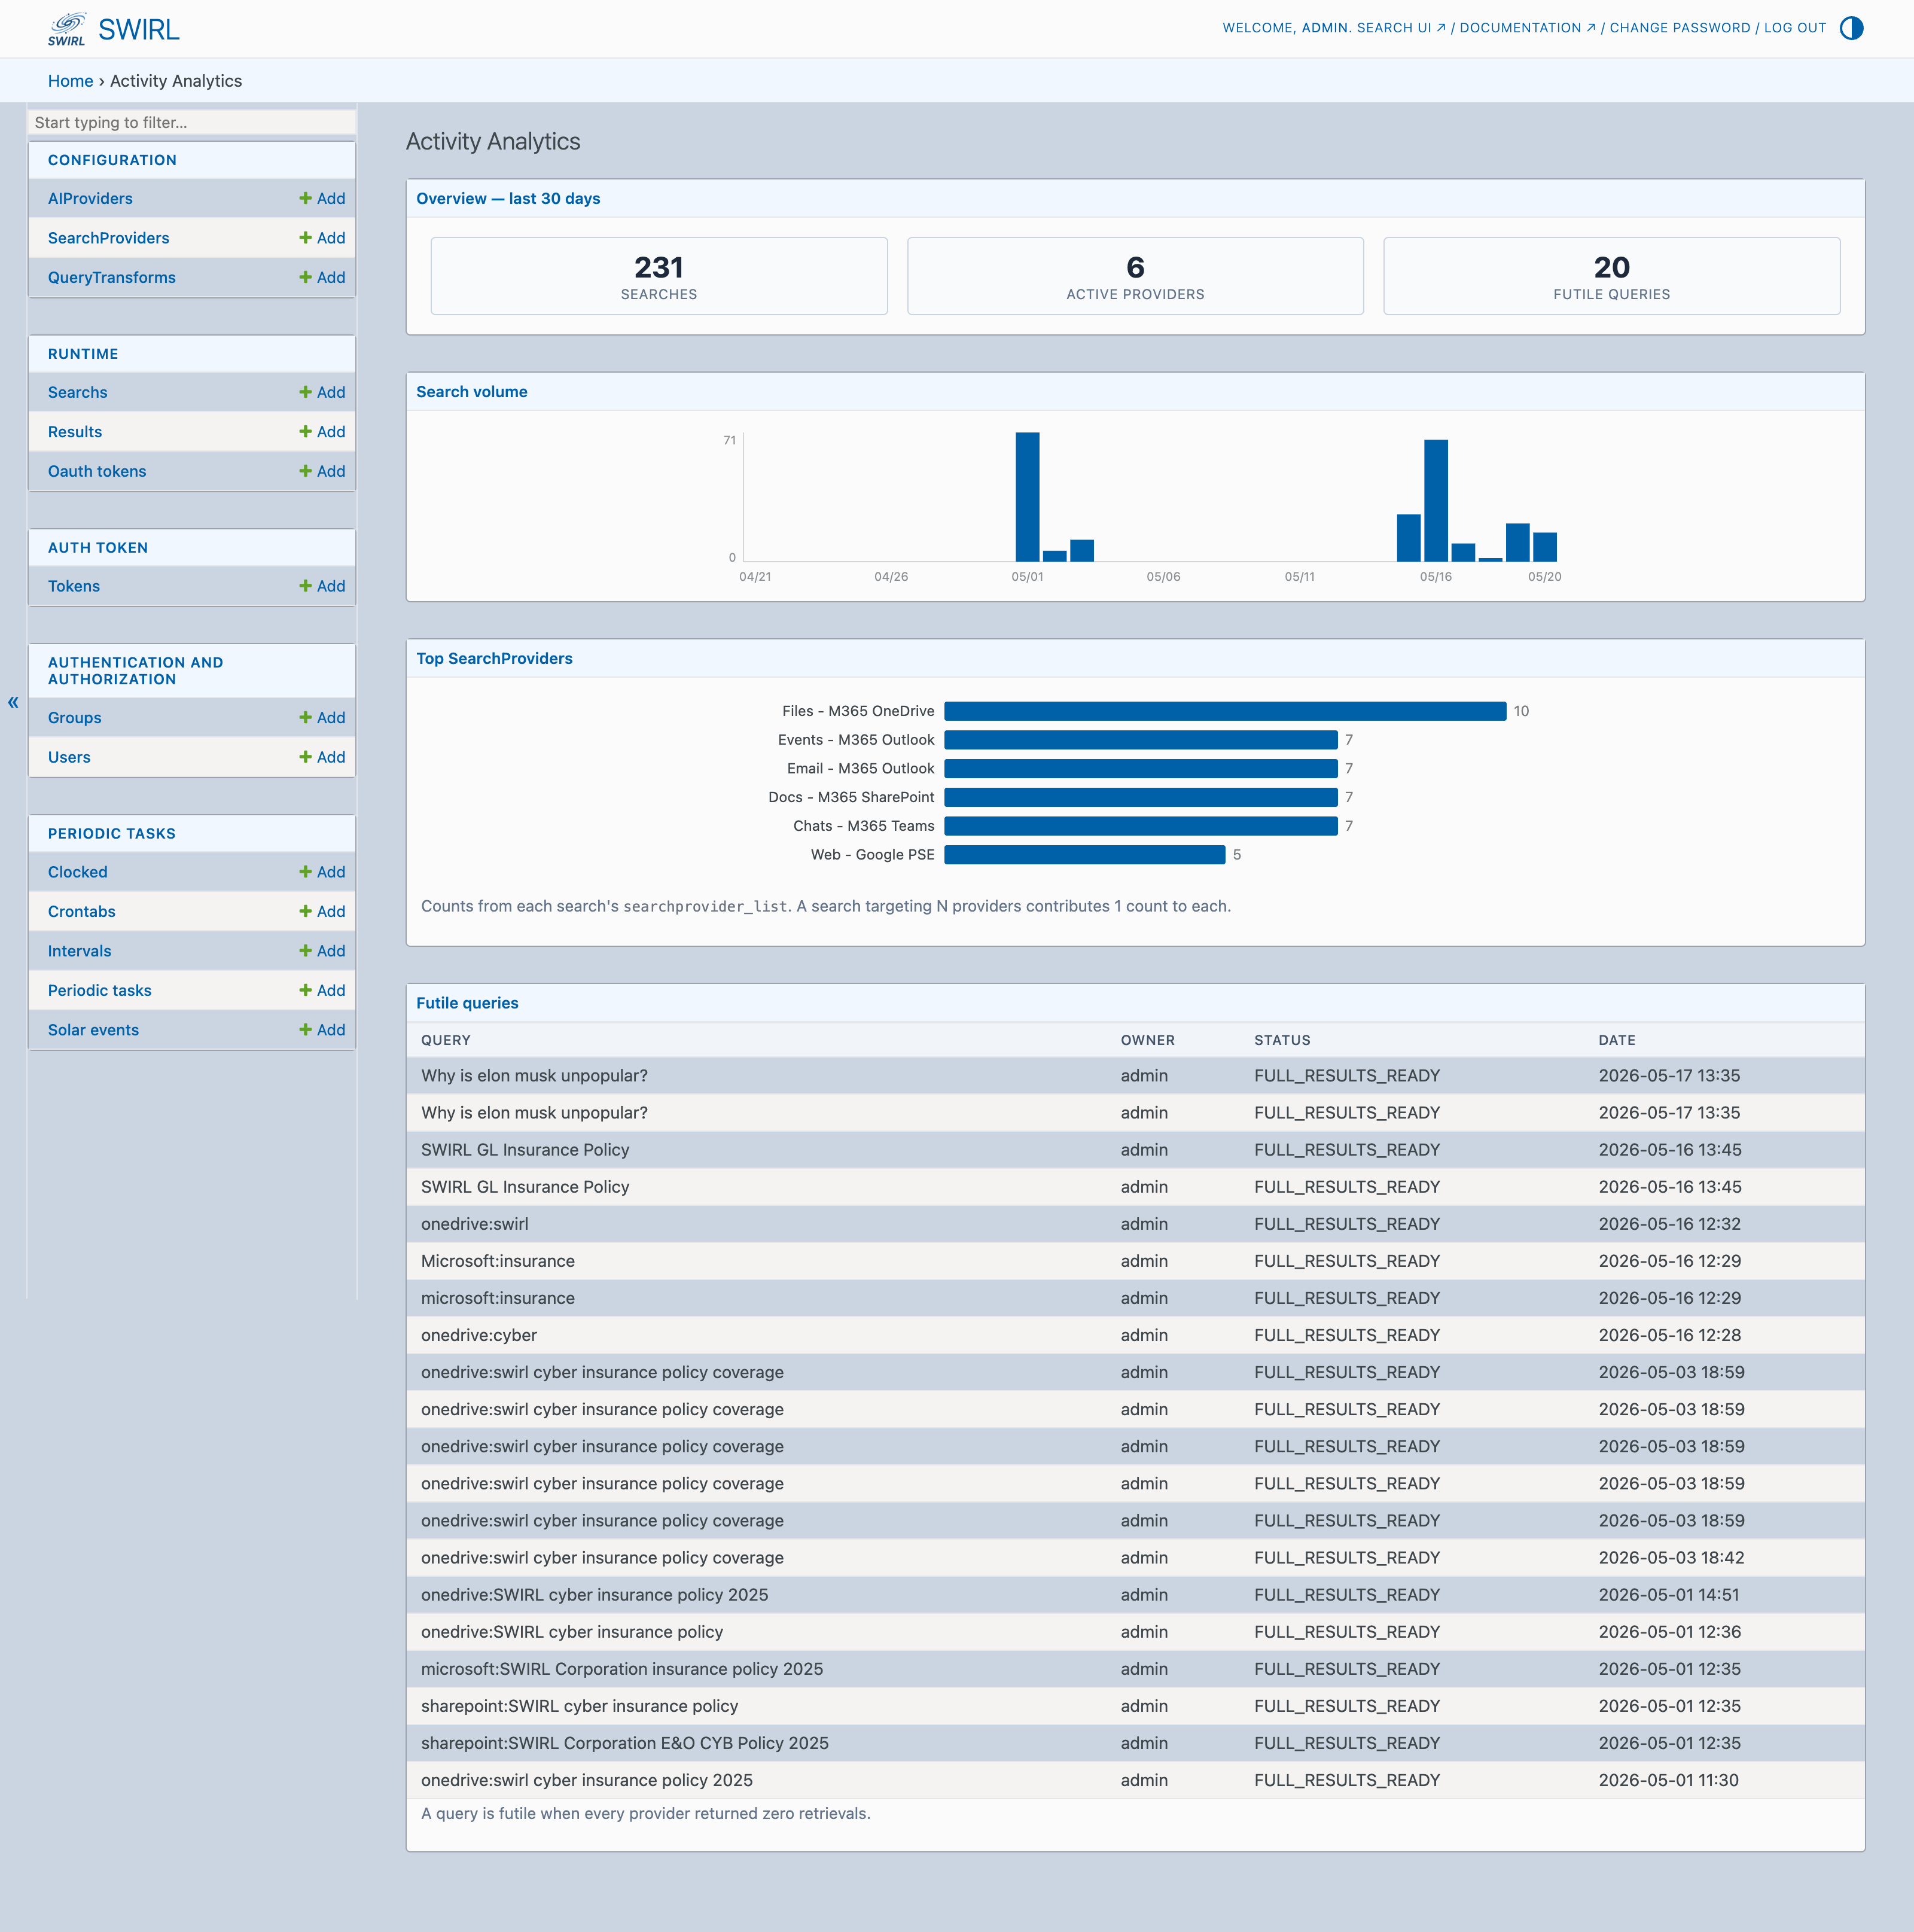
Use this page to spot drifting providers (consistently zero or low result counts), to find common failure modes, and to gauge whether the system is being exercised the way you expect.
Log Viewer
COMMUNITY: The Log Viewer at /admin/log-viewer/ reads any logs/*.log file SWIRL is currently writing (Django, Celery worker, Celery beat) and tails the last N lines without requiring shell access to the host.
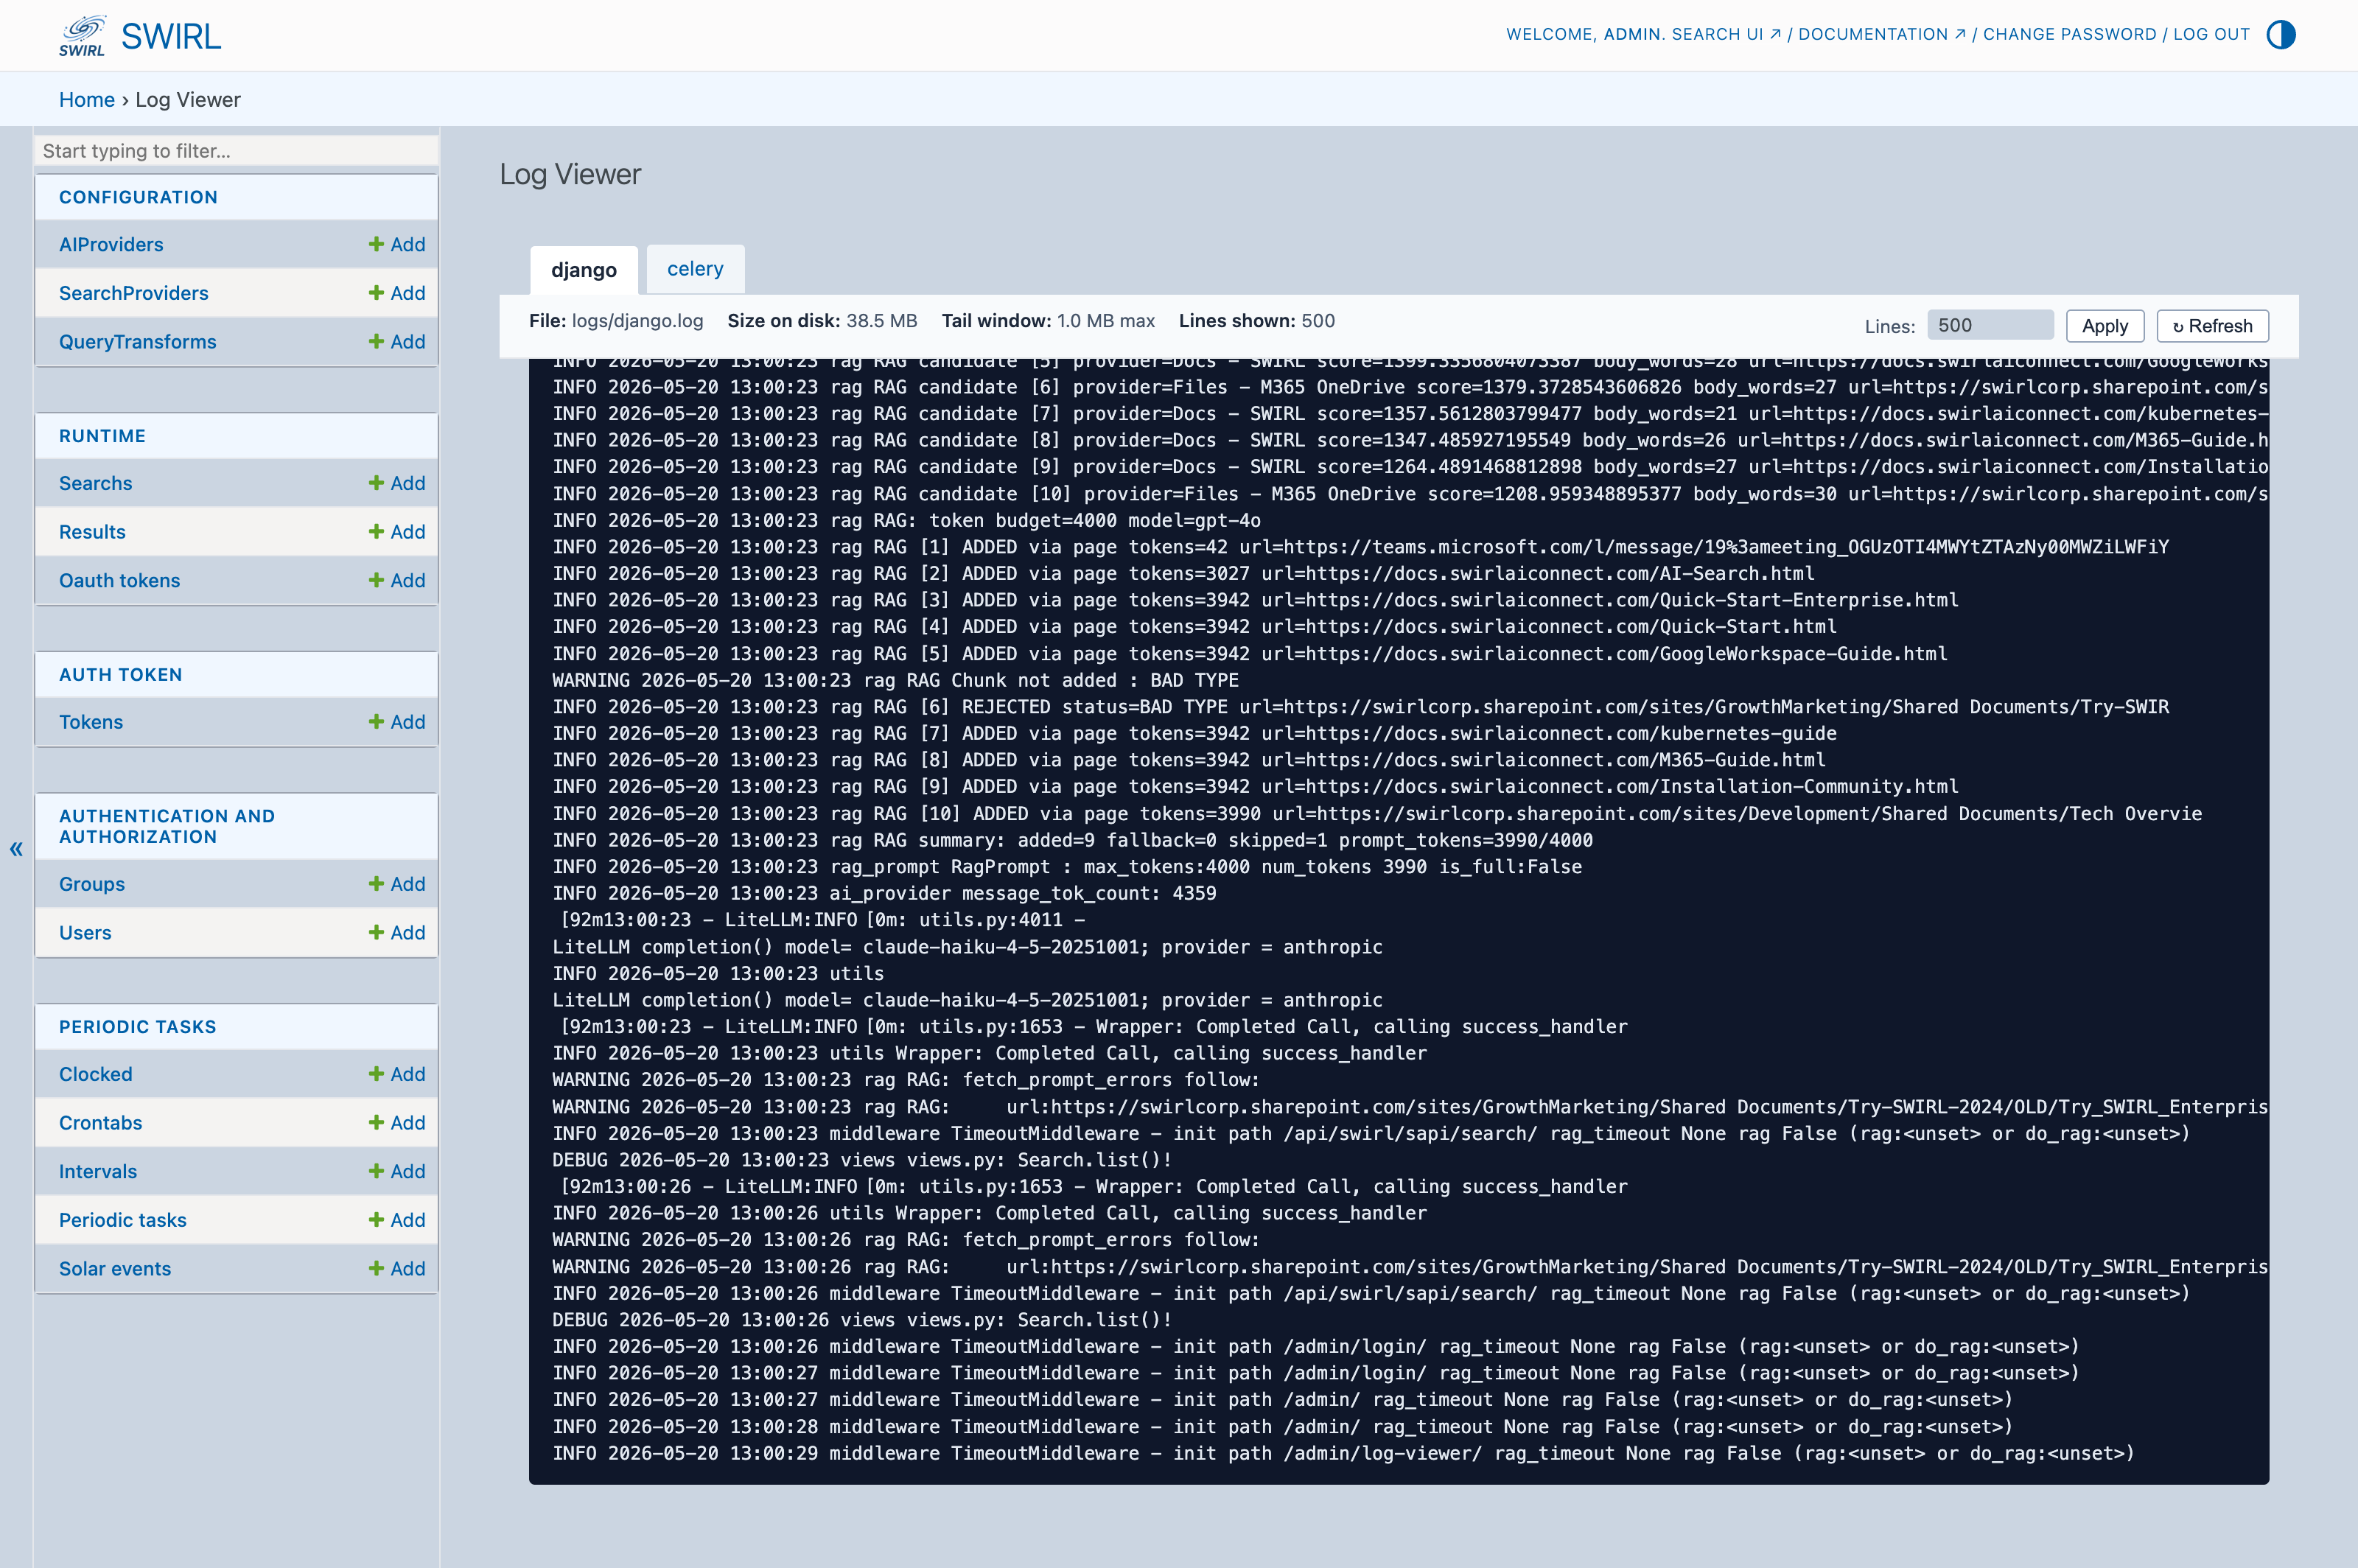
This is especially useful when:
- Debugging a SearchProvider that is silently failing — Celery worker logs will show the connector exception.
- Troubleshooting M365 OAuth token refreshes.
- Verifying that the
expirerorsubscriberCelery Beat tasks are firing on schedule.
For deeper investigation, the log files themselves still live under logs/ in the SWIRL repository root and can be tailed with python swirl.py logs from a shell.
Configuring AIProviders (COMMUNITY)
COMMUNITY: The AIProvider model, previously available only in SWIRL Enterprise, is now part of SWIRL Community Edition. An AIProvider is a reusable configuration of an LLM — its model name, API key, base URL, and role assignments — and it replaces the older approach of hard-coding LLM settings in SearchProvider JSON or in .env.
To configure an AIProvider:
- Sign in to the Administration Console at http://localhost:8000/admin/.
- Under Configuration → AIProviders, click + Add.
- Fill in Name, Model, API key, and (if not OpenAI's default endpoint) API base.
- Tick the roles this provider should be used for — typically RAG and/or embeddings for Community.
- Mark it Active and save.
SWIRL Community ships preloaded with an OpenAI AIProvider and an Azure/OpenAI AIProvider in db.sqlite3.dist; you only need to set your API key to activate them. See the RAG Configuration Guide for the role matrix and the supported model list.
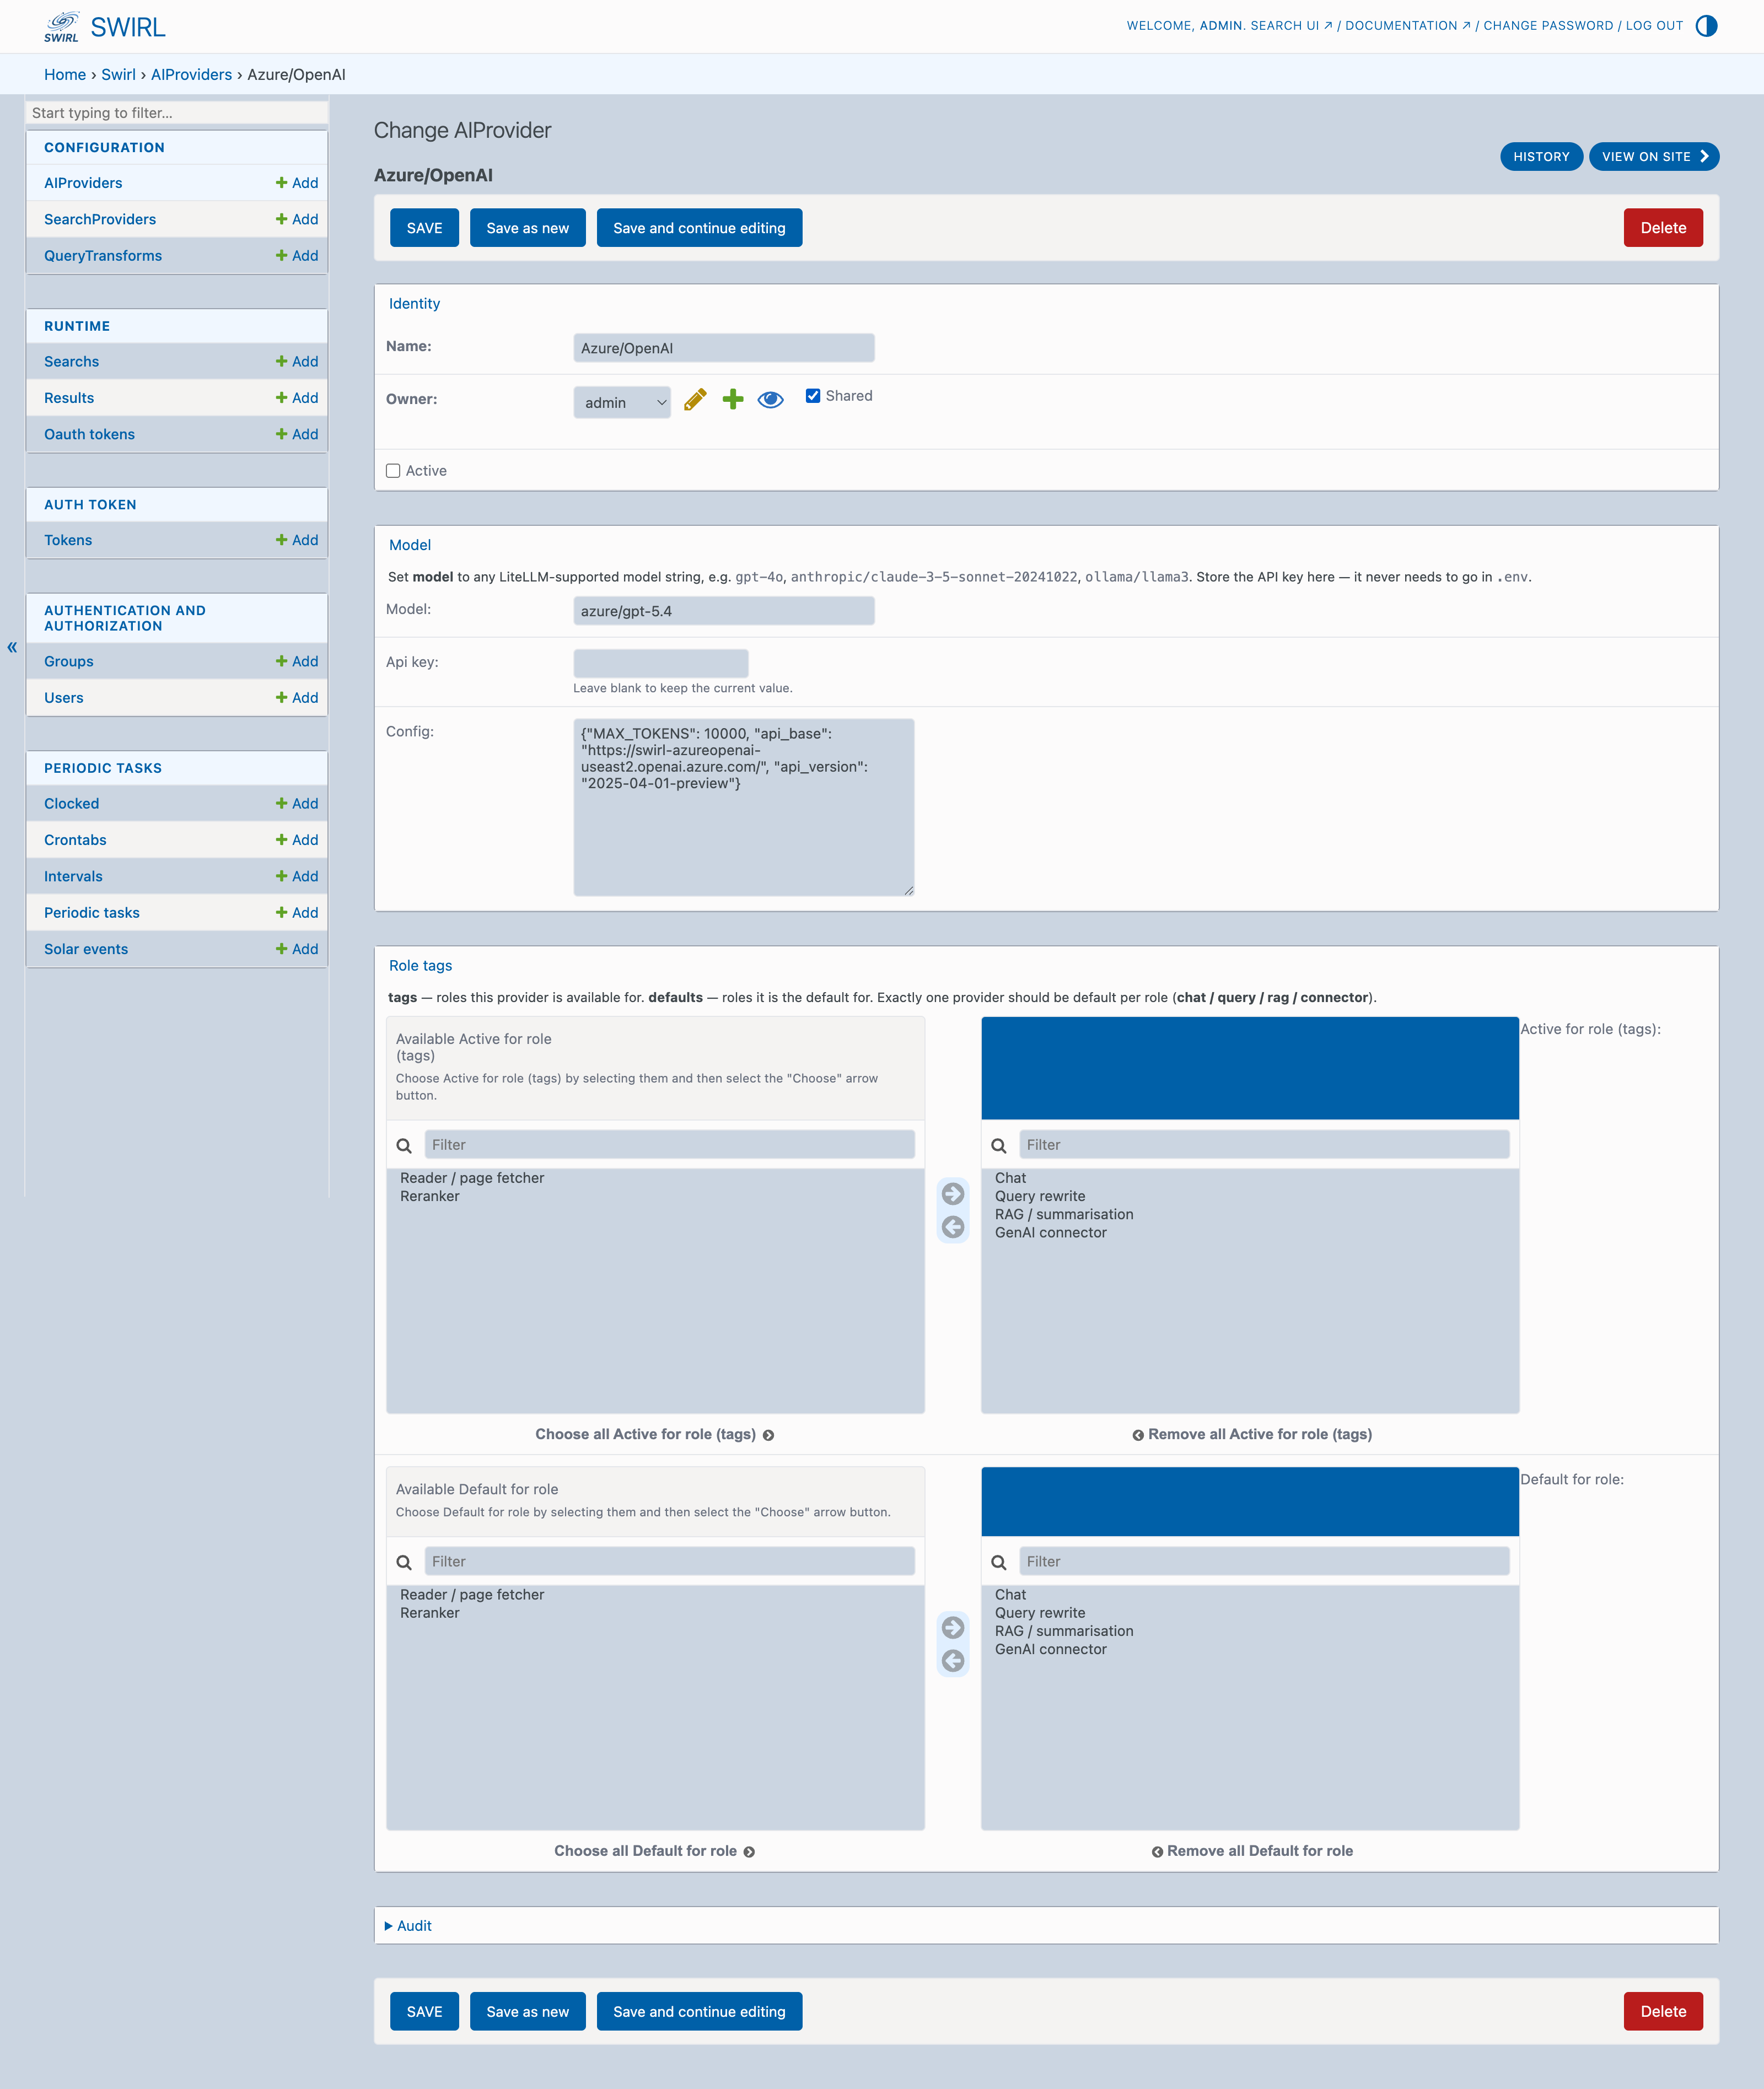
How the API key field works
The API key input on both the AIProvider edit page and the SearchProvider edit page is rendered as an HTML <input type="password">. Two consequences worth knowing:
- The field renders empty when you open the edit page — the stored key is not displayed back to you (or to anyone who shoulder-surfs). This is a deliberate display-write-only pattern, not a sign that the key is missing.
- Saving the form with the field left empty preserves the previously stored value. Behind the scenes a paired hidden input
initial-api_keycarries the existing key through the form submission. SWIRL only overwrites it when you type something new. So you can change the model, roles, or active flag without having to re-enter the API key each time. - To change the key, type the new value into the field and Save. To clear the key entirely, type a single space and Save (saving an empty field is treated as "no change"; saving whitespace is treated as an intentional reset).

Bulk operations on SearchProviders and AIProviders
Both list pages (SearchProviders, AIProviders) support the standard Django-admin bulk-action pattern plus a SWIRL-specific JSON bulk-import:
-
Bulk delete via row checkboxes. Tick the checkbox next to one or more rows, choose Delete selected … from the Action dropdown above the list, and click Go. Django prompts for confirmation, then deletes the selected records. The action runs in a single transaction.
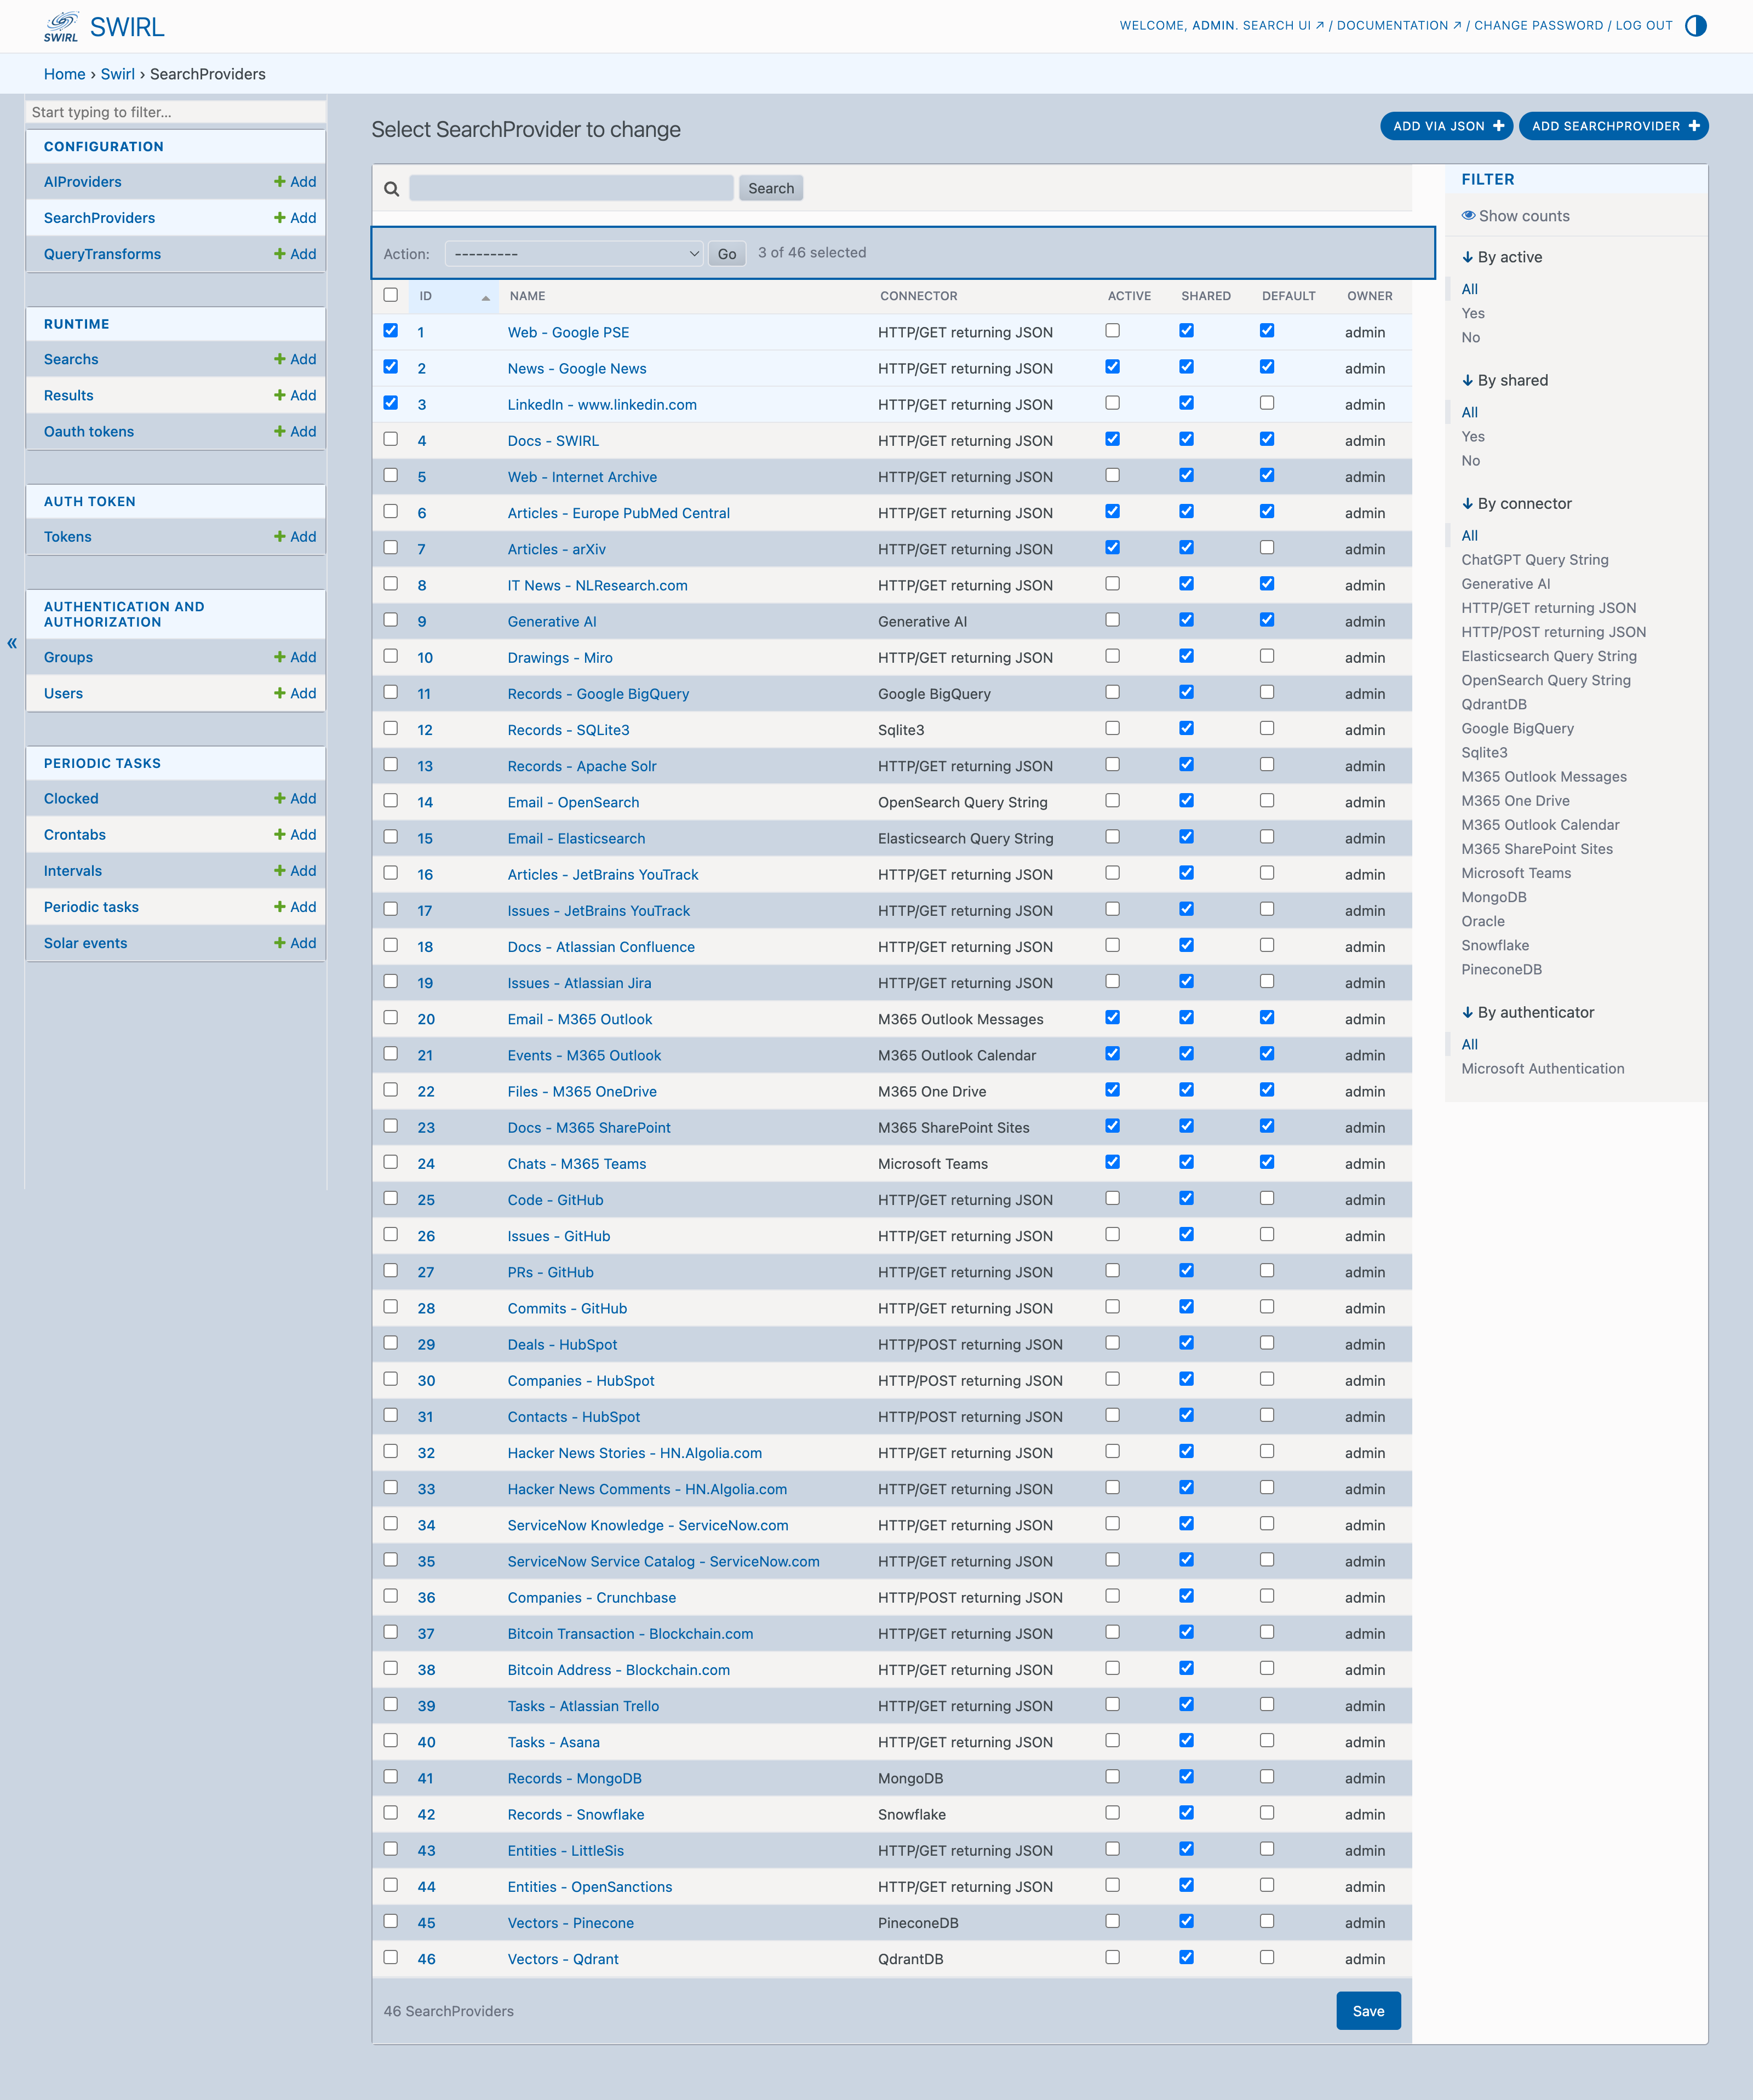
-
Bulk create / replace via JSON. Click Add via JSON in the top-right of either list page (it sits next to Add SearchProvider / Add AIProvider). Paste a single JSON object, or an array of objects, with the same field shape as the per-record API responses at
/swirl/searchproviders/and/swirl/aiproviders/. SWIRL validates each record before committing; on validation failure no rows are created.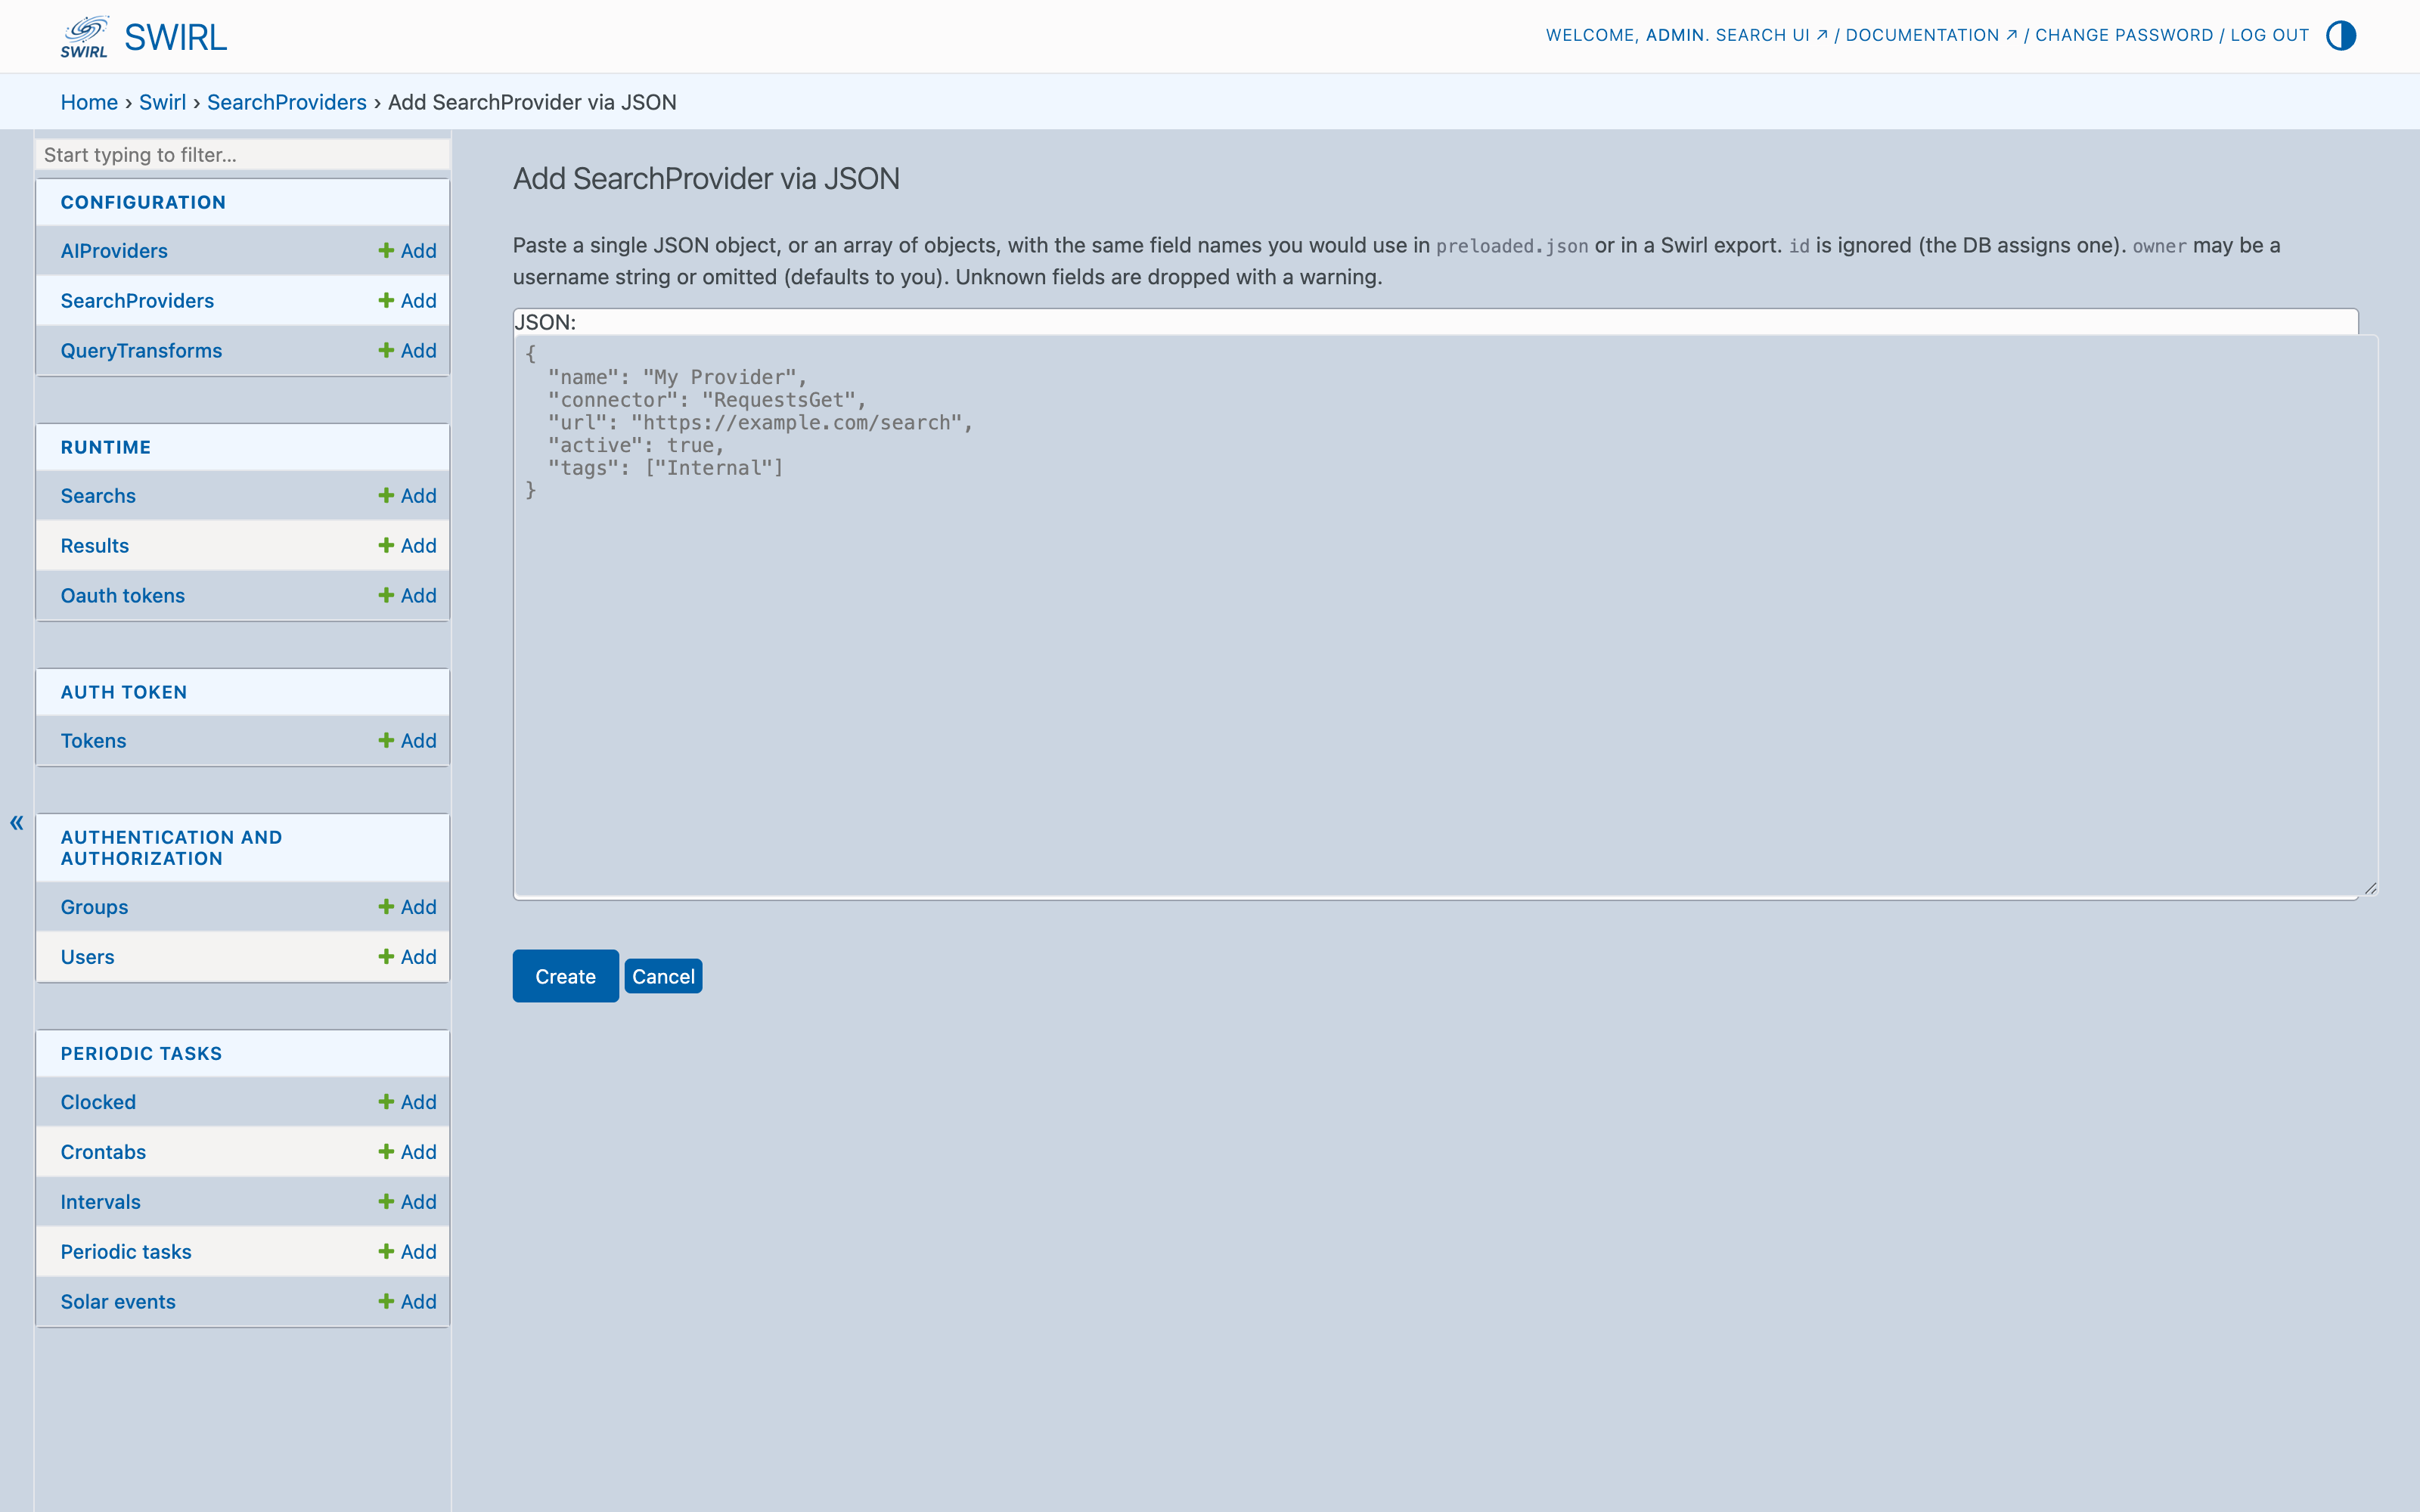
This is the fastest way to seed a fresh install with a curated set of connectors, and the same mechanism that
swirl_load.pyuses under the hood. The companion AIProvider variant lives at/admin/swirl/aiprovider/add-json/.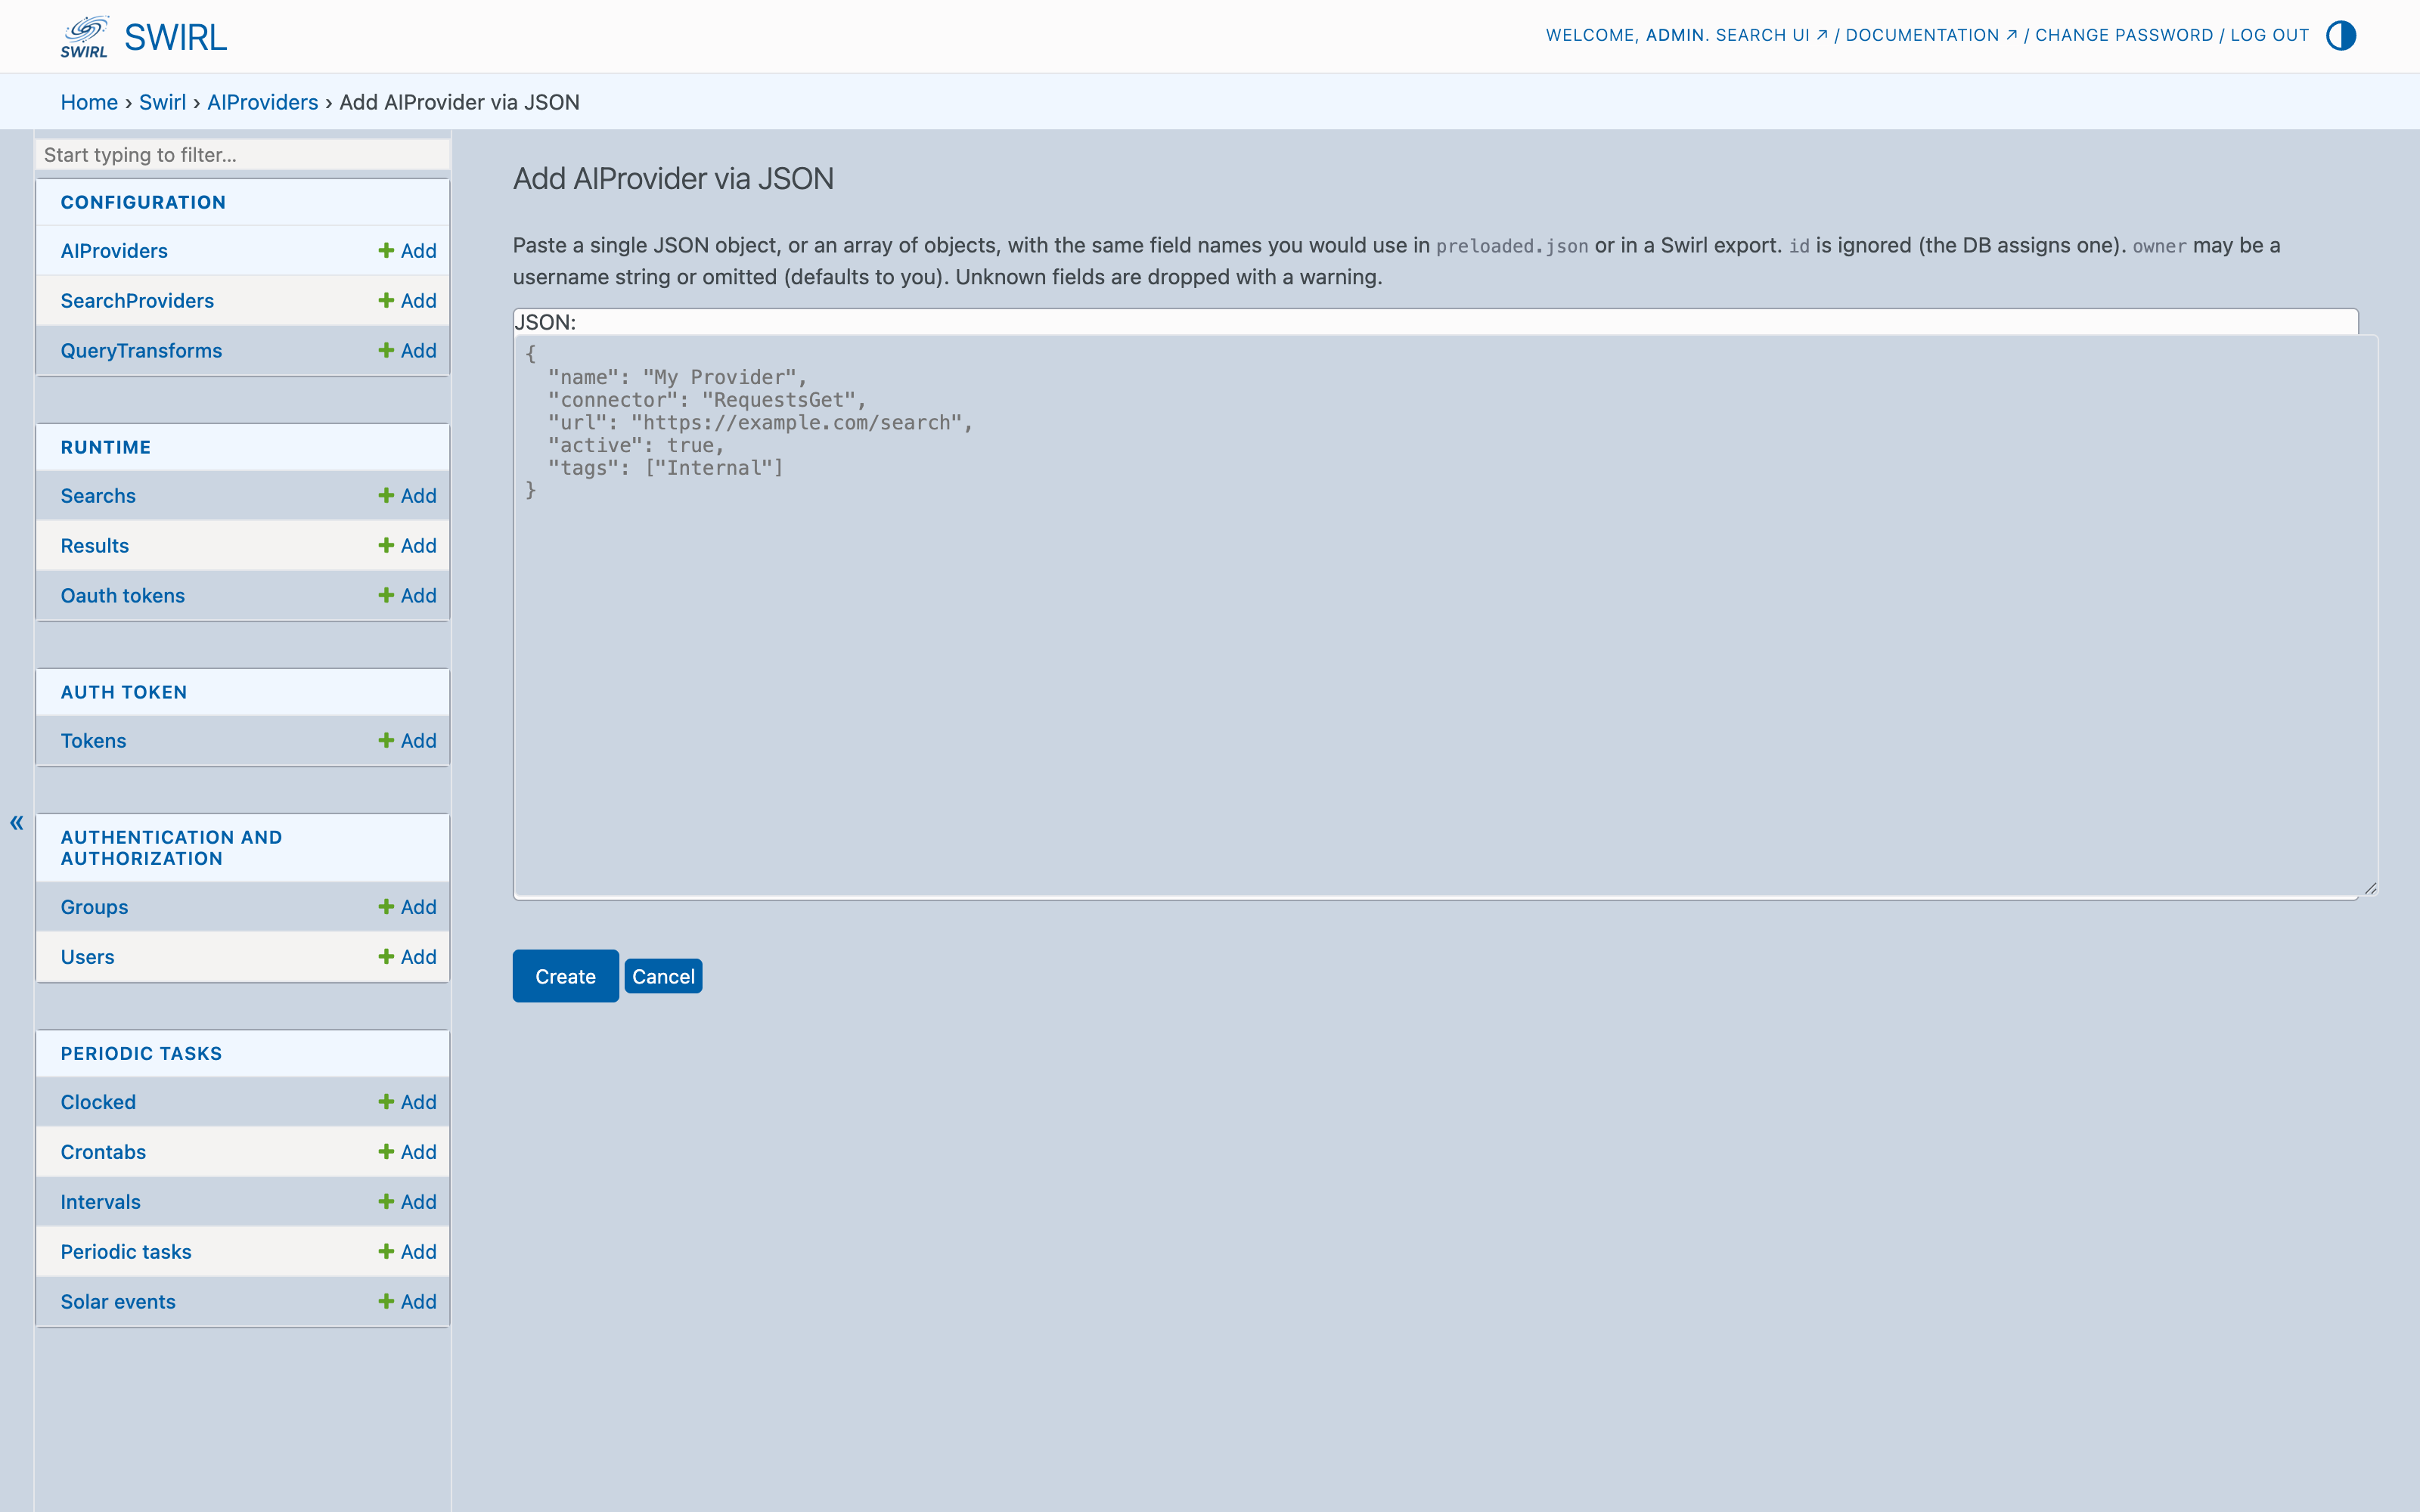
-
Tip: the Save as new button on any edit page (next to Save) clones the current record's fields into a new row, which is useful for spinning up a second SearchProvider that differs from the first by only a tag or query template. Renaming the cloned record first prevents the unique-name constraint from blocking the save.
Configuring SWIRL AI Search
Configuring the Environment
COMMUNITY: Most settings that previously had to be edited in .env can now be configured from the Administration Console. .env is still used for one-time bootstrap values — SECRET_KEY, database connection info, Microsoft OAuth callback host/port, and OpenAI key bootstrap — but day-to-day configuration of providers, transforms, schedules, and users happens in the admin UI.
SWIRL uses django-environ to load critical settings from a file named .env.
.env.distcontains default settings.- If no
.envfile exists, theinstall.shscript copies.env.distto.env.
Example .env file:
SECRET_KEY=your-secret-key
ALLOWED_HOSTS=localhost
PROTOCOL=http
SWIRL_EXPLAIN=True
SQL_ENGINE=django.db.backends.sqlite3
SQL_DATABASE=db.sqlite3
SQL_USER=user
SQL_PASSWORD=password
SQL_HOST=localhost
SQL_PORT=5432
MICROSOFT_CLIENT_ID=''
MICROSOFT_CLIENT_SECRET=''
MICROSOFT_REDIRECT_URI=''
OPENAI_API_KEY=
Making changes to .env
To configure hostname, protocol, or port:
- Edit the
.envfile. - Restart SWIRL for changes to take effect.
There should never be a .env file in the SWIRL repo. When upgrading SWIRL, these settings persist automatically.
Environment variable descriptions
SWIRL_EXPLAIN— enables the explain structure.SECRET_KEY— a cryptographic salt used by Django. Generate a new one for production; see the Django signing key documentation.
Creating a SWIRL Super User
To reset the database:
- Delete or rename the
db.sqlite3file. - Run:
python swirl.py setup
This creates a new blank database.
To create a super user, run:
python manage.py createsuperuser --email admin@example.com --username admin
Changing the Super User Password
To change the password of an existing admin user:
python manage.py changepassword admin
If the new password is too simple, Django will reject it.
For more, see Django Admin and manage.py.
Using the Django Admin
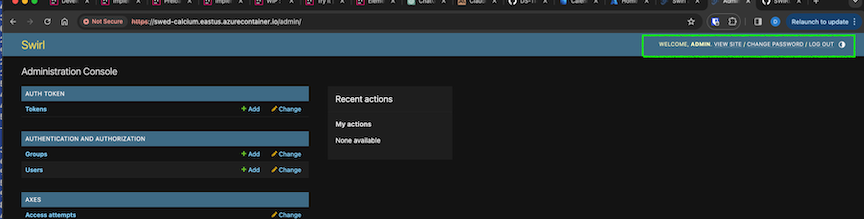
To change the super user password via Django Admin:
- Go to http://localhost:8000/admin/.
- Click
CHANGE PASSWORD:
- Enter a new password:
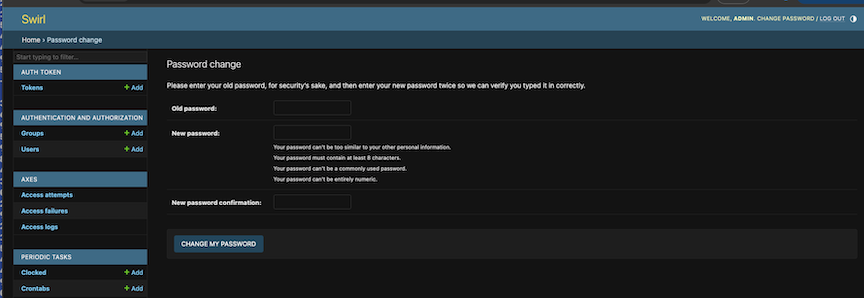
- Click
CHANGE MY PASSWORD.
Adding Normal Users
Users can be managed via Django Admin at http://localhost:8000/admin/.
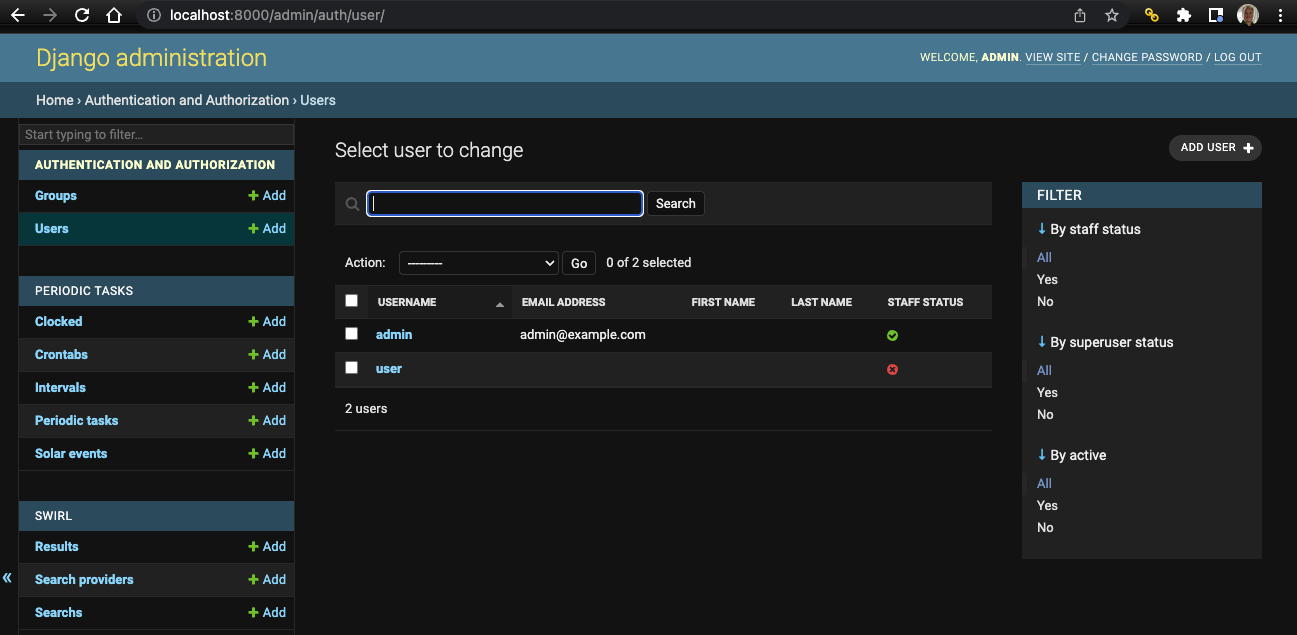
If using OpenID Connect, manual user creation is not required. See the AI Search Guide for details.
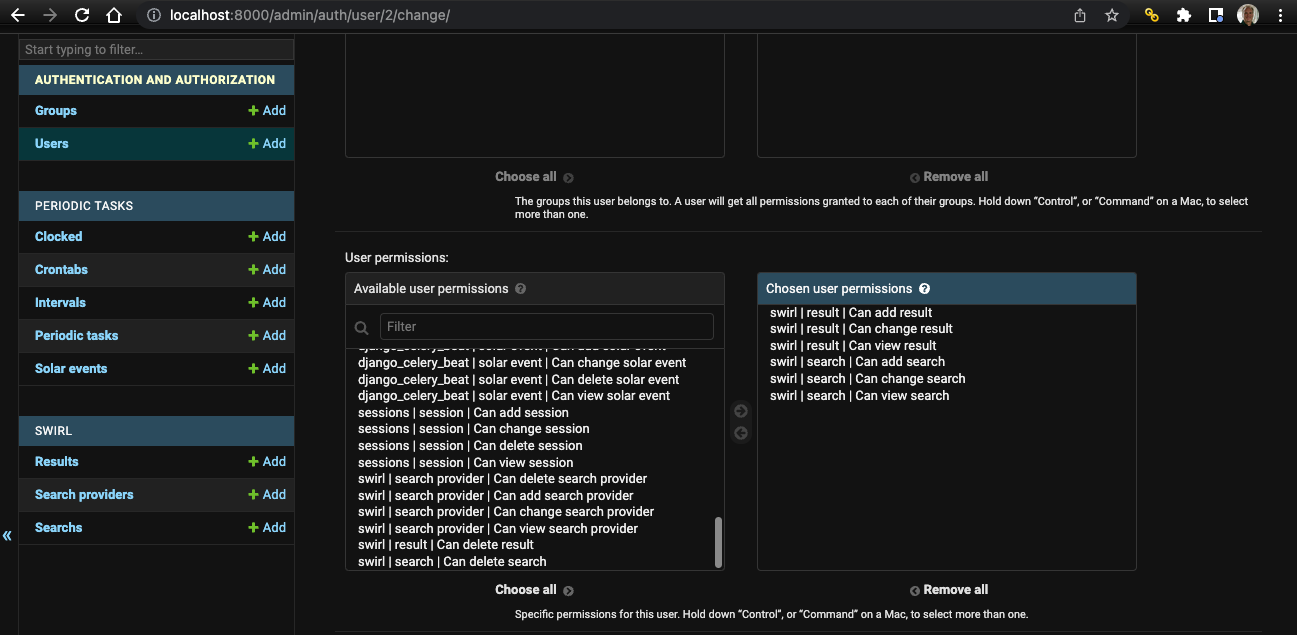
Permissioning Normal Users
Each SWIRL core object (SearchProviders, Search, Result, Query Transform) has four permissions:
add— allows creation.change— allows modification.delete— allows removal.view— allows read-only access.
Recommended Permission Configurations
| Scenario | SearchProvider | Search | Results | Query Transform |
|---|---|---|---|---|
| Admin | ALL | ALL | ALL | ALL |
| Search ONLY | NONE | Add | ||
| Result ONLY | NONE | NONE | View | |
| Search & View Results | NONE | Add, View | Add, View | Add, View |
| Manage Search (including re-run) | NONE | ALL | ALL | ALL |
| SearchProvider Admin | ALL | Add | View | View |
Object Ownership
SearchProvider, Search, Result, and Query Transform objects are owned by the Django user who creates them, and are private by default.
Shared SearchProviders and Query Transformations
- By default, sharing is disabled (
false) for all users. - Django super users (
admin) have sharing enabled (true) by default.
This prevents users from needing to duplicate SearchProviders or query transformations.
Managing large user groups
For installations with many users, consider:
- Creating user groups with predefined permissions.
- Assigning users to the appropriate groups.
This simplifies access control and reduces administrative overhead.
Deploying SWIRL for Production Use
Deploy SWIRL behind a reverse proxy for scalability, security, performance, and availability.
Why use a reverse proxy?
- Scalability — horizontal scaling across multiple SWIRL servers; dynamic provisioning of additional VMs under load; deactivation of idle VMs to reduce hosting costs.
- Security — SSL/TLS termination at the proxy reduces CPU load on the application server.
- Performance — separates static-content delivery from the application server; supports CDNs for faster response times.
- Availability — load-balances traffic across multiple backend SWIRL servers and removes failed servers to maintain uptime.
Recommended reverse-proxy solutions
For deployment assistance, contact support.
Upgrading SWIRL
Local Installations
For Docker upgrades, contact support for instructions.
- Update the
swirl-searchrepository:
git pull
- Run the install script:
./install.sh
- Set up SWIRL:
python swirl.py setup
- If upgrading the Galaxy UI, run:
./install-ui.sh
- Update AI prompts:
   python swirl.py reload_ai_prompts

6. Update authenticators. Check the release notes (below) and update authenticators that have changed:
```shell
   python manage.py load_authenticators swirl/fixtures/DefaultAuthenticators.json

7. Update SearchProviders. Check the release notes and only update SPs that have changed:

```shell
   python manage.py load_fixture SearchProviders/<searchprovider-name>
- Restart SWIRL:
python swirl.py restart
See the release notes for details on each update.
Docker
See the appropriate guide for your edition:
Resetting Prompts
To reset AI prompts to defaults, run:
python swirl.py reload_ai_prompts
This restores system prompts to factory settings while keeping custom prompts unchanged.
Resetting Authenticators
To update all Authenticators:
python manage.py load_authenticators swirl/fixtures/DefaultAuthenticators.json
Resetting SearchProviders
To reset a specific SearchProvider:
python manage.py load_fixture SearchProviders/<searchprovider-name>
Configuring SWIRL
SWIRL configuration is managed in: swirl_server/settings.py
Key Configuration Items
| Configuration Item | Explanation | Example |
|---|---|---|
| CELERY_BEATS_SCHEDULE | Defines the schedule for the Search Expiration Service and Search Subscriber Service | See linked sections |
| SWIRL_DEFAULT_QUERY_LANGUAGE | Determines the stopword dictionary | SWIRL_DEFAULT_QUERY_LANGUAGE = 'english' |
| SWIRL_SEARCH_HTTP_CONNECT_TIMEOUT | Time (in seconds) to wait for initial connection to a SearchProvider | SWIRL_SEARCH_HTTP_CONNECT_TIMEOUT = 3 |
| SWIRL_SEARCH_HTTP_READ_TIMEOUT | Time (in seconds) to wait for a SearchProvider to return results | SWIRL_SEARCH_HTTP_READ_TIMEOUT = 10 |
| SWIRL_SUBSCRIBE_WAIT | Timeout for updating a search | SWIRL_SUBSCRIBE_WAIT = 20 |
| SWIRL_DEDUPE_FIELD | Field used for duplicate detection | SWIRL_DEDUPE_FIELD = 'url' |
| SWIRL_DEDUPE_SIMILARITY_MINIMUM | Minimum similarity score to classify as duplicate | SWIRL_DEDUPE_SIMILARITY_MINIMUM = 0.95 |
| SWIRL_DEDUPE_SIMILARITY_FIELDS | Fields used for duplicate detection | SWIRL_DEDUPE_SIMILARITY_FIELDS = ['title', 'body'] |
| SWIRL_RELEVANCY_CONFIG | Defines relevancy score weights for key fields | See below |
| SWIRL_MAX_MATCHES | Maximum matches per result (limits long articles) | SWIRL_MAX_MATCHES = 5 |
| SWIRL_MIN_SIMILARITY | Minimum score required for query hits to be scored | SWIRL_MIN_SIMILARITY = 0.01 |
| SWIRL_EXPLAIN | Enables relevancy explain structures in responses | SWIRL_EXPLAIN = false |
Example SWIRL_RELEVANCY_CONFIG
SWIRL_RELEVANCY_CONFIG = {
    'title': {
        'weight': 1.5
    },
    'body': {
        'weight': 1.0
    },
    'author': {
        'weight': 1.0
    }
}
All configuration items must be uppercase, following the Django settings convention.
Search Expiration Service
The Expirer service automatically deletes expired Search objects and their associated Result objects. This prevents SWIRL from retaining all past searches indefinitely.
Service Frequency
SWIRL allows custom expiration settings for Search and Result objects, but the expiration service runs on a fixed schedule.
- By default, it runs every hour.
- The schedule is defined in the Django settings:
CELERY_BEAT_SCHEDULE = {
    # Executes every hour
    'expire': {
         'task': 'expirer',
         'schedule': crontab(minute=0, hour='*'),
    },
}
- Temporary changes can be made via the Django Admin Console:
http://localhost:8000/admin/django_celery_beat/crontabschedule/
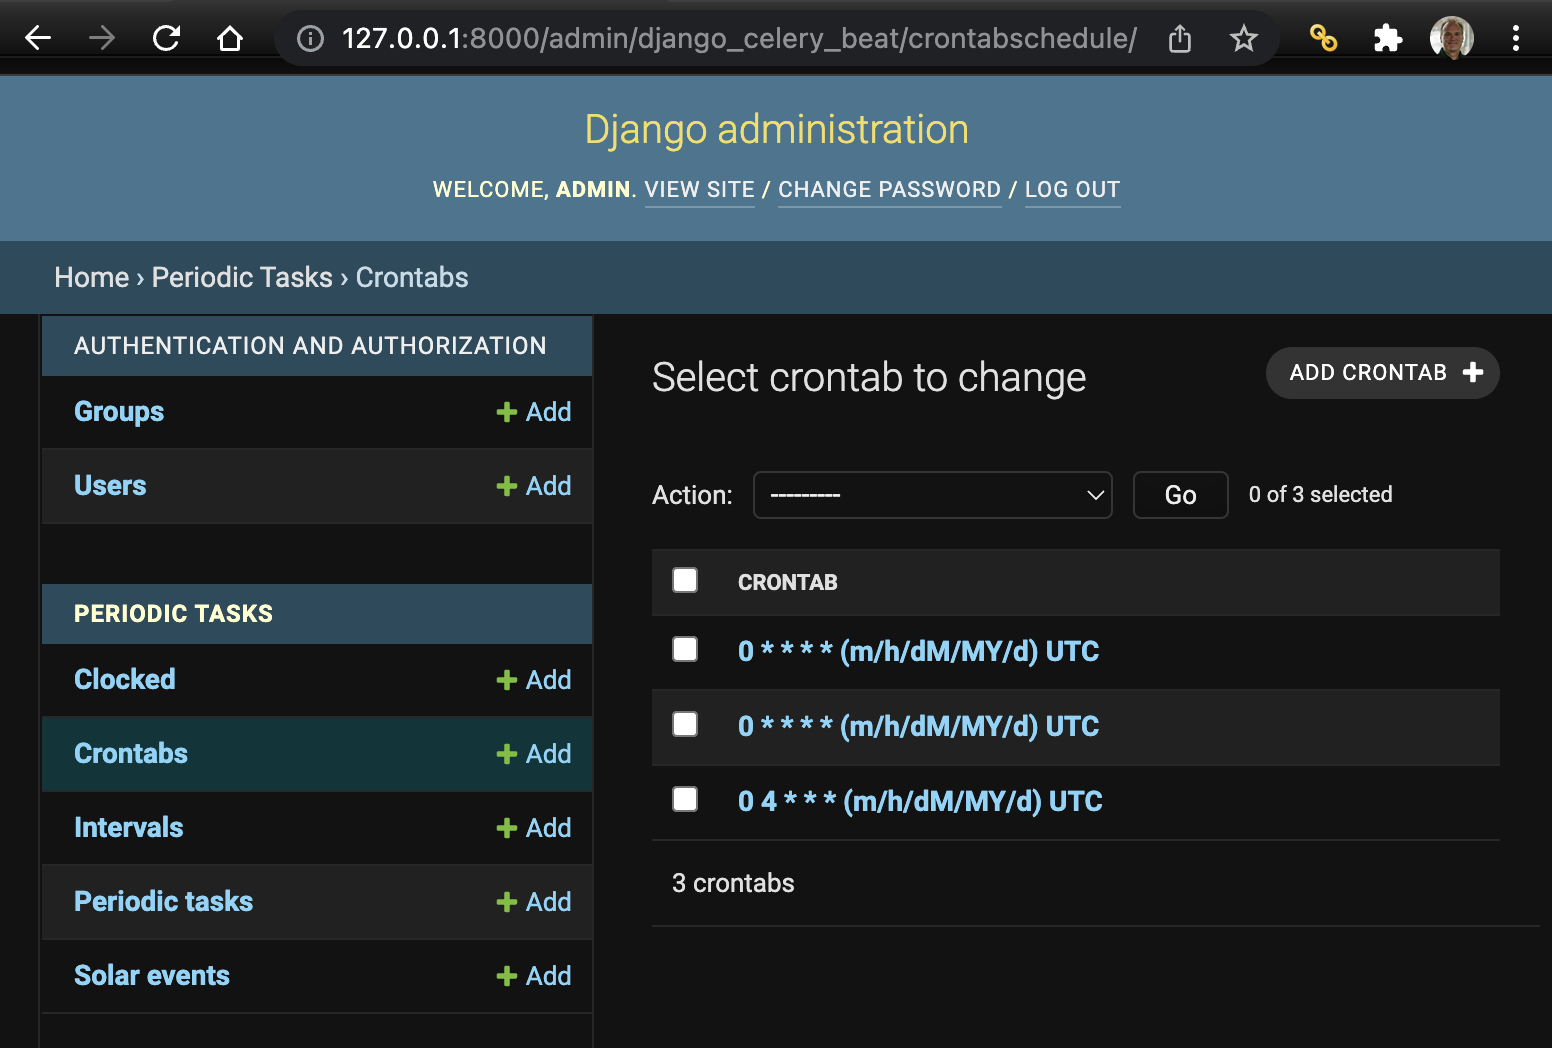
SWIRL Enterprise supports a 5-minute expiration schedule. Contact support for details.
If you modify crontab in the database without updating CELERY_BEAT_SCHEDULE, the original schedule is restored when SWIRL restarts.
Search Subscriber Service
When a Search object has subscribe=True, SWIRL periodically updates that Search. See the Developer Guide for details.
- By default, the service runs every 4 hours.
- The schedule is defined in Django settings:
CELERY_BEAT_SCHEDULE = {
    # Executes every four hours
    'subscribe': {
         'task': 'subscriber',
         'schedule': crontab(minute=0, hour='*/4'),
    },
}
- Temporary changes can be made via the Django Admin Console:
http://localhost:8000/admin/django_celery_beat/crontabschedule/
If you modify crontab in the database without updating CELERY_BEAT_SCHEDULE, the original schedule is restored when SWIRL restarts.
Service Startup & Daemonization
Using swirl.py
For normal operations, use swirl.py to start, stop, or restart services. The script is located in the SWIRL installation directory (next to manage.py).
Starting services
python swirl.py start
To start specific services, specify them by name:
python swirl.py start celery-beats
Checking service status
python swirl.py status
Example output:
INFO 2025-03-01 19:59:55 settings Swirl Enterprise 4.5-DEV licensed to: SWIRL_Corporation

         .   o
        .        .   .  o
        .      .
  o        .  @ @   .            SWIRL AI ENTERPRISE 4.5-DEV
    .        @ @  .    .         Licensed to: SWIRL_Corporation
      .  . .   .     .    .
            .       .     o
     o  .       o .


Service: django...RUNNING, pid:34738
Service: celery-search-worker...RUNNING, pid:34767
Service: celery-pagefetch-worker...RUNNING, pid:34780
Service: celery-interactive-worker...RUNNING, pid:34793
Service: celery-maintenance-worker...RUNNING, pid:34806
Service: celery-healthcheck-worker...RUNNING, pid:34819
SWIRL Enterprise runs five specialized Celery workers, each handling a different task type: celery-search-worker (query federation), celery-pagefetch-worker (full-page content fetching for RAG), celery-interactive-worker (real-time chat and interactive queries), celery-maintenance-worker (expiration, subscription, and housekeeping), and celery-healthcheck-worker (service health monitoring). SWIRL Community runs a single celery-worker that handles all task types.
Stopping services
python swirl.py stop
Restarting services
python swirl.py restart
To restart specific services, specify them by name:
python swirl.py restart celery-worker consumer
Getting help
python swirl.py help
Complete Command Reference
| Command | Description |
|---|---|
start |
Start all SWIRL services |
stop |
Stop all SWIRL services |
restart |
Restart all SWIRL services |
status |
Show status of all services |
logs |
Tail logs from all services |
setup |
Initialize SWIRL (create database, load fixtures) |
migrate |
Run Django database migrations |
debug |
Start SWIRL in debug mode (foreground, verbose logging) |
watch |
Start SWIRL and watch log output |
load_branding |
Load or reload branding configuration |
load_data |
Load fixture data into the database |
load_fixtures |
Load fixture files |
reload_ai_prompts |
Reload AI prompt templates to factory defaults |
config_postgres |
Configure PostgreSQL as the database backend |
config_db |
General database configuration |
config_default_api_settings |
Configure default API settings |
galaxy |
Open the Galaxy UI in the default browser |
help |
Display help information |
Customizing
The services invoked by swirl.py are defined in swirl/services.py. Modify this list to start celery-beats automatically.
Disabling the Cookie Consent Notice in Galaxy
By default, the cookie consent notice appears for users in Galaxy until they accept it.

To prevent the notice from appearing, add the following to the .env file:
COOKIE_CONSENT_DISPLAY=False
Changing the Galaxy Logos and Branding
To customize the logo, search button, and labels in SWIRL Galaxy:
- Go to the SWIRL Admin Page at http://localhost:8000/admin/:
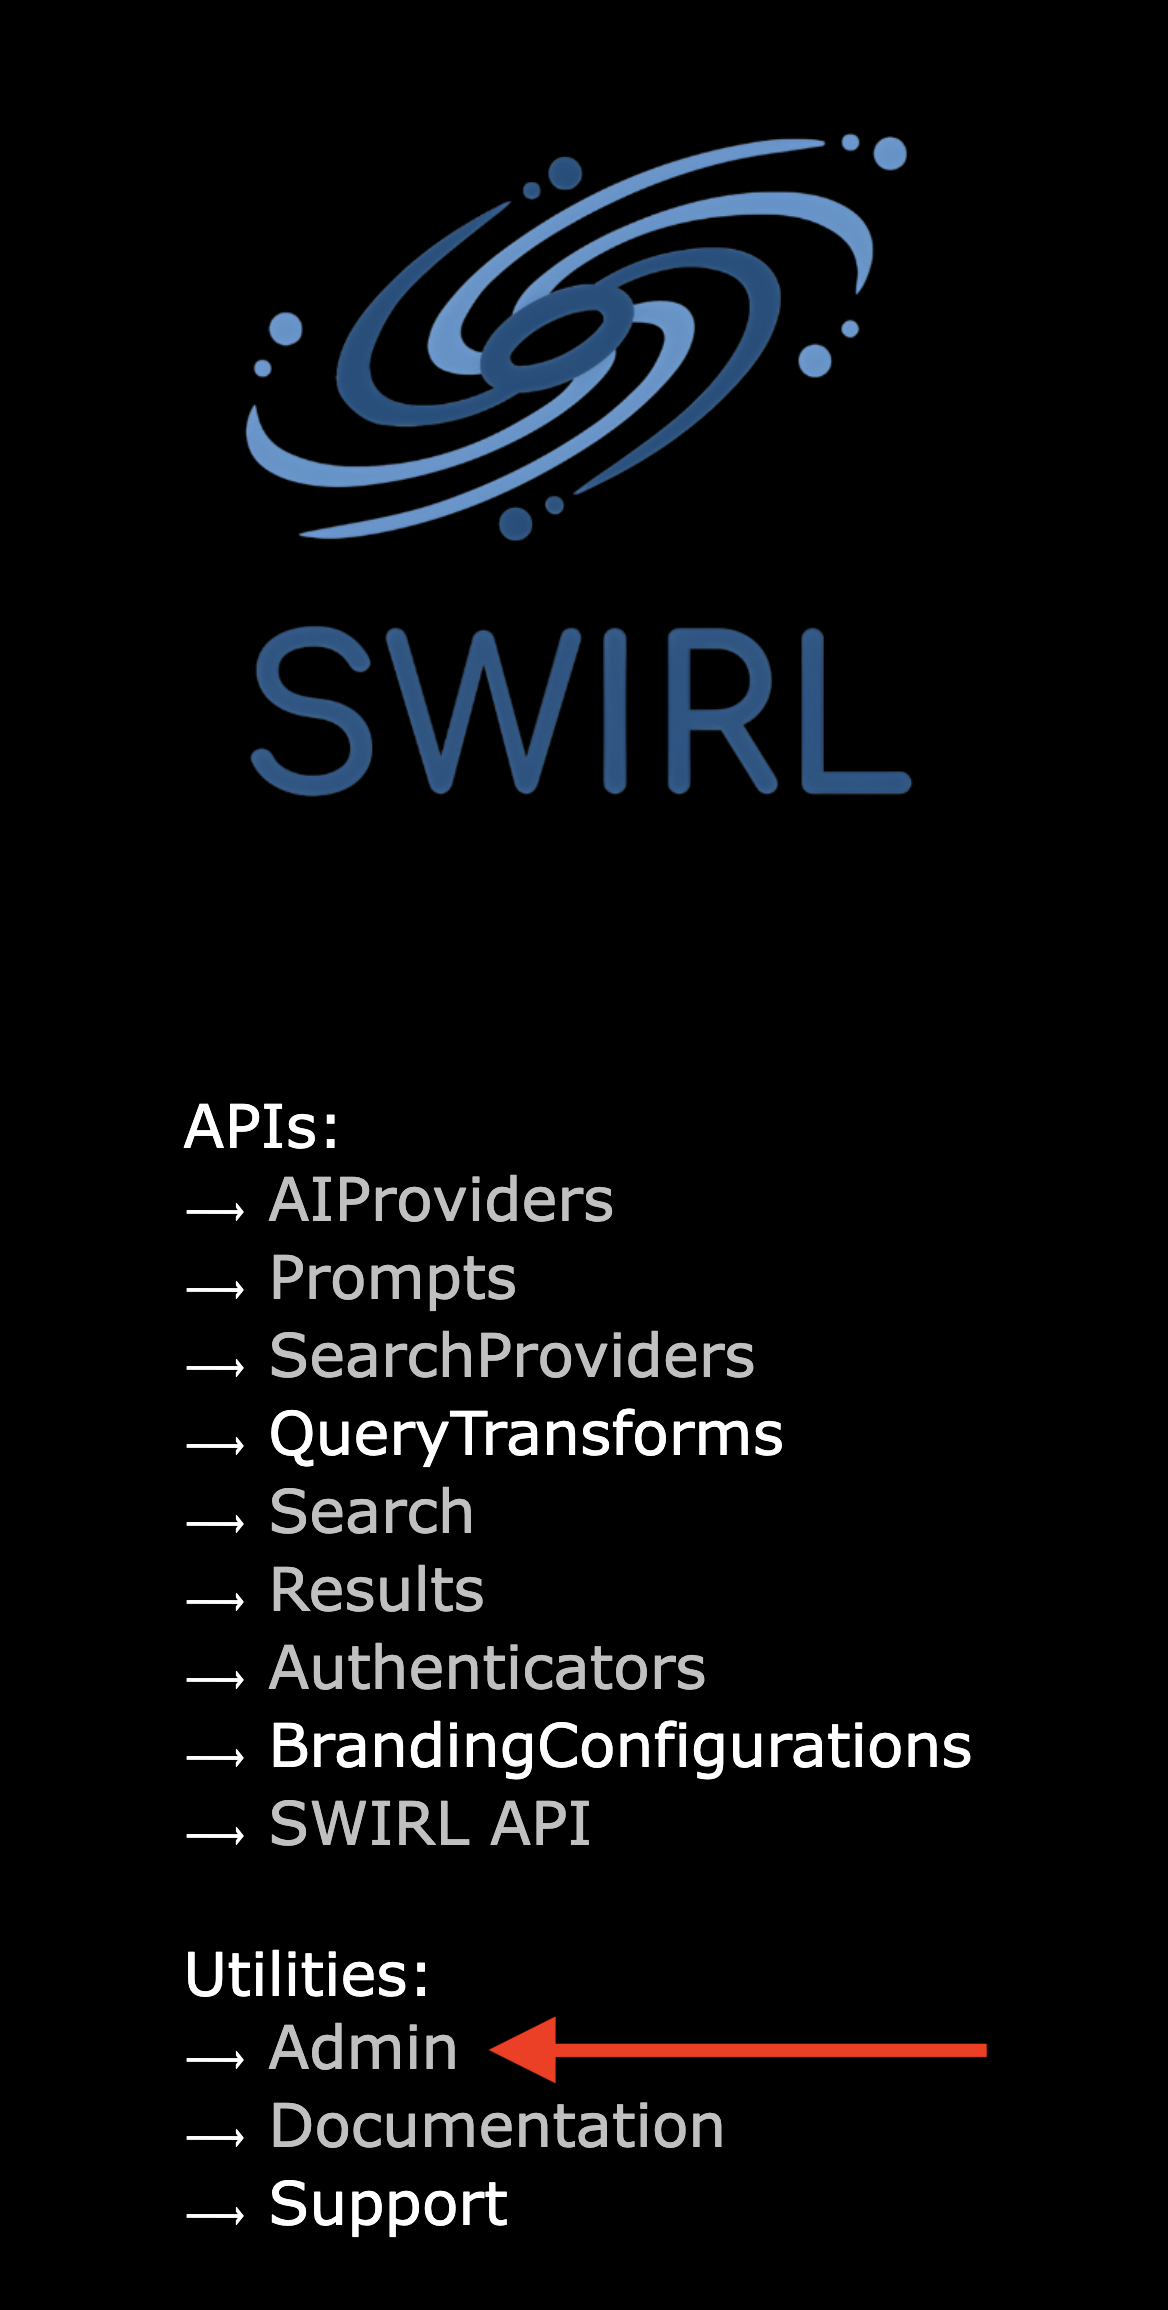
- Click the
adminlink to open the Admin UI:
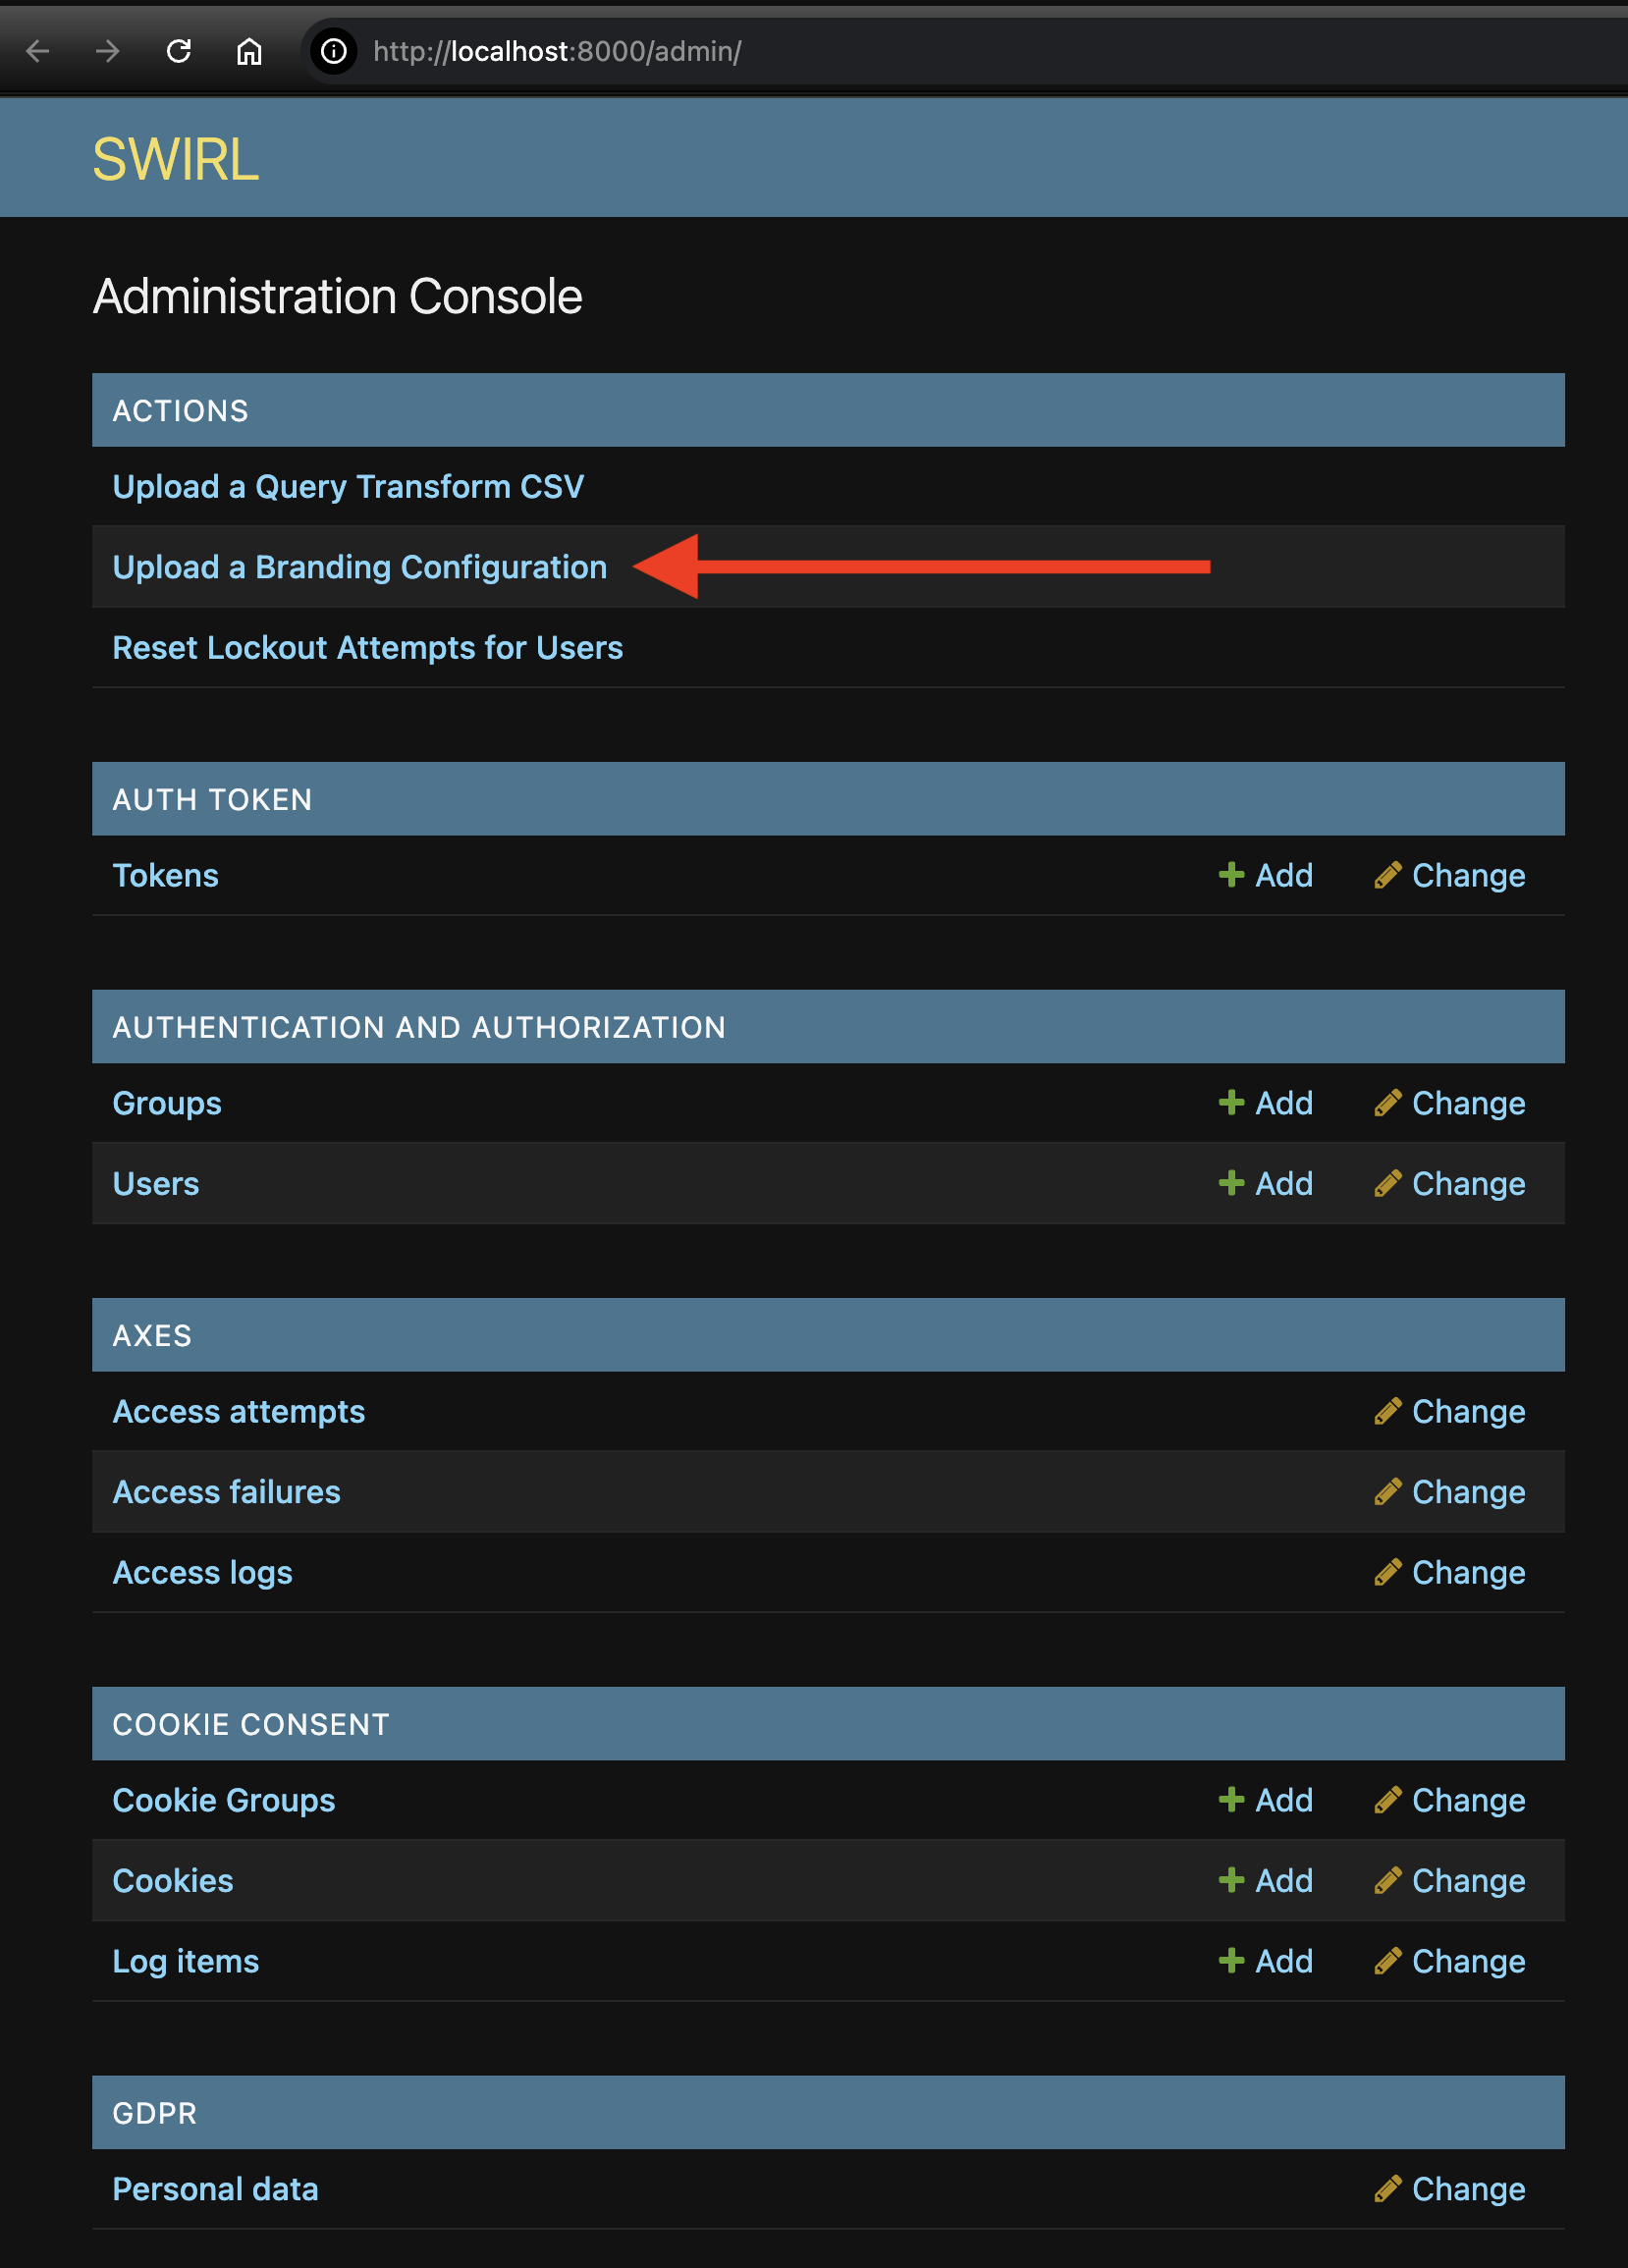
- Click
Upload a Branding Configurationto go to the Branding Configuration page:
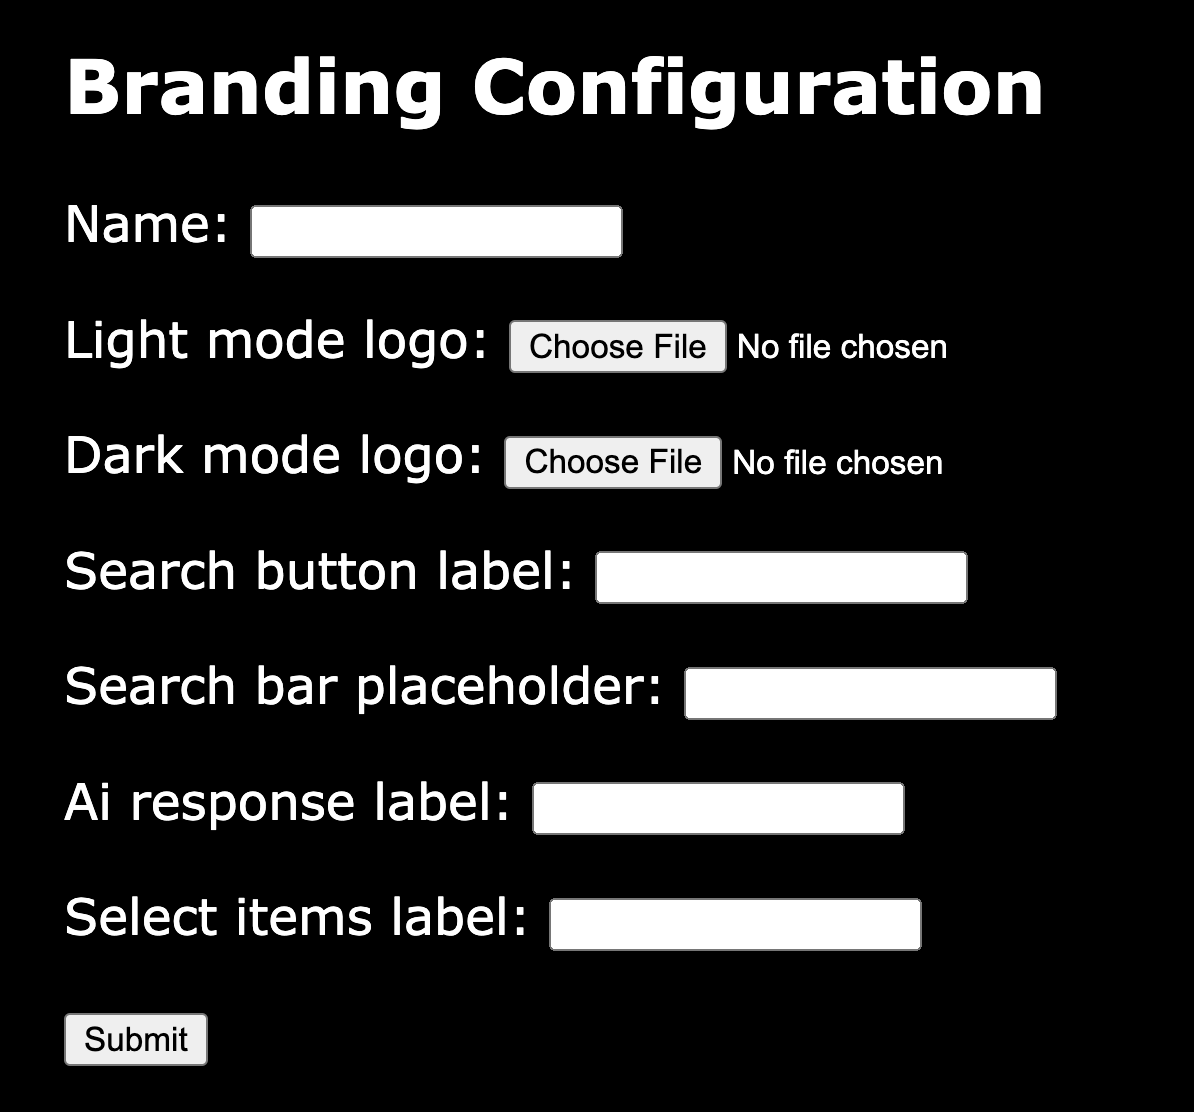
- Fill out the form:
-
Nameis required. - At least one additional field must be customized. - To change the logo, upload a light-mode image.
Branding configuration options
| Item | Galaxy Location | Default |
|---|---|---|
| Name | Not shown | N/A |
| Search button label | Search button text | SEARCH |
| Search bar placeholder | Placeholder text in search box | "What are you searching for today?" |
| AI Response label | Below search box | "Generate AI Response" |
| Select items label | Below paging control | "Select Items" |
- Click
Submitto save your branding changes. - Refresh your browser to apply changes in the Galaxy UI.
Refreshing may start a new RAG or chat session.
Logo File Suggestions
- Format: PNG
- Dimensions: 818 × 214 px
- Whitespace: at least 30 px margin around the logo
Only one branding configuration can be active at a time.
Restoring a Previous Branding Configuration
SWIRL displays the last updated branding configuration. To make a previous configuration active:
- Go to http://localhost:8000/admin/.
- Scroll down to Branding Configurations under the SWIRL section. Click it.
- Click a previous configuration, then click
SAVEat the bottom of the form. No actual changes need to be made.
Reload Galaxy in the browser. The saved branding configuration appears, replacing the previous one.
Managing Django Users
Django Admin
Most users can be managed through Django Admin at http://localhost:8000/admin/.
For more, watch this YouTube video on Django Administration.
Changing a User's Password
To change a user's password via the command line:
python manage.py changepassword <user_name>
Unlocking a Locked Account
-
Login to the SWIRL UI with a different superuser account.
-
Open the user profile icon in the top right corner, and go to http://localhost:8000/admin/ (the Administration Console). (COMMUNITY: the previous standalone
/swirl/index page has been replaced by the Administration Console.)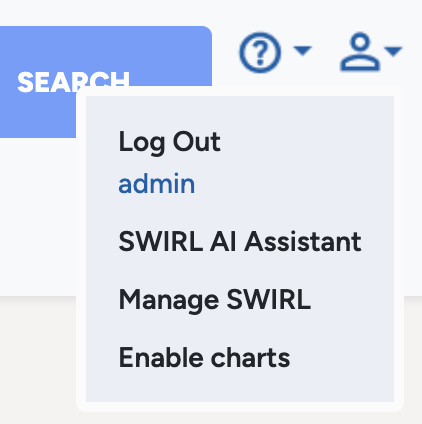
-
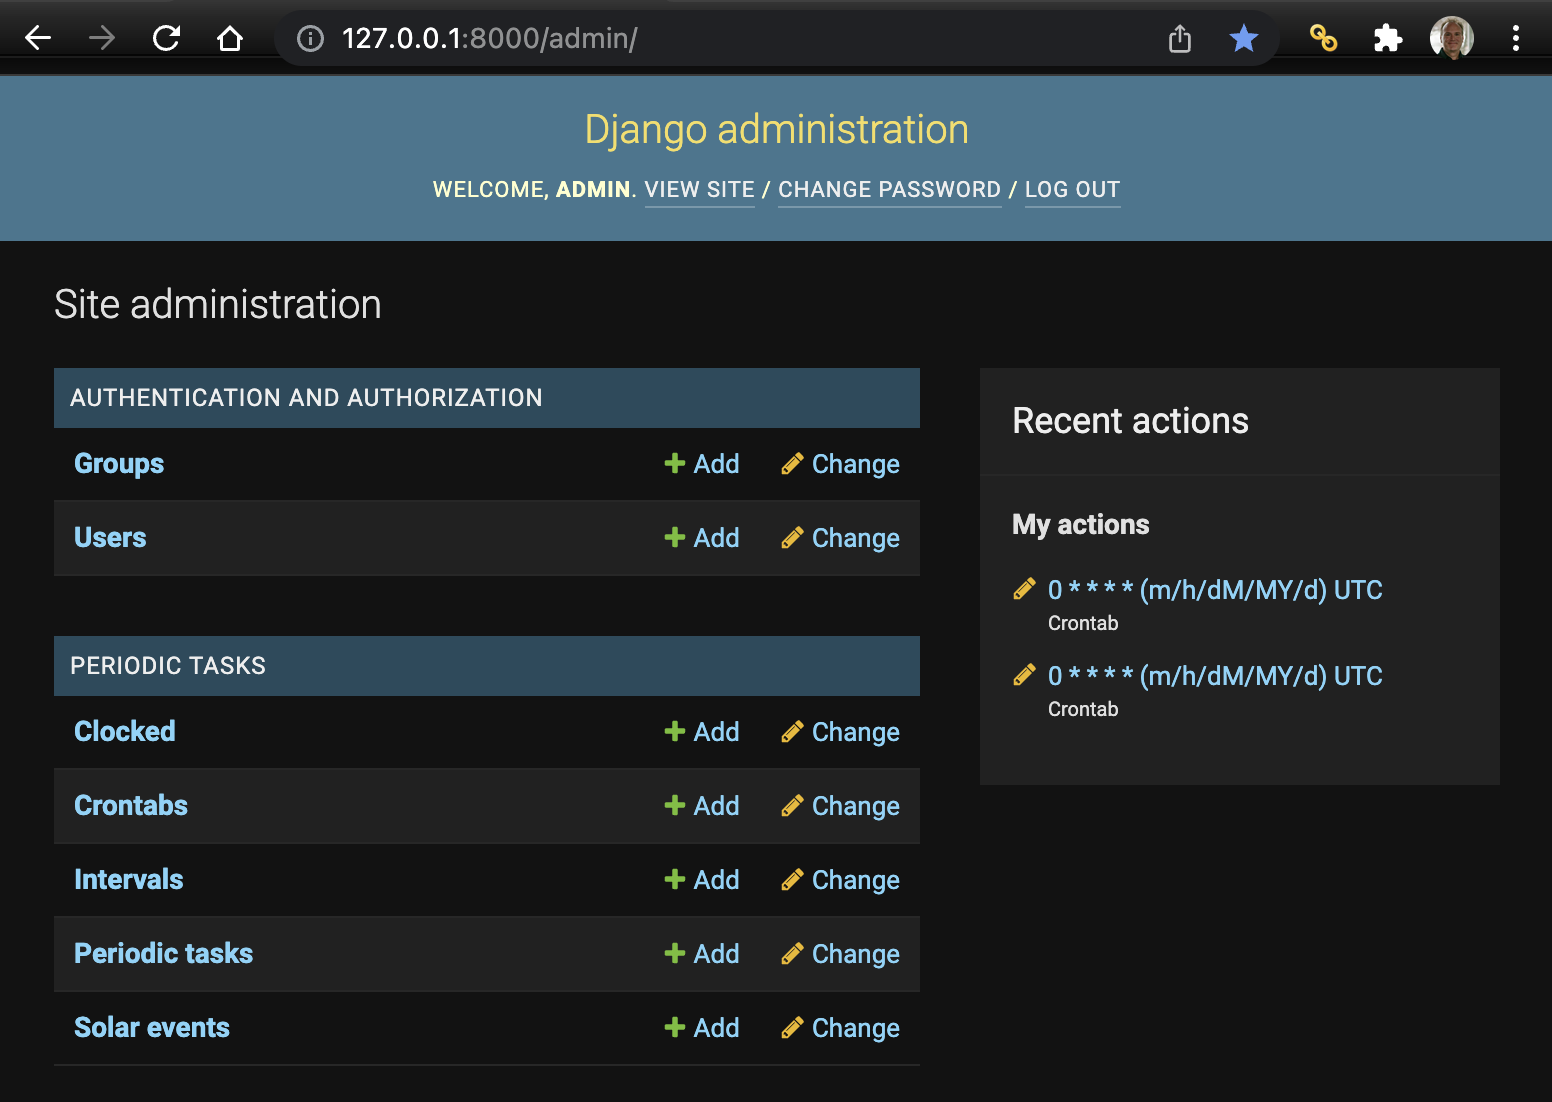
From the new tab that opens, click the
Adminlink to enter the Django Admin area. -
In the top left corner, click on the “Reset Lockout Attempts for User” option:

-
In the new tab that opens, select the “admin” user from the list of locked out accounts. (In the example above, we are unlocking the user
testuser01.) With the user selected, click theResetbutton on this page: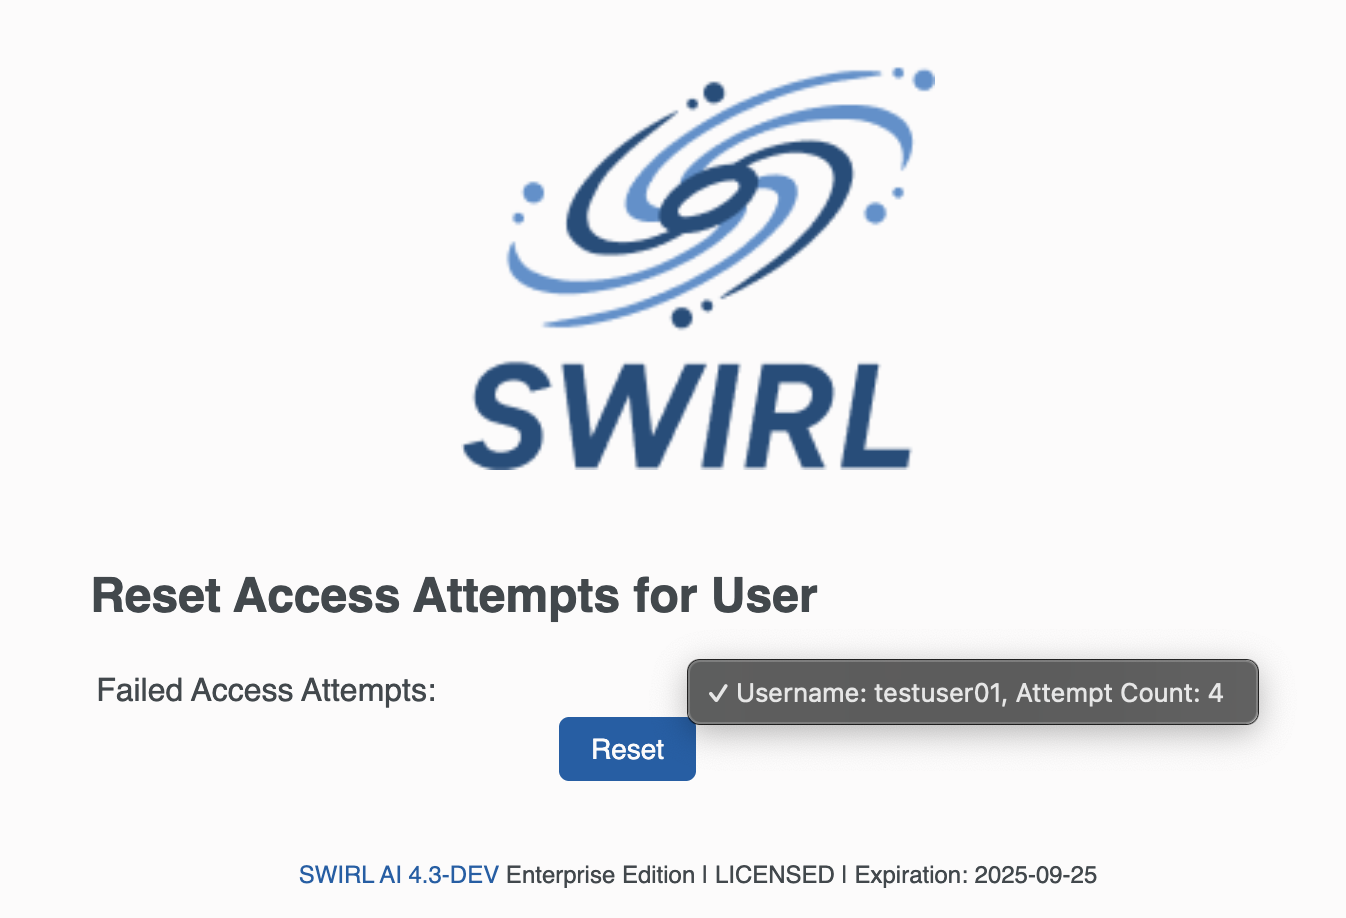
-
Return to main SWIRL UI tab, and select the User Profile icon again. Click
Logoutfor the superuser account. -
This returns you to the SWIRL login page where you should be able to login again with the
adminuser, now unlocked!
Management Tools
Django Console
Django provides a web-based UI for managing users, groups, crontabs, and more.
Access it here: http://localhost:8000/admin/
For an in-depth tutorial, watch this YouTube playlist on Django Admin.
Django dbshell
Django has a built-in shell for direct database management. Run it inside the swirl-search directory:
./manage.py dbshell
Wiping the Database
To delete all SWIRL objects and reset the database:
python manage.py flush
This will remove all data permanently.
You must create a new SWIRL Super User after doing this.
sqlite-web
sqlite-web provides an open-source web-based GUI for SQLite.
Installation & Usage
pip install sqlite-web
sqlite_web my_database.db                   # Runs locally at http://localhost:8080/
sqlite_web --host 0.0.0.0 my_database.db    # Run it on the LAN
Use the full path to db.sqlite3 in swirl-search when running sqlite-web.
Database Migration
If you modify swirl/models.py, you must run a database migration.
Basic Migration Command
python swirl.py migrate
For more details, see: https://docs.djangoproject.com/en/4.0/topics/migrations/
General Migration Guidelines
- Adding fields or changing defaults is usually simple.
- If renaming an id or modifying relationships, consider wiping existing data first (sqlite-web can help).
If Migration Fails
- Delete
db.sqlite3 - Delete all files in
swirl/migrations/ - Run:
python manage.py flush
- Repeat the migration process.
After flushing the database, don't forget to create a SWIRL Super User.
Configuring Django
SWIRL's Django configuration is managed in:
swirl_server/settings.py
Key Configuration Items
Hostname & Protocol
## Set the Fully Qualified Domain Name (FQDN) first
ALLOWED_HOSTS = ['localhost']
HOSTNAME = ALLOWED_HOSTS[0]
PROTOCOL = 'http'
The FQDN SWIRL should listen on must be the first entry in ALLOWED_HOSTS.
Time Zone
TIME_ZONE = 'US/Eastern'
CELERY_TIMEZONE = "US/Eastern"
CELERY_TIME_ZONE = "US/Eastern"
Celery Beats
Celery-Beats is used for scheduled services like the Search Expiration Service and the Search Subscription Service.
CELERY_BEAT_SCHEDULE = {
    # Executes every hour
    'expire': {
         'task': 'expirer',
         'schedule': crontab(minute=0, hour='*'),
    },
}
Database Provider
DATABASES = {
    "default": {
        "ENGINE": os.environ.get("SQL_ENGINE", "django.db.backends.sqlite3"),
        "NAME": os.environ.get("SQL_DATABASE", BASE_DIR / "db.sqlite3"),
        "USER": os.environ.get("SQL_USER", "user"),
        "PASSWORD": os.environ.get("SQL_PASSWORD", "password"),
        "HOST": os.environ.get("SQL_HOST", "localhost"),
        "PORT": os.environ.get("SQL_PORT", "5432"),
    }
}
The following sections apply only to SWIRL Community Edition. For Enterprise Edition instructions view the AI Search Guide.
Configuring PostgreSQL as the Database Backend
- Install PostgreSQL (if not already installed).
- Ensure
pg_configis in yourPATHand runs from the command line. - Install the PostgreSQL driver:
pip install psycopg2
- If you are using the PostgreSQL connector in these files:
swirl/connectors/__init__.py
## Uncomment this line to enable PostgreSQL
## from swirl.connectors.postgresql import PostgreSQL
swirl/models.py
CONNECTOR_CHOICES = [
    ...
    # Uncomment the line below to enable PostgreSQL
    # ('PostgreSQL', 'PostgreSQL'),
    ...
]
For further setup, follow the Django Database Configuration Guide.
Configuring Celery & Redis
SWIRL uses Celery for executing metasearch requests asynchronously, with Redis as the backend.
Celery is configured in at least three locations. They must be consistent!
1. swirl_server/celery.py
app = Celery('swirl_server',
             broker='redis://localhost:6379/0',
             backend='redis://localhost:6379/0')
To verify the setup, run Celery from the command line:
> transport:   amqp://guest:**@localhost:6379//
- ** ---------- .> results:     rpc://
2. swirl_server/settings.py (Django Settings)
## Celery Configuration Options
CELERY_TIMEZONE = 'US/Eastern'
CELERY_TASK_TRACK_STARTED = True
CELERY_TASK_TIME_LIMIT = 30 * 60
CELERY_BEAT_SCHEDULE = {
    'expire': {
         'task': 'expirer',
         'schedule': crontab(minute=0, hour='*'),
    },
    'subscribe': {
         'task': 'subscriber',
         'schedule': crontab(minute=0, hour='*/4'),
    },
}
CELERY_BROKER_URL = 'redis://localhost:6379/0'
CELERY_RESULT_BACKEND = 'redis://localhost:6379/0'
Security
For the comprehensive, CISO-level view of SWIRL Enterprise security — identity, data protection, network hardening, logging, vulnerability management, incident response, and a production hardening checklist — see the Security Guide.
The Django Secret Key
Django's SECRET_KEY is a cryptographic salt used for security. If changed, active users will need to log in again.
To generate a new secret key:
python -c "import secrets; print(secrets.token_urlsafe())"
For more details: Django Secret Key Guide.
SWIRL User & Group Support
Django provides built-in authentication with User and Group objects. These can be managed via the Django Console or API.
User Management API
| URL | Explanation |
|---|---|
/swirl/users/ |
List User objects & create new users |
/swirl/users/id/ |
Retrieve, delete, or edit a User object |
Group Management API
| URL | Explanation |
|---|---|
/swirl/groups/ |
List Group objects & create new groups |
/swirl/groups/id/ |
Retrieve, delete, or edit a Group object |
Alternatively, use the Django Console:
For additional details, see User Authentication in Django.